

Let's get this Vegan Cashew Cheese party started.
I love party-platter-approved vegan cheese. So I'm simply giddy that after many months of hit-and-miss vegan cheese experimentation I've finally perfected a recipe that I adore. Pop the bubbly, it's vegan cheese party time..
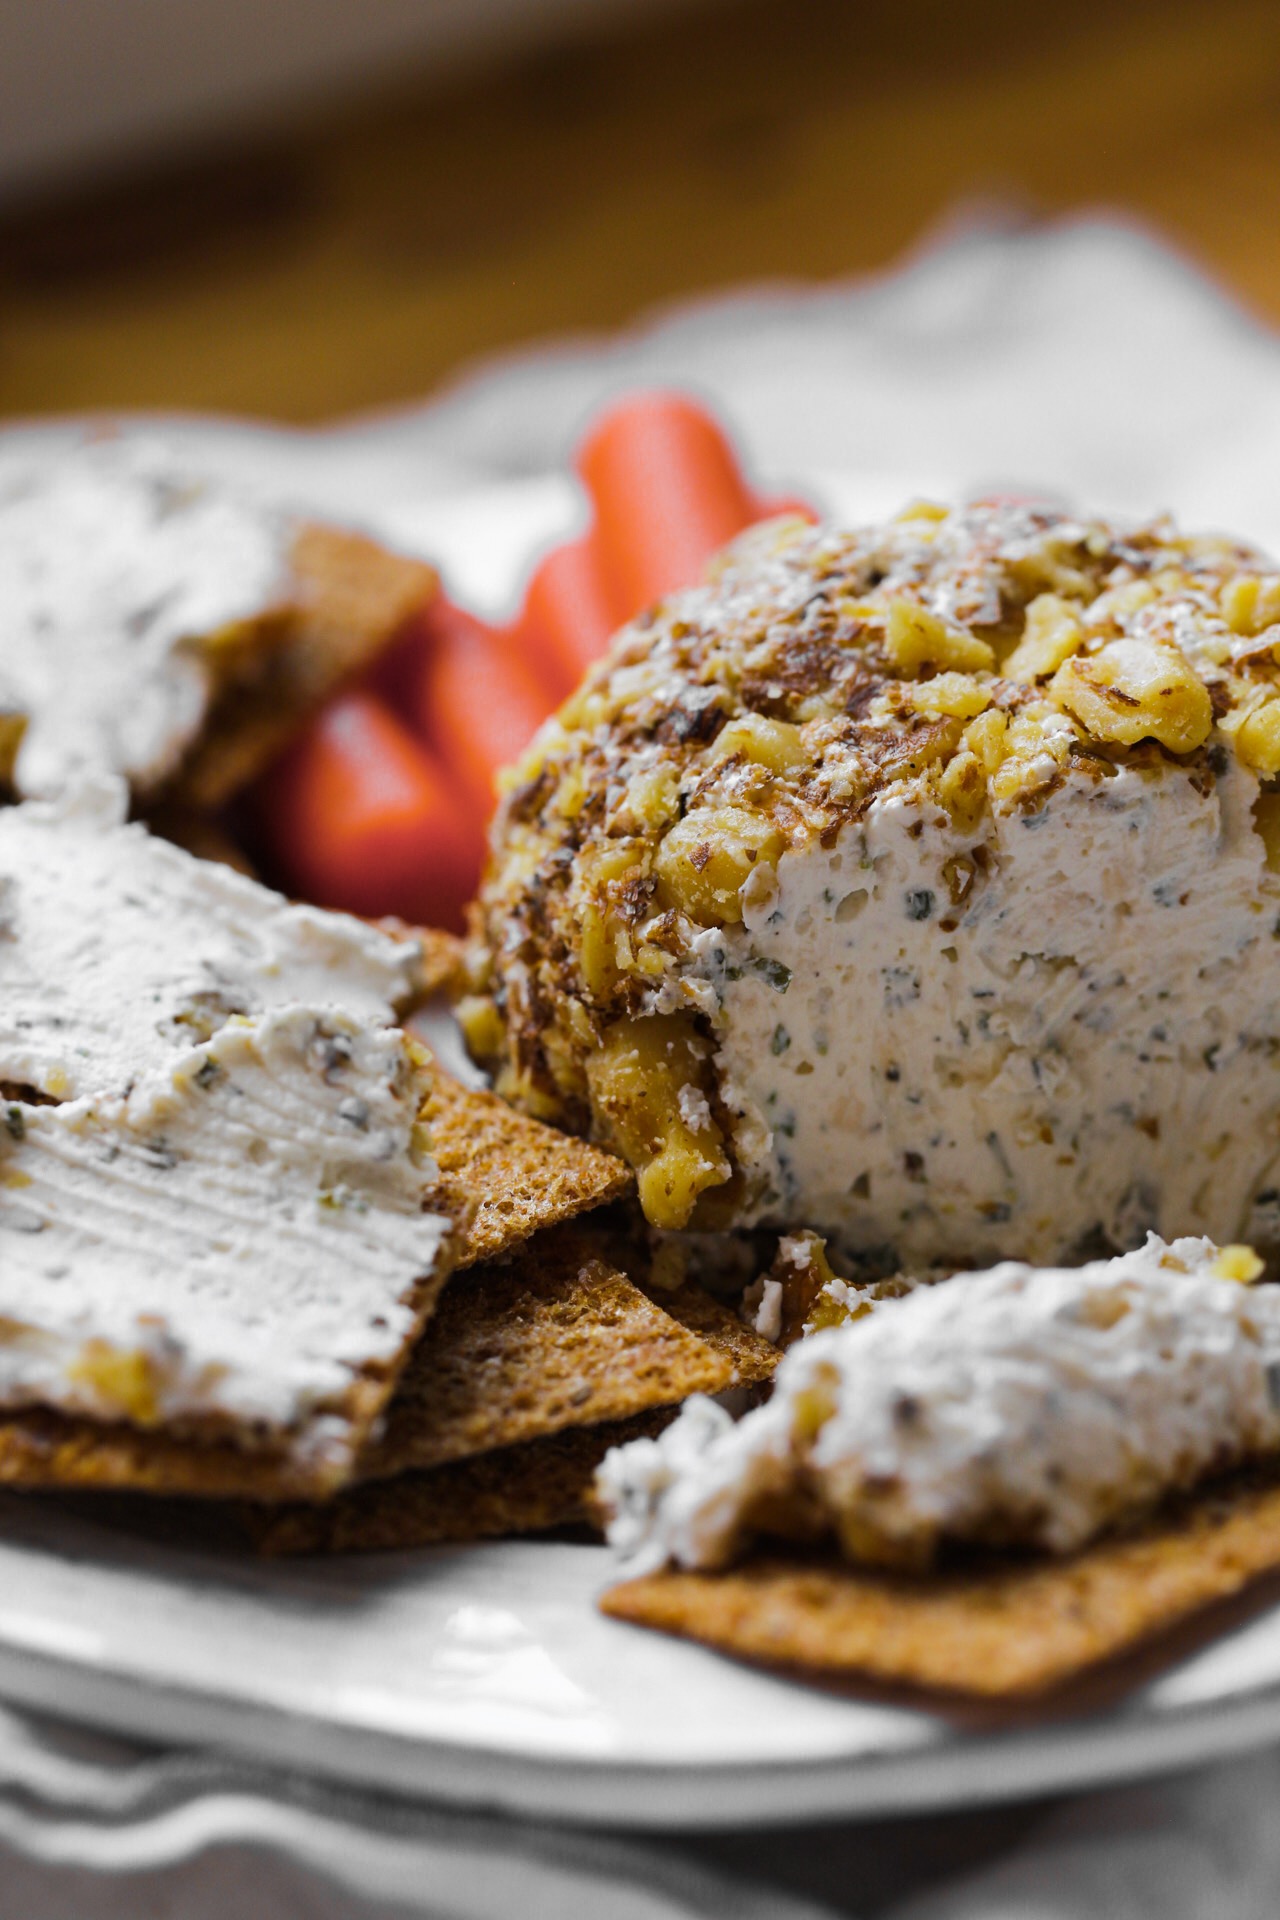
Crusty Meets Velvet. The outer layer is dry and fluffy with a gently crisp toast-like shell, while the deep core is smooth and velvety. The cheese round stays firm enough to slice - yet melts in your mouth. Super spreadable.
Three Ingredients. This herbed salt-crusted cashew cheese is simple with only three ingredients (cashews, water and herbed coarse sea salt). The process is specific - yet totally newbie-approved.
Anyone can do this. No Master Cheese-Maker Certification required.
Soak your cashews today and be enjoying your cheese by tomorrow night! Woo hoo.
First a Quickie Photo-Overview. Then the Details. - it's a process, worth the journey...
Blended Cashew Cheese Mixture Placed in Cheesecloth:

Post-cheese-drying:

Place in oven-safe serving dish and bake:

Post-dry-baked:

Slice & Serve:


Details on this scrumptious cheese..
Husband-Approved. Before I pass any recipe onto you guys I always send it through my husband and his super-picky taste buds. He is not a fan of dairy so he is a big fan of vegan cheeses like Daiya and Dr Cow - just like me. Taste Test: I made him a lavish after-work spread of cheese, rice crackers, harissa, lemon juice/EVOO dip and champagne - he loved it.
This cheese is like nothing I've ever tasted before. The flavor and texture is unique and cravable.
Served Warm or Cold. You can serve this cheese warm and crisp-crusted straight out of the oven - or you can chill it in the fridge for a few hours to chill it firm. If you chill it you will loose a bit of that fluffy outer crust, but the cheese will harden a bit more than the warm super-velvety version. I loved it both ways, it just depends on your mood and your tastes.
Before you start, you'll notice I've included a list of tools in my "ingredients" list.

You CAN do this. It's easier than you think..
Vegan Cashew Dry-Baked Cheese
vegan, makes one large round (about 1 ⅔ cups cheese)
2 cups raw cashews, soaked in salted water for at least 8 hours
½ cup salted soaking water (reserved for recipe)
1 teaspoon sea salt (use an herbed salt if you'd like - high quality goes a long way here)
optional: garlic powder, additional herbs/spices for rubbing on top before baking
Tools:
mesh cheesecloth - about 15" x 15" to wrap/hang cheese
(double lined if using the waffle-mesh and single lined if using a tighter weaved cheesecloth like I used.)
1 bucket or deep bowl for hanging cheese
1 wooden/metal rod (I used a long spoon) for hanging cheese
food processor
Small baking/serving dish
Directions:
1. Soak your cashews in salted water overnight or at least 8 hours. I soak mine on the counter top - covered.
2. Drain your cashews - but reserve about ½ cup of water, maybe more.

3. Add your cashews, salt and ½ cup salted soaking water to a food processor. Blend until as smooth and velvety as you can possibly get them. You want the consistency to be that or a thick ricotta cheese. If you need to add more water - do so. But don't add too much and get a soggy mixture.
**Stop and Taste Your Food: do a taste test here and add more salt if needed - but remember the saltiness will condense as the cheese dries out. So the taste test should taste slightly under-salted - but still flavorful**
Soft Food-Processed Cashew Cheese Mixture:


**note: you can eat this as is at this stage - makes a delicious raw cream cheese spread. Or continue on..**
4. Set up your cheesecloth and pour the mixture into the center of your cloth.
5. Wrap the cheese mixture in a tight bundle and tie with a rubber band or string.
6. Cut two holes in the top end of the bundle so that you can suspend the bundle over your deep bowl/bucket/pitcher. See photo below:

7. Allow your cheese to "drain" at room temperature for 2-4 hours. Some cheese mixtures will drain a bit of liquid off and some will simply dry out and the water will soak into the cloth. Today my cheesecloth was super dry and no actual water collected in my pitcher - but the cheese cloth soaked up a good amount of moisture.
8. Next, place you cheese (still in the bundle) in the fridge. You can either leave it suspended over the bucket, or your can wrap it in an extra layer of cloth and place in a bowl in the fridge. Either way works.
9. Let chill overnight or at least a few hours.
10. Remove the cheese from the cloth! It should be in a nice firm ball now. Some of the moist cheese shell may stick to the cloth - that's OK. Just be gentle removing the cheese. Plop it into an oven-safe serving cheese dish. Sprinkle a bit of herbed salt and pepper on the top of it. I added a dash of garlic powder for color, texture and flavor.
Remove from cloth:

Place in oven-safe serving dish:

11. Place in a 200-250 degree oven to bake for 45 minutes-2 hours. If doing 2 hours be sure to have your oven turned to 200 degrees or even a bit lower. This process will slow-bake the cheese, drying it out without "melting" or burning it. I baked my cheese at about 215 degrees for 90 minutes.
12. Remove cheese and allow to cool a few minutes before serving. Or you can allow to cool in fridge for at least an hour, or overnight for a firm cheese with a less crisp crust.
Serve!

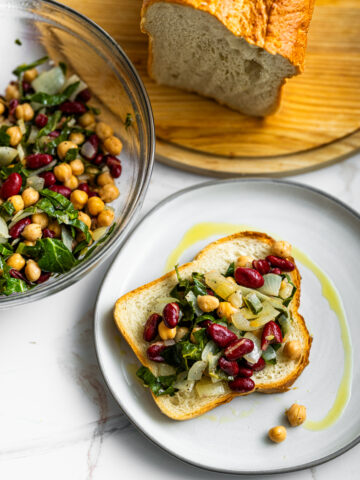
Serve with crackers, bread, veggies and more. I added a spritz of EVOO and lemon juice to the top of my cheese before serving for an extra layer of flavor.
Gourmand-Approved Creative Flavor Options. What about.. Harissa Cheese. Basil Cheese. Peppered Cheese. Lemon Cheese. Pumpkin Cheese. Sweet Maple Cheese. The options are endless. So once you get familiar with this basic recipe you can experiment with all sorts of "cheese" flavors.
Aged Nut Cheese. One of my fave nut/cashew cheeses is the raw cheese by DrCow. They add vegan acidophilus and allow their cheese to age - the flavor forms into a tangy, creamy, rich bite that is amazing. While I haven't mastered aged cheese yet - I am experimenting with adding acidophilus to this recipe and seeing what happens. I'll post any good results and recipes in the future. There is a lot of complex chemistry that goes into aging cheese and I really would like to learn eventually. Any hints or tips? Let me know..

It Almost Looks Like Dough! But it doesn't taste like it..

Close-up of pre-baked cheese:

My cheese hanging in a pitcher:

Jen Gray says
Look up the book - Vegan Artisan Cheese, it is amazing, she walks you through the aging process!
Ashley Toland says
Thank you!
Kathy Patalsky says
You can make vegan cheese out of macadamia and Brazil nuts .. I have not tried yet though!
Ashley Toland says
I am severely allergic to cashews. Can I substitute another nut in this recipe?
Mat Cabral says
you're right, it might have been the food processor. no matter how long I blended it was still not very smooth .. damn
Kathy Patalsky says
..Or you didn't add enough liquid..
Kathy Patalsky says
You either didn't soak nuts long enough and/or did not blend at a high enough speed. Did u use a vitamix or similar?
Mat Cabral says
mine was mealy and crumbly, not smooth n spreadable
What did i do wrong!
Stephanie says
My little bundle is drip-drying as we speak! I added rosemary and sea salt and couldn't help licking the spoon as I was transfering it to the cheesecloth - delicious! I've never made anything like this before, but if the "raw" product is any indication, I'm in for a treat!!
Kathy Patalsky says
Good! Makes yum dip or spread
Yulon Zhu says
How does this cheese taste without baking? I'm trying to eat as many raw foods as possible. Thanks.
Kathy Patalsky says
Hi Becky! I'll be honest, my first cashew cheese was bland to me too! It takes a bit of practice to figure out how much salt and seasoning to use. I over-salted the water the first time so thought I could be easy on adding salt - but realized that it was too, under-seasoned. And since everyone's salt tastes are different, I always say "salt to taste" and with this recipe it does take practice. However I even liked it in its "bland form" I just love the taste of cashews even when unsalted. Hope u try again and get more flavor-bold results. ps - sweetness is another factor. You may want to add more salt + a splash of agave syrup. And lemon juice can perk things up too.
Becky Anderson says
Thanks for the tips! I'll definitely give it another try. 🙂
Becky Anderson says
I baked this last night after letting it hang for about 33 hours. The ball came out nice and firm and I baked it for 90 minutes at 215 degrees. It looked great when it came out of the oven,,,just like the picture, but no one in my family liked it. It was really quite bland. Maybe I didn't put enough salt in it. Oh well. 🙁
Linda M. says
I am eager to try this recipe. Do you know how long it will last in the fridge?
Callmejanets says
I also tried to drain it (1/2 day and over night). The cloth got wet but never dripped water into the bowl. Even still, when I went to take it out of the cloth, it was mostly just as mushy as when I put it in. I scrapped it out and am baking it now, but sure would like to know why mine didn't form and just stayed mushy?
Kathy Patalsky says
Well the "mushiness" is caused by too much water in the blend. All cashews are different - some drier than others. And when you soak some may absorb more water just by nature. add water as needed to blend.
But even a mushy mixture will firm up to cheese when baked. So the ingredients as you described can still be delicious. You just may need to bake for a longer time period.
It does take practice to familiarize yourself with the process.
Ibejenn1 says
I tried to drain it more and never really got a from ball. So I just scrapped it out of the cheesecloth into a mound and baked it. It turned out pretty good and my daughter loved it. I'm thinking maybe I soaked it too long. Anyways I will definitely make it again. Thanks for the recipe!
Ibejenn1 says
I got to the step of unwrapping it to bake and it wasn't a firm ball. So I have put it back out to hang. Any idea what I did wrong? I bummed, I hope it eventually works out.
Kathy Patalsky says
That is OK! It will dry out a lot in the oven. If you want the ball to start baking you will probably need to drain away more excess liquid in the cheesecloth step.
Kathy Patalsky says
I only use raw cashews, unsalted for cashew cheese.
Ninufar says
DO use un-roasted, white cashews or cashew pieces. Won't do the same thing at all if they're already roasted, though you might get a tasty spread.
If you don't find cashews in your local health food store (pref. in the fridge), try a grocery that serves mostly Chinese or Indian customers. I'm living in the boonies at the moment and I order bags of 'em from an online Indian grocery.
Kathy Patalsky says
Um, a mix of dried herbs. Nothing extreme. I think it was thyme, and an herbed citrus coarse sea salt
Kathy Patalsky says
Nope, not tangy - but delicious! I have experimented with adding cultures, and 'aging' the cheese for a few weeks in the fridge. It comes out a bit tangier, but really I can't match the wonderful-ness that is DrCow. 🙂
Kathy Patalsky says
I have left my cashew cheese w/ acidophilus in the fridge for up to 2 wks to 'age. It always gets hard/dried out around the edges. I tasted it once, and it was good - but not like Drcow! They age their cheese for 3 months I believe. Since I don't know enough about 'aging cheese' I think I need some help before I establish a feasible recipe! The quest continues though... Good thing for DrCow.
Kathy Patalsky says
I am curious as well - will eventually try more varieties of nuts and seeds!
Kathy Patalsky says
It's funny, for this cheese there was nothing, nadda in my bucket - but the "hanging" process is still goo to let the cheese air dry a bit. I have made a similar cheese before were a nice pool of "milk" leaks through - and yes I have tasted it. It's yummy. I have also made almond milk in this same process...I should do a post on this... hmmm. 🙂
Kathy Patalsky says
Totally looks like bread dough - but looks can be very deceiving when it comes to flavors! 🙂 ps - fantabulous is a fantabulous word.