

Here are my 15 Food Photography Tips for Bloggers. Since many of you have requested a food photography post, I'm excited to finally say "here it is!"..
Tips! Drawing from my self-taught experience as a photographer - I have solidified a few food photography tips that I think will help bloggers improve their food photography skills - and increase their chances of getting approved by the awesome food photo blogging sites like FoodGawker and Tastespotting. This post is jam-packed with info: Check out my 15 tips!..
Since starting the site FindingVegan.com last summer I have been exposed to so many talented food blogger photos - thousands upon thousands submitted to the site. Since July I have curated and posted over 2400 submitted photos all linking to delicious vegan recipes or articles. It's been eye-opening to see such a wide variety of submissions (both approved and unapproved). Some fantastic food blogger already have galleries on FV, including Meet The Shannons, Namely Marly, VeggieNumNum, NatureInsider, BittersweetBlog, CestLaVegan, ManifestVegan and many more. Be sure to swing by and check it out: FindingVegan
Now onto my 15 Food Photo Tips! But first a quick intro and "warning"..
Warning! Dear artists, read my tips with an open mind. As an artist myself I am incredibly passionate about not having too many rules when it comes to critiquing any sort of art - paintings, photography, music, writing and more. I'm with you. There is really no right or wrong way of producing art.
I worked in an art gallery here in NYC for a while and saw paintings of "gorgeous blobs of paint" on a canvas (they were literally blobs of paint) sell for thousands of dollars. So believe me, I certainly know that art is in the eye of the beholder.
So my number one tip to you is to take these tips with a grain of salt and if you are critiqued or rejected by food photography sites, don't take it personally. As with anything, the editor or curator of a visual project will be looking for something specific. Something that fits the mold and something that speaks to them. Hopefully, these tips will help you get to that happy place of food photography "yes!"
Now before you proceed you'll want to make sure you have three things:
* a good camera
* lovely lighting
* beautiful food to photograph.
Your Camera: Your camera is really your best friend through all this. It doesn't matter how beautiful your food is if your camera stinks. A low-lit, cell phone snapshot of a gorgeous Pure Food and Wine restaurant plate will probably not do the food's beauty justice (at least not enough to be accepted by photo sites).
And no, you don't need a $2k Canon with a macro lens and studio lighting to get a fab shot. A nice SLR or DSLR (digital single-lens reflex) camera will get you started. Heck, you may be able to swing successful shots with a point and shoot. But SLR's are just so much more fun. My first SLR was a Canon EOS Xsi - loved it. In the past year I upgraded to a Canon D7 and I shoot mostly with a 100mm Macro lens.
Ten Food Photography Tips for Bloggers
1. Viewpoint: be weary of "flying bird" shots.
What in the world is a "flying bird" shot, you ask? Well it is any shot that is overhead and directly (or nearly directly) pointing down at the food in a "birds eye view" sort of way. Don't do this. The correct general rule is that you want to capture an angle that makes the viewer think they are about to dive into your yummy creation. And most humans don't fly over their food - they look directly at it. Straight on.
Note: sometimes "flying bird" shots can be awesome. But you really have to know when to use them and how to capture the shot. Like if you hover over the table and capture a colorful place setting, some rustic ingredients along side your serving bowl and a shiny spoon. Remember: make me want to dive into your photo (not fly over it).

2. Capture a Scene.
This bounces off of tip number one. Capture a scene for your food. Food is real. Food is relatable. Use this to your advantage and put the viewer in the shot. Give the food context. Like a movie set for an actor. Don't be afraid to show more than just the food in your shot. Instead of a simple slice of pizza on the plate, try to capture the whole pizza, maybe a place setting and some background props like tomatoes. Pretend you are directing a movie and instead of "photographing the food" you are preparing for "the pizza scene". Create a scene.


3. Props: Go for the background glow.
Now you don't always need props. Sometimes food is gorgeous shot in a minimalist form. And you really do want to capture a variety of angles, plating arrangements and settings. Now for "the scene" shot mentioned in tip #2, you may want to include some "props".
Props may be ingredients, utensils, napkins, glassware, excess plates/dishes, flowers, cooking tools and more. The fabulous things about props are that they don't always have to be in focus - so really the most important factors for choosing them are: 1)color 2) shape 3) lighting effects (..sometimes a nice translucent glass can add a colored glow effect). So if you are doing a pizza photo shoot and want the effect of red blur in the background, you can certainly use tomatoes - but with the right aperture - you may not even need tomatoes - just something red - you can even use your cats red ball cat toy! Get creative with background blur, "glow" effects. They can really make your main focal point (aka your food) pop!


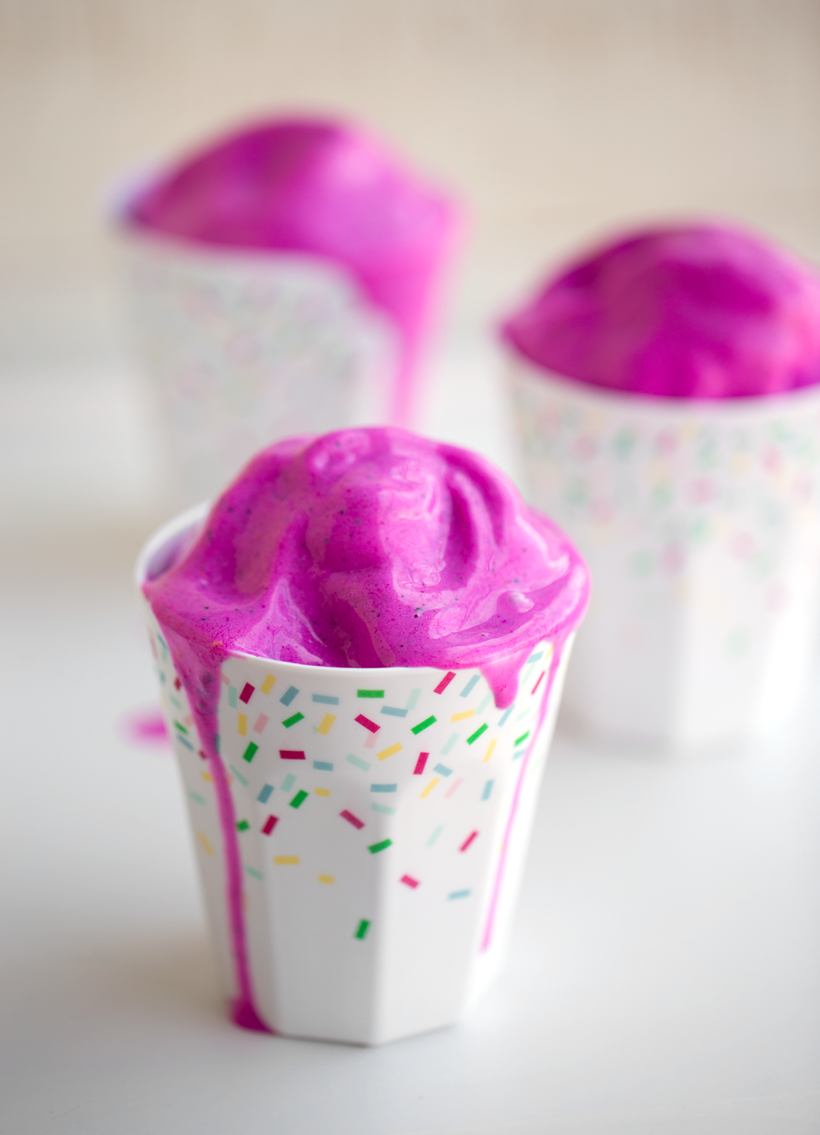
4. Bust those Beige Blues. Color is your friend.
To increase your odds of getting approved on photo submission sites, go with color! I was shocked by how many submissions I received that were "beige" in color. A screen full of beige photos is terribly unappealing - even if they are the most gorgeous shots ever! Sometimes I'll scroll through submissions and seek out a brightly colored photo (even if the quality is slightly lower) just to get a pop of color amidst a stream of beige pics. Just think of all the yummy "beige" foods: bread, grains in general, muffins, cereal, pasta noodles, nuts, cakes and more.
The ironic part is that not only are "colorful" foods good for photography - but they are healthier too. "Eat the rainbow" can easily be "photograph the rainbow" .. And even if you are photographing a beige food like a slice of homemade grain bread - you can still add a pop of color via your plating props or garnish. A turquoise plate, a light pink napkin, a purple flower in the background, a blob of jam - whatever. If you are photographing a beige food - add a splash of color somewhere in the shot.
But don't go overboard on plate colors. White always works and white plates and dishes are my personal preference to photograph food. I like to add splashes of color elsewhere, like in the linens, food, garnish and props.

5. Embrace Shapes.
Shapes are very useful when setting up your scene. Oddly shaped food items or a random splattering of ingredients can sometimes lead to disaster. While a simple "shape" can help guide your shot. Lets say you are plating pasta. Throwing the pasta on a plate in a random way will create a "splattered' effect. Find a way to create a shape either with the pasta or by placing the pasta in a shape-making bowl. This also goes for items like baked goods. A nice triangle shaped pie is better than snapping it at an odd shapeless angle. Don't get too hung up on exact shapes, but definitely stay away from the "splatter" effect. Messy is rarely a good look for food photography.

6. Pull Back for a Brilliant Shot.
If you do a quick browse of the photos that get accepted to food photo sites you will notice one thing - about 70% of the time the shots are perfectly cropped and "pulled back". This phrase of "pulling back" is one of the most important tips I can give you. A newbie photographer will have the impulse to "move in" on their subject. Get that beautiful crumbly crust of a muffin as close as can be. But really, the most beautiful shots are when you can "pull back" from your subject and make the intended focal point "pop" as opposed to "fill the shot". It's a simple phrase to remember when shooting: "pull back".
7. Lighting. Be a light-chaser.
Lighting is one of the three key points in food photography. It's huge! Lighting can make or break a shot. It's even more important than the food. Yes, I'll say it again: Lighting is More Important than the Food. It's true.
And the second point about lighting I will make is that "every studio is different". Very key. The 4pm lighting in your kitchen may be better than the 11am lighting in your dining room. Or maybe that small window in your bedroom gets amazing light around 1pm. Skylight in your bathroom? Go for it! OK, maybe not. But the key is to find your sweet spots for lighting. Also realize that the weather can play a big role too. Glare-filled sunny days can ruin your shoot. But a nice cloudy, bright day may be your ideal lighting setting. The one thing to remember about working with natural (rather than studio) lighting is that you control very little. You are merely a light chaser, and when you capture the perfect light take advantage of it.
Lastly, try experimenting with back lit photos - or even side-back lit. Back lit food can be very glowing and warm.
8. Getting technical: Camera Settings.
I'm not going to get too technical in this post because your camera quality will have a lot to do with how you run your settings - so really, every camera is different. A few photo settings may look like this:
ISO speed 400 | Aperture ƒ/2.8
In general, I work on auto ISO and constantly change my aperture. But obviously - more light (slower ISO) is usually a good thing. For the "f" aperture I like low settings to get that background blur effect. The lower your "f" setting the more intense the blur will be from focal point to background.
Learn by doing. Shoot a lot, play around with your camera. I don't want to get further into settings since I believe the best way to learn about your camera is to read the manual from front to back (I did on a long train ride once) and then really play around with every possible setting. And if you can get a mentor to give you an in-person photo lesson take it!
9. Be Clear. Reduce Focal Point Blur.
Your focal point is the thing you want your viewer to look at - what their eyes will be drawn to. It may be a whole muffin, or it may be a single dreamy blueberry on the muffin. You do not want a blurry focal point. While it is fun to capture a blur -> sharp transition in your entire photo (blurry background, crisp focal point), a blurry focal point can ruin your entire shot.
To reduce focal point blur: 1) work with a tripod to reduce 'shaky' shots. I don't always use a tripod. I used to use it religiously, and I do think it helps new photographers. But if you can be a steady shooter in good lighting, it is your call. 2) Lighting. For the best photos, make sure your lighting is perfect. Too much or too little light will tarnish your shot. You want a warm glow that highlights the food from the front and back. 99% of the time, I use natural lighting. So no 1am photo shoots for me. 3) Settings. Your camera settings will also impact the blur of your photos - see tip #8 above. So while the yummiest of food photos usually do have a blur effect (an intense background blur can really make your focal point pop) - you do not want a blurry focal point.

10. Lighting Trick: Whitewash it.
When using natural lighting you want to make sure to wash it in white. What this means is you don't know what color filters could be hiding in your "in-home studio". The yellow curtains, dirty glass windows, a blue-painted wall reflecting onto your food and more. In a perfect "studio" setting everything would be white. Crisp, bright, clear.
But obviously your "studio" probably isn't perfect (I know mine isn't!), so one trick I use is to have removable/adjustable long white-translucent curtains on my windows. So all the natural light that is coming in is white-washed/white-filtered. I was shooting with beige-yellow curtains for a few weeks and realized that all my photos had an annoying 'gold' tint to them. Changing the curtains fixed my issue.


11. Plate Cropping Crimes.
Simple tip. Don't crop the plate in a choppy way. You will be best off if you can get the whole dish or elegantly half-crop one side of the dish. Try to avoid the dreaded triangle corner look.

12. Embrace Randomness. And "The Rule of Thirds".
There are a few theories on how to set up a shot and where to place your focal point or points of interest when framing a shot. The "Rule of Thirds" is a popular photo 101 technique. Basically, the lesson is that a direct face-on, centered shot is not always the most interesting or pleasing to the eye. You want your photo to have movement and flow. Here is a good tutorial on the rule of thirds.


13. Rejection Red Flag: Hands and Bite Marks.
There are a few red flags when accepting a photo on a photo site. Hands and sloppy "obvious bites" are two of them. I remember I actually felt a little offended the first time my photo was rejected because it had my hands in the shot. Ha, I'm over it.
I've realized that in general, hands do not work well in food photos simply because then it personalizes the food. It makes the food someone else's rather than your own. Someone else holding your sandwich does not make it as appealing as laying the sandwich on a plate (just for you).
The only time hands are great is for process photos. I love to see hands making the food. Chopping, rolling dough, stirring.. But that's just me. As for bite marks. Just don't do it. Yes it is possible to give food a yummy look after being bitten, opened or sliced - but really, who wants to eat food with a bite out of it? Hands and bites - use with care!

14. Too Dark. Too Many Shadows.
This is just a general reminder about brightness. Photos that are too dark will get rejected. Make sure you have good lighting that captures the color, texture and tone of the food. And make sure the lighting is generally free of shadows. Too many shadows can distort your food. ..You know how shadows can distort your face in photos - bring out all the little imperfections and lines and kill your face photo? Well the same is true for food.

15. Reasons for Rejection: frustrated? You're not alone.
It's never fun to get rejected. But it happens to everyone. Like I said, don't take it personally - and it doesn't mean your photo is 'bad' - it's just not what the editor is looking for. If you've submitted to FoodGawker or Tastespotting, you probably know that there are several standard reasons for rejection. My 'favorites' are poor composition and low lighting/exposure issues.
Rehected? Frowny face. But really, these critiques are worthy of judgement for a photo site. To work on your composition, use the "pull back" method I referred to in tip #6. To work on the lighting issues you'll really have to play around with your camera and pray to the "lighting Gods". And never give up! Your photos will improve as you gain more experience.


Good luck!

J Cooper says
In food photography the main point is to make it look natural and thats why the use of lighting needs to be perfect. Also the decoration plays a vital role in taking the good shot!
Photography says
There are many technique on shot photographs. I like to found your post on one of the food galleries. I always look forward to seeing your meals the colors its incredible.
photo books says
You learn photography by pursuit jarvis digital cameras, D-Town TV, digital cameras 101, the art of digital photography and so on. Take lots of pictures.
kitchen essence says
Fantastic article! Your helping with my photos alot already 🙂
jmeineche says
What a great and useful post. Thank you very much! I can definitely use this!
Kathy Patalsky says
good for you! keep trying and good luck! 🙂
________________________________
Kathy Patalsky says
Yes, I shoot RAW too..
And you're welcome! 🙂
Kathy Patalsky says
thnx Nicole 🙂 ..I use iphoto and photoshop. anyone else want to weigh in on editing software??
Kathy Patalsky says
Good tip Nadia!