HealthyHappyLife.com

  • recipes
  • cookbooks
  • about
  • subscribe
  • mom life
  • travel
  • blogging
  • videos
  • free gift!
  • shop
menu icon
go to homepage
  • recipes
  • cookbooks
  • about
  • subscribe
  • mom life
  • travel
  • blogging
  • videos
  • free gift!
  • shop
search icon
Homepage link
  • recipes
  • cookbooks
  • about
  • subscribe
  • mom life
  • travel
  • blogging
  • videos
  • free gift!
  • shop
×
Home » Recipes

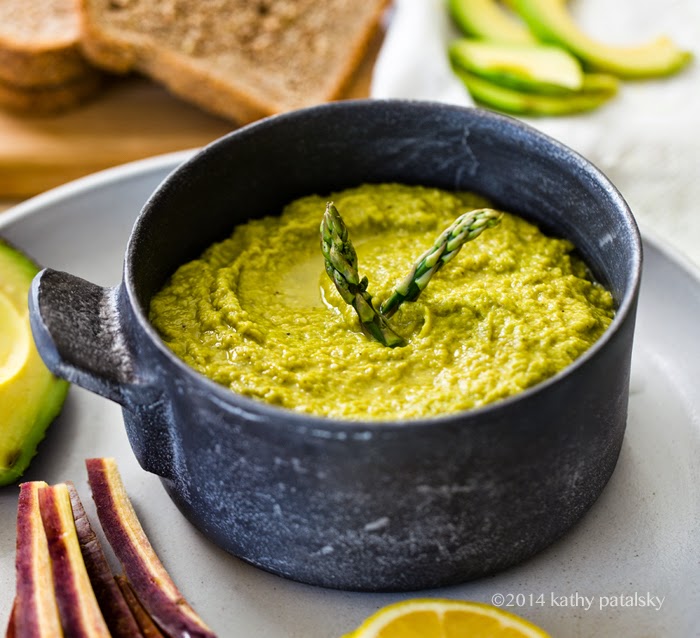
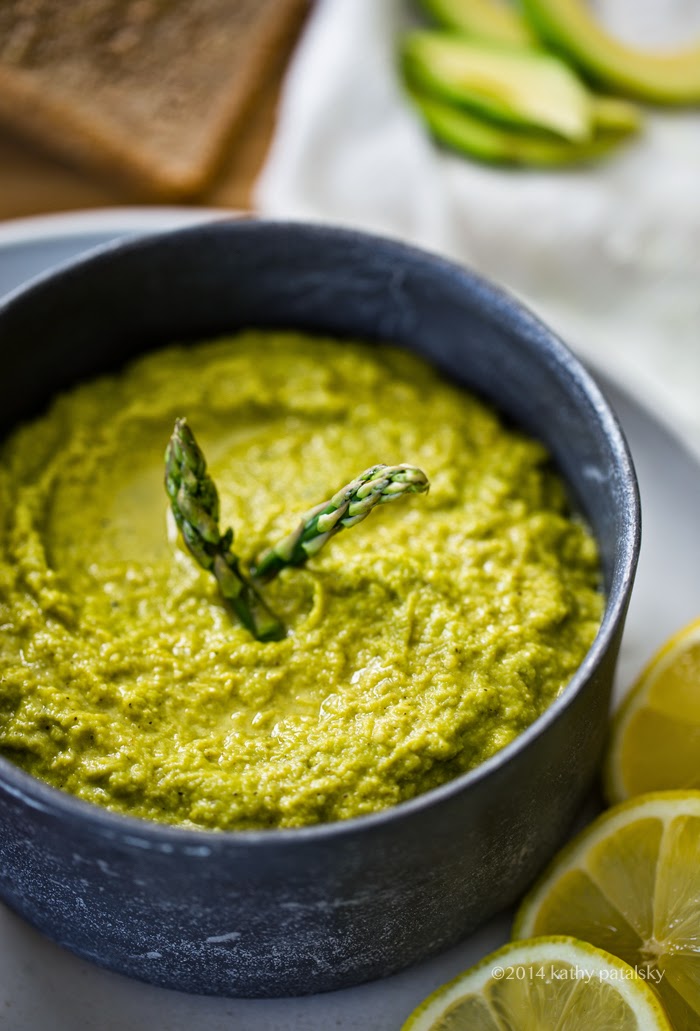
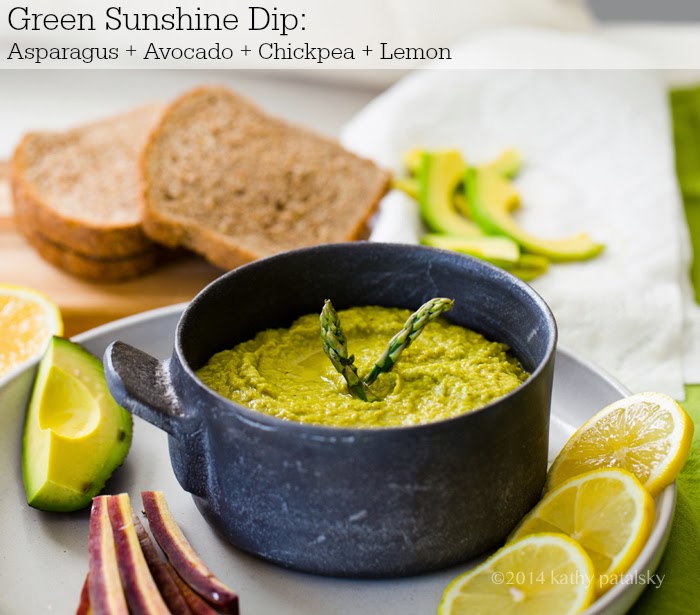
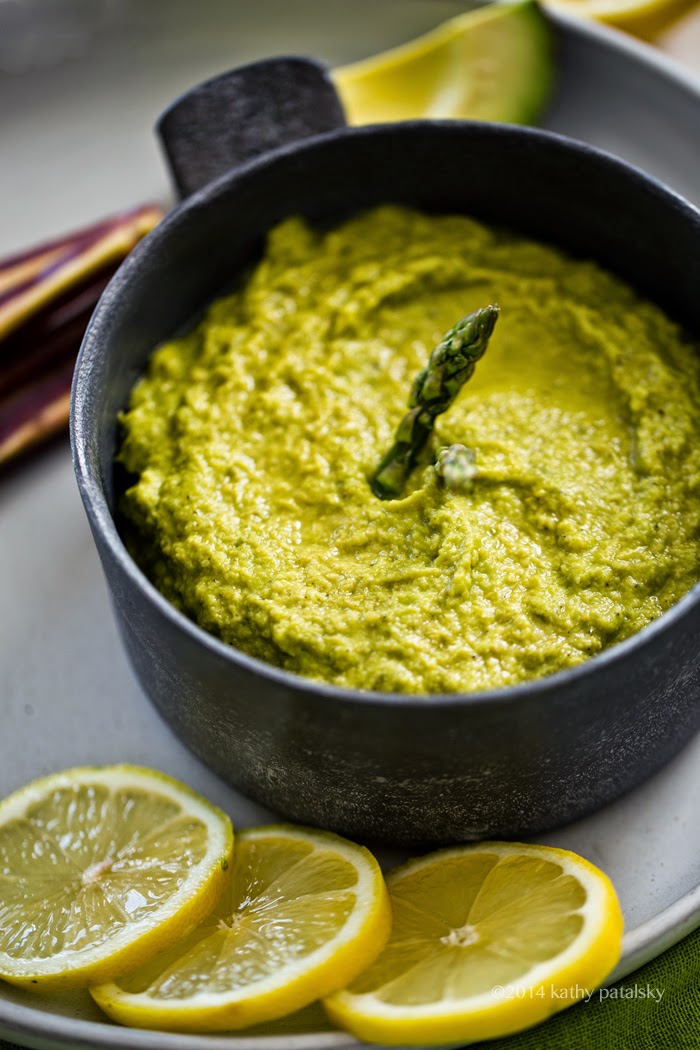
Green Sunshine Dip. Asparagus, Lemon, Avocado, Chickpeas.

April 1, 2014 by Kathy Patalsky 18 Comments

2014_03_13_matcha_9999_164asparagus-dip.jpg


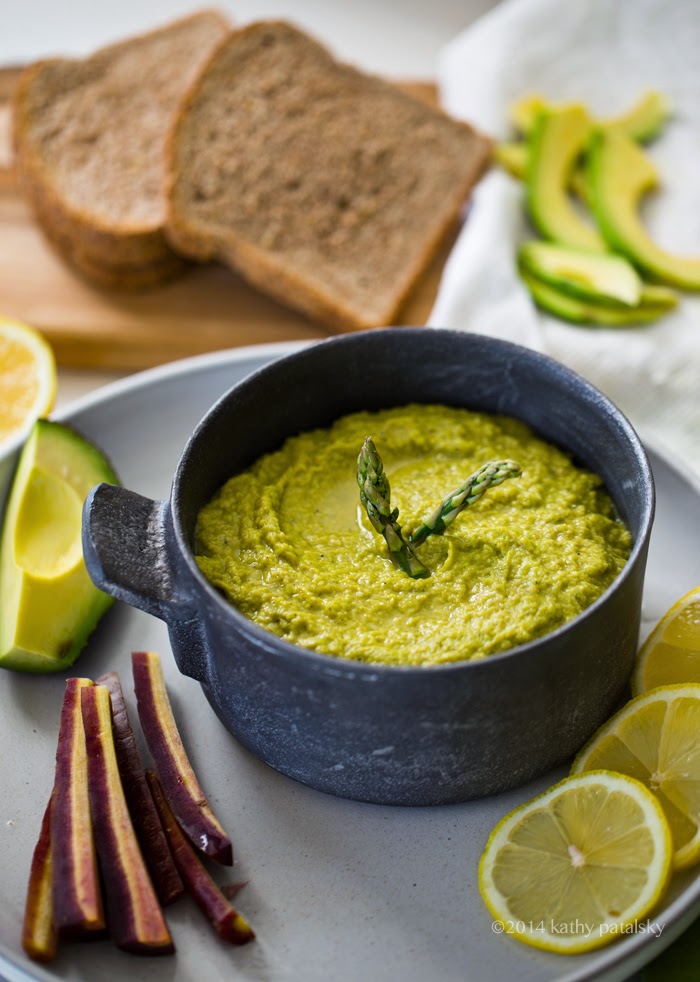
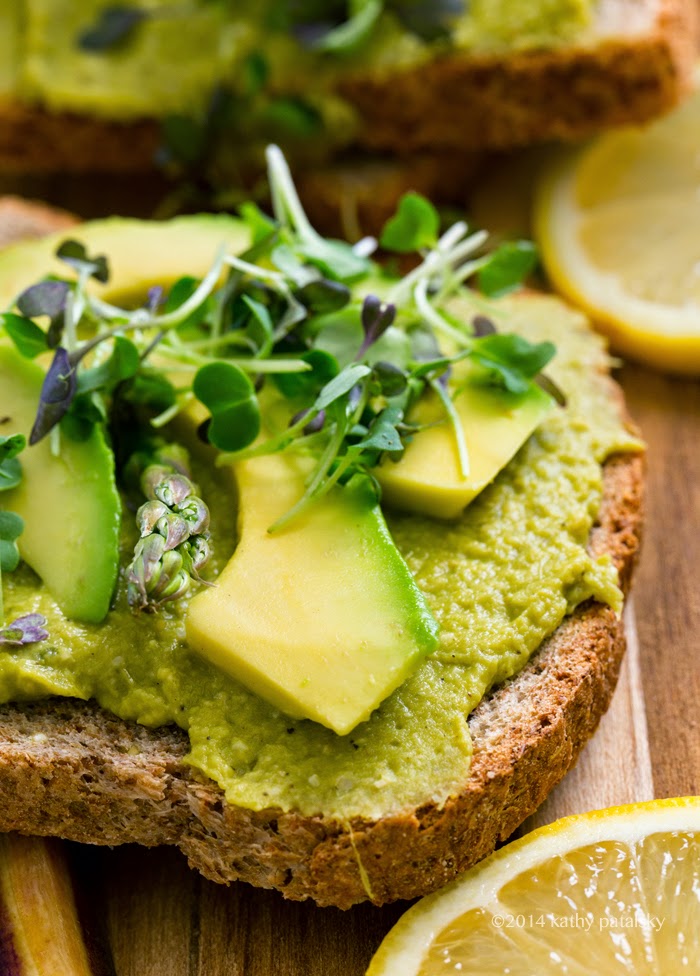
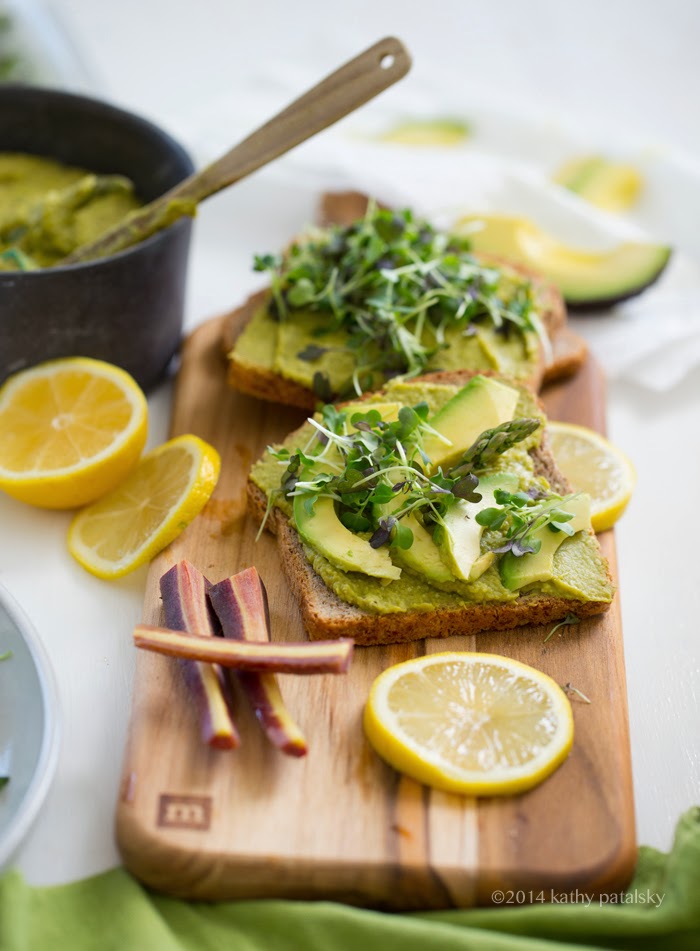
Spring was simply made for smart snacking. And this Green Sunshine Dip made using fresh spring asparagus, sunny lemon juice, creamy avocado and nutty chickpeas is just the thing your snack platter needs. Serve it as a munch-as-you'd-like dip or slather it on top of sprouted grain toast for open-faced sandwiches. Any which way you serve it, those crisp green flavors shine through. And just pause, smile and inhale that sunny spring feeling that can only be experienced this blossoming time of year!..

Toasts! with micro greens..

Why Asparagus? Well this in-season veggie is one to embrace. Here are a few reasons why..

"1. It’s loaded with nutrients: Asparagus is a very good source of fiber, folate, vitamins A, C, E and K, as well as chromium, a trace mineral that enhances the ability of insulin to transport glucose from the bloodstream into cells.

2. This herbaceous plant—along with avocado, kale and Brussels sprouts—is a particularly rich source of glutathione, a detoxifying compound that helps break down carcinogens and other harmful compounds like free radicals. This is why eating asparagus may help protect against and fight certain forms of cancer, such as bone, breast, colon, larynx and lung cancers." - Eating Well, 5 health benefits of asparagus

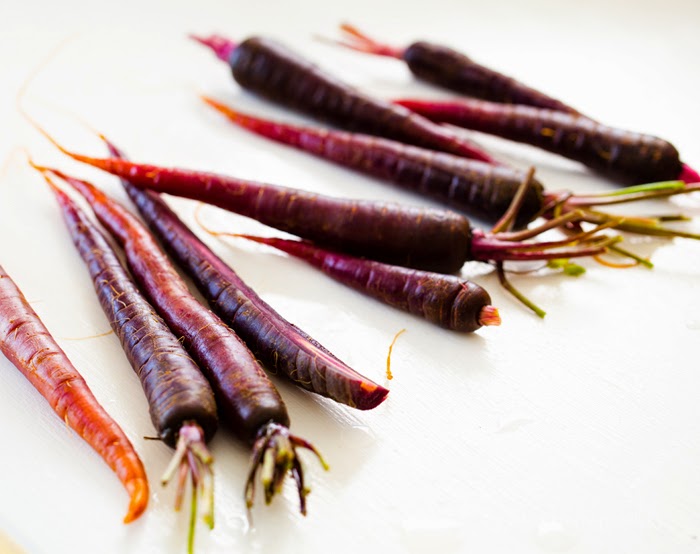
These pretty purple carrots are perfect for chopping and dipping:

Now find some sunbeams and have a happy spring!..

Green Sunshine Dip
vegan, 4 generous servings

2 cups fresh asparagus, halved and woody stems sliced off
1 ½ cups cooked or canned chickpeas (drained and rinsed if using cans)
1 clove garlic
1-2 lemons, squeezed (about ¼ cup fresh juice)
½ large avocado
¼ cup pumpkin seeds, raw (salted and sprouted used)
salt and pepper to taste

additional spices to try: nutritional yeast, cayenne, garlic powder, onion powder, smoky paprika, fresh herbs and more!

add richness: drizzle of extra virgin olive oil (optional)

Directions:

1. Halve your asparagus and slice off any woody stems. Bring a large pot of water to a boil and add asparagus. Boil for 3-5 minutes, until moderately tender, but not mushy. Drain water and add asparagus to high speed blender.
2. Also add in the avocado, chickpeas, lemon juice, pumpkin seeds and a pinch of salt and pepper.
3. Blend from low to high until smooth, about 1-3 minutes of blending depending on your blender power.
4. Taste test and add additional salt and pepper and spices to taste.

Serve warm, freshly blended or chill in the fridge for a firmer texture.
Serve as a dip or a spread for sandwiches and wraps.

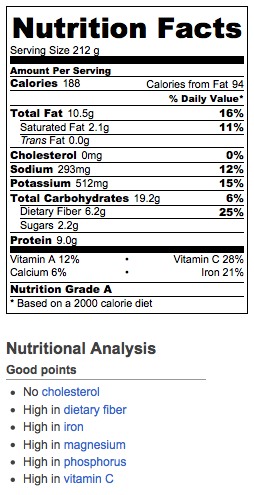
estimate:

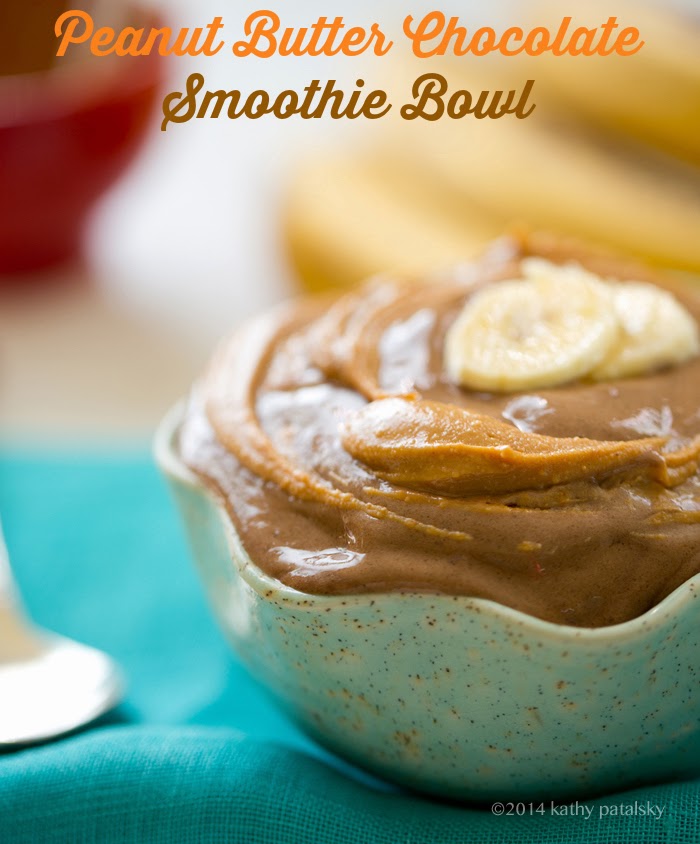
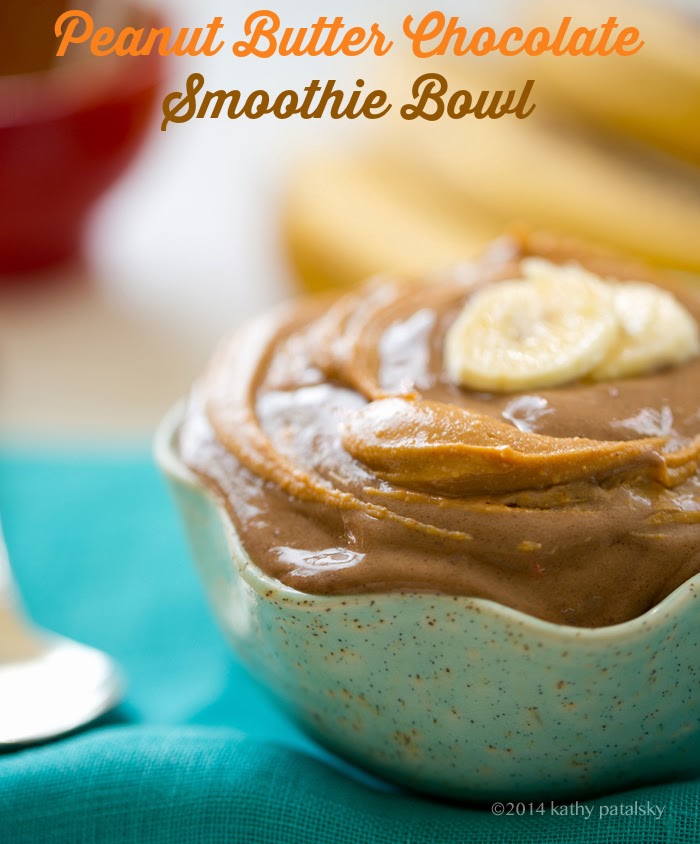
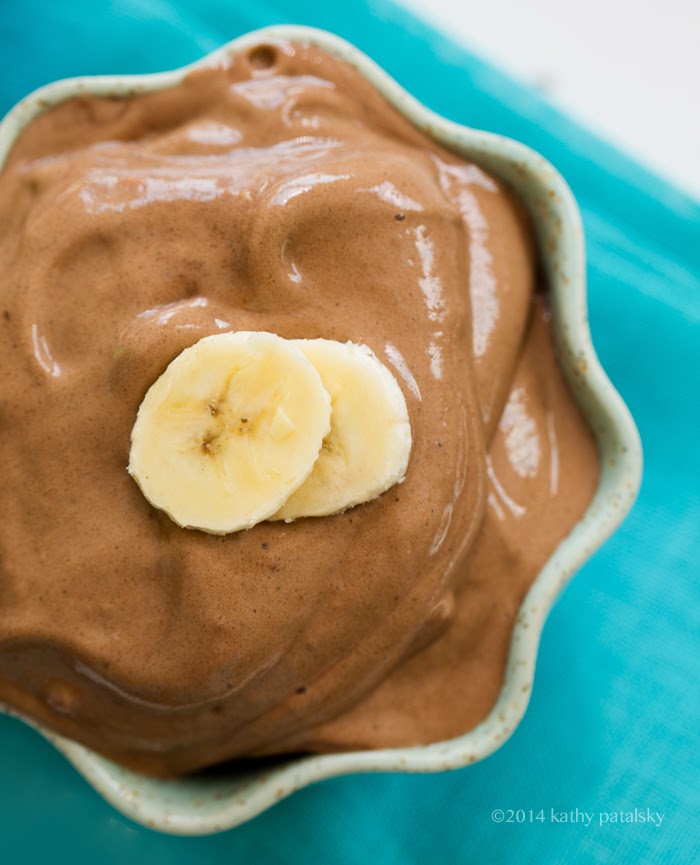
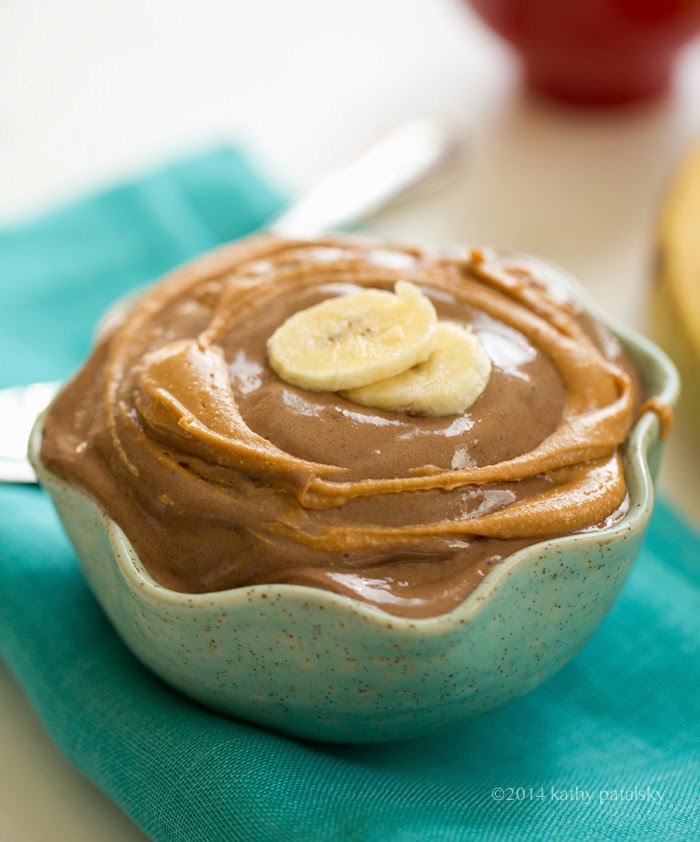
Chocolate Chocolate Smoothie Bowl with Peanut Butter

March 31, 2014 by Kathy Patalsky 31 Comments

p9-2014_03_28_pb-bowl_9999_65choco-pb-bowl.jpg


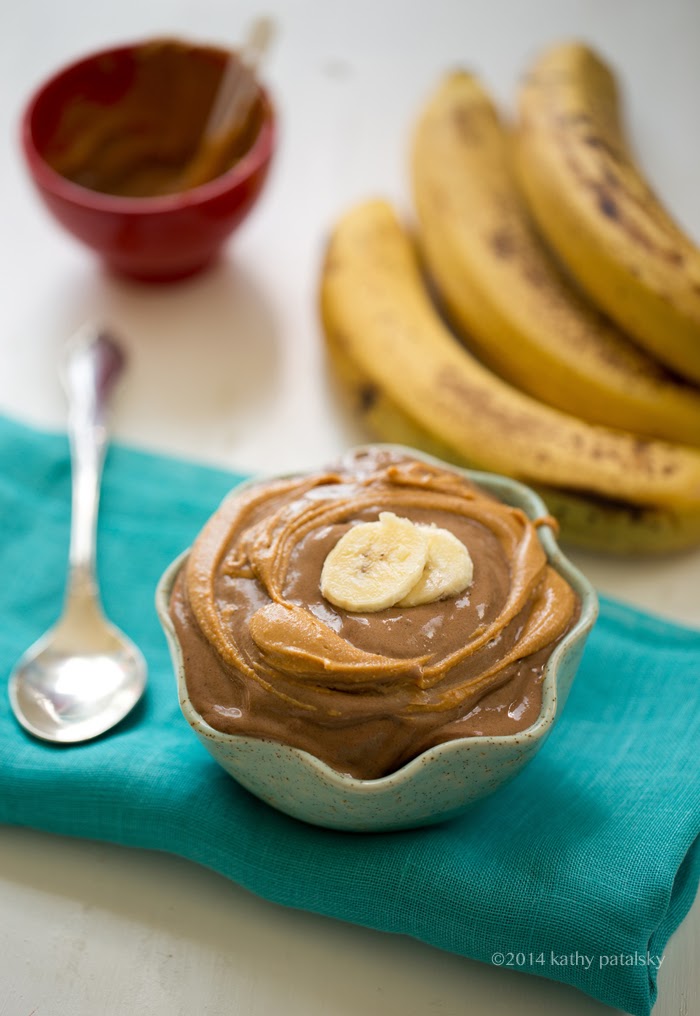
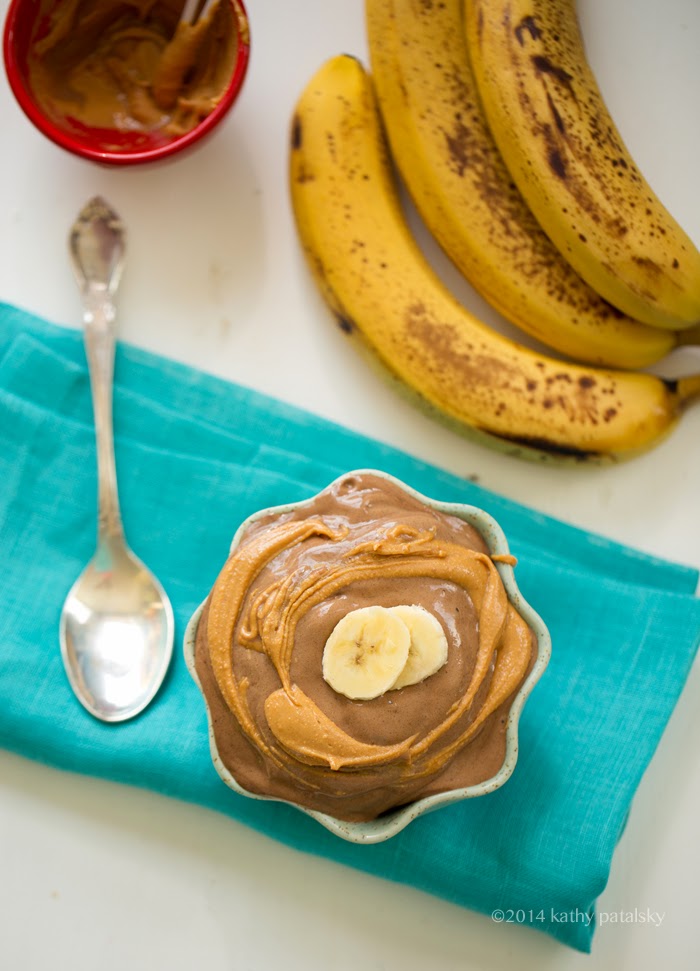
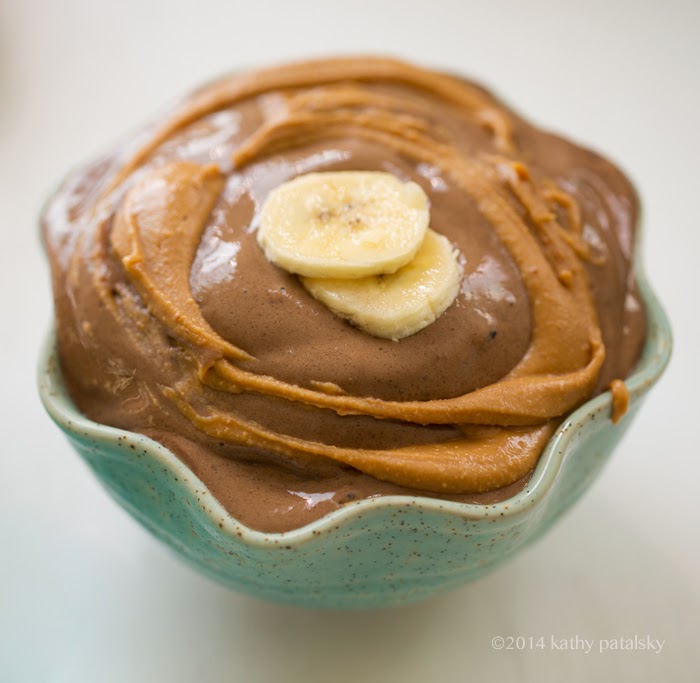
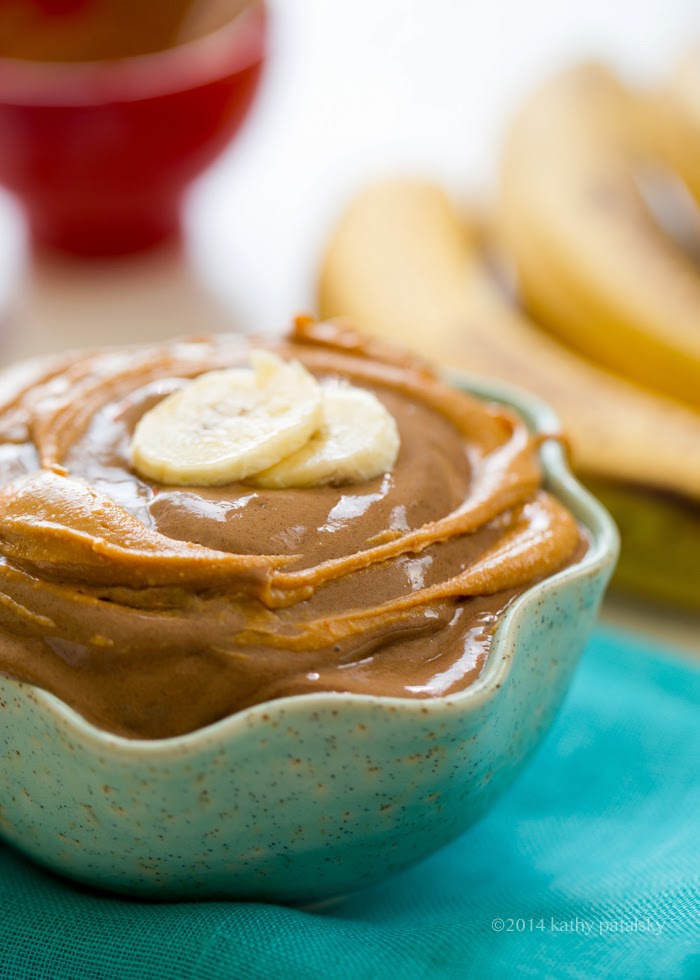
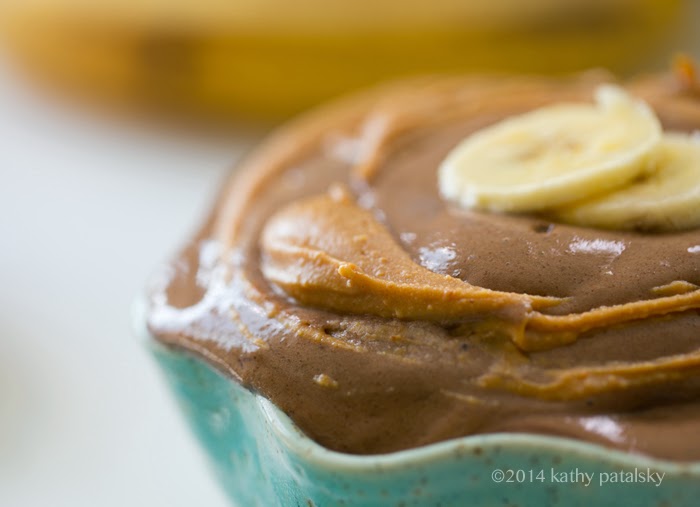
Acai bowls, I love you, but make room for another smoothie bowl on the block. The Chocolate Bowl. The Chocolate Chocolate Peanut Butter Smoothie Bowl to be exact. This creamy-layered, decadent-looking dish is actually quite the healthy-delicious vegan treat..

pre-PB..

Out of this swirled.

Where's my spoon?

The Chocolate bowl. OK, so lets be clear here. There is nothing terribly mind-blowing about this recipe. I know that. It is really just a super thick, creamy and frosty smoothie poured into a bowl and topped with a swirl of sweetened peanut or almond butter. But even still, this recipe is one to try. I make it allllllll the time so I figured I would share it with you guys. And if you get bored easily like I do, just whip out your thinking cap because there are endless topping options once your creativity takes flight.

Shredded coconut
Chopped nuts
Cacao nibs
Seeds
Fresh fruit
Spices and superfoods
Crumbled cookies
Rice puffs
Pumpkin seeds
Crushed vegan cookies
Granola

And on and on. Just imagine the vegan topping bar at your fave frozen yogurt shop. Sprinkle your cravings on top for color, texture and even added nutrition.

Whip this up in the afternoon for a treat-style energy boost or indulge and have it for breakfast or even serve it as an after-dinner dessert treat. It has plenty of sweetness so you will easily mistake this bowl for a bowl of ice cream. But one glance at the ingredients and you will remember how healthy this bowl actually is!

To lighten things up simply use a bit less of the calorie dense nut butter.

Chocolate bowl here you come..

Chocolate Chocolate Smoothie Bowl with Peanut Butter

By Kathy PatalskyPublished 06/01/2014Chocolate Chocolate Smoothie Bowl with Peanut Butter
This chocolate chocolate smoothie bowl is accented with creamy nut butter and made using bananas.

Ingredients

  • 2 frozen bananas
  • 1 tablespoon cacao powder
  • 1 ¼ cups non-dairy milk
  • ½ cup frozen watermelon (or sub with ice)
  • 1-3 teaspoon of your fave nut butter or handful of nuts like walnuts
  • pinch of sea salt
  • sweet: 1 teaspoon agave syrup or 2 Medjool Dates, pitted and soaked in warm water
  • optional: vegan chocolate or vanilla protein powder
  • optional: scoop of vegan ice cream - chocolate or vanilla
  • optional: hanful of cacao nibs, chocolate chips or a piece of chocolate (vegan)

Instructions

  1. If using dates, soak them in warm water for 1-2 minutes. Then remove the pit and toss in blender.
  2. Add all the ingredients to your high speed blender. Tip: Start off with only half of the liquid amount, and add as needed to blend. Using the least amount of liquid possible will give you thicker, ice cream-like results.
  3. Blend from low to high until smooth and creamy.
  4. Optional: add in the chocolate add-in and lightly blend for a few seconds, just until little bits show up.
  5. Pour smoothie in a big bowl or tall glass. Optional: Add a swirl of nut butter over top.

Yield: 1 bowlPrep Time: 00 hrs. 03 mins. Cook time: 00 hrs. 04 mins. Total time: 7 mins. Tags: smoothie,chocolate,vegan,breakfast,beverage,shake,non-dairy,banana

And hooray! because it is just about the start of smoothie season. Buy my book 365 Vegan Smoothies for all your smoothie cravings, tips, ingredient info and more!

Grab this bowl, curl up on your favorite chair and start swooning. Hopefully this treat will make you feel like this...

Spicy Blackened Cauliflower Bites

March 26, 2014 by Kathy Patalsky 21 Comments

p99-2014_03_13_matcha_9999_52buffalo-cauliflower.jpg


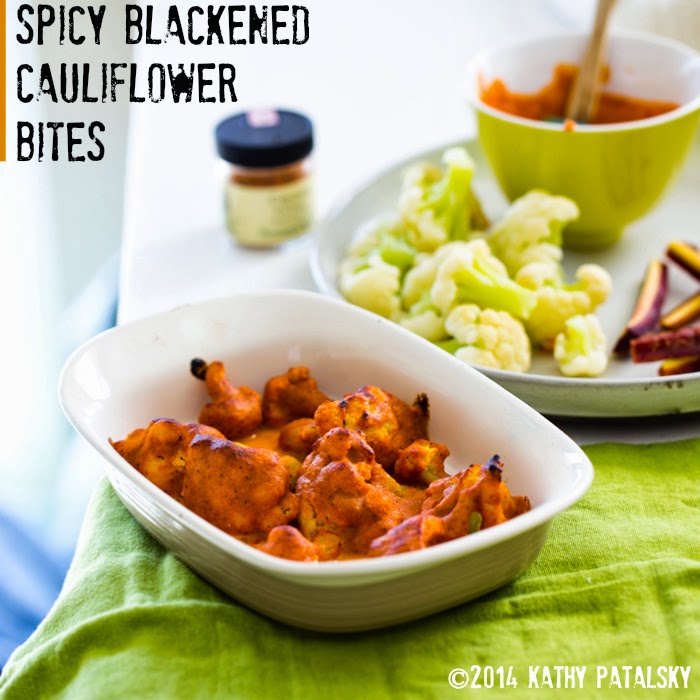
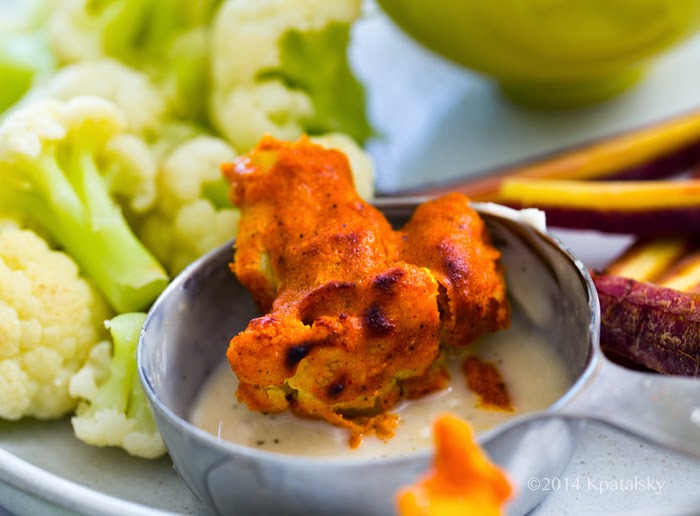
Snack on veggies with this fun and tasty way to serve up cauliflower. Bite-sized cauliflower florets are coated in my spicy creamy sauce, then quickly cooked in the oven to blackened perfection. Healthy meets delicious in each warm and lively bite. Add a cool ranch (vegan!) dipping sauce on the side, a pile of freshly sliced veggie sticks and happy snacking time is ready! These "buffalo wing" inspired bites are perfect for vegging out in front of your iPad or paired with some "me time" watching Netflix or browsing a good book or cookbook! (There are soooo many vegan cookbooks, like this one, out or coming out this year, I need a bigger bookcase!) This recipe would be fun for parties too, simply add a toothpick to each bite and serve! The bright red-orange color looks so pretty against a green tablecloth or napkin. Grab a head of cauliflower at the store or farmer's market and make my Spicy Blackened Cauliflower Bites!..

Buffalo-wingish-inspired..

Sauce.

Cauli-fleurs.. These were from the farmer's market and had a light green tint to them.

Optional dip. Ranch of course!..

Cauliflower used to be the veggie I brushed off as boring. White, hard, bland. It was the veggie you only ate off of party platters if the broccoli was finished. And you only ate the broccoli if the carrots were out. The cauliflower was literally just a crunchy vehicle for whatever creamy dip was hanging out nearby. It wasn't bad, just pretty boring. But cauliflower has been given new life recently. Have you noticed? Bloggers have created some amazing cauliflower recipes, I found these (just a few of them!) on my other site, Finding Vegan:

How-to Make Cauliflower Rice by Everyday Maven
Sweet Roasted Cauliflower Steaks by May I Have that Recipe
Potato and Cauliflower Cakes by The Veg Life
Green Cauliflower Dip by Sometimes I Veg
Spicy Buffalo Wings by PETA

And to springboard off of those cauliflower "buffalo wings" that everyone loves, I made these spicy blackened cauliflower bites! They are a bit more thickly coated with blackened edges I love. You can make the texture as tender or crunchy as you'd like by adjusting the initial cauliflower boiling time.

Life. Spring is starting to show its warmth and things are getting busy. No more winter cocooning and cocoa drinking. Scratch that last part, cocoa is clearly a year-round sip. Right now I am super busy finalizing book edits, working on some projects for the blog (.. always!) and exploring iPhone App possibilities for Finding Vegan! I am trying to come out of my winter hibernation by scheduling some meet-ups with friends and re-invigorating my fitness plans too. And with the start of spring in California, for me, means a bit of seasonal allergies! I think my immune system is still adjusting to the new kittens too. So I am just waiting for things to mellow out so I can put away the cough drops and constant regimen of immunity supplements! Elderberry syrup, vitamin C, immunity teas, oregano oil if need be and more. Anyone else feeling the wrath of winter-to-spring allergies? What do you do to perk up your immune system?

Well one thing that helps me is spicy foods! My lemon-cayenne morning tea perks everything up to start my day, and I find spicy soups (like miso and brothy soups) to be very helpful too. And these spicy cauliflower bites are another way to kickstart your system with cayenne! Make them extra spicy if you like that sort of thing. The optional side of cool, creamy ranch dip and chilled veggie sticks counteract the heat quite nicely.

Spicy Blackened Cauliflower Bites
vegan, makes about 3 cups of bites

1 head of cauliflower, broken into florets

Spicy Sauce:
¼ - ½ cup boiled or steamed cauliflower (from head broken into florets)
1 clove garlic
2 ½ tablespoon agave or maple syrup, grade B
¼ cup raw cashews, soaked
¼ cup non-dairy milk, plain flavor
3-6 pinches cayenne (how spicy do you like them?)
¼ teaspoon smoky paprika
2-3 tablespoon apple cider vinegar (start with 2)
a few pinches of black pepper
⅛ - ¼ teaspoon salt
optional: nutritional yeast to taste (thickens sauce and adds cheezy flavor)

a bit of oil to grease baking dish (safflower, EVOO, coconut..)

(optional) Creamy Ranch Dip - or try this recipe:
1 ½ tablespoon vegan mayo (vegenaise)
2-3 teaspoon agave syrup
2 tablespoon lemon juice
1 teaspoon red or apple cider vinegar
¼ teaspoon garlic powder
⅛ teaspoon paprika
1 teaspoon finely chopped parsley
pinch of salt and pepper

Directions:

1. Before starting you will want to pre-soak your cashews. Soak in a cup of salted water for at least 4 hours, overnight is standard. In a hurry? -> Simmer the cashews in the salted water for 4-5 minutes on medium heat in a pot, this will quickly soften them, although I still prefer the overnight soak method for more tender cashews. But if a bind and if you don't mind not keeping them are, a slow simmer can help speed things up.

2. Preheat oven to 400 degrees.

3. Wash the cauliflower and remove the thick stem and any green leaves. Break the cauliflower into florets with your hands, use a knife if needed for tough pieces.

4. Note: How crunchy do you want your cauliflower to serve? I made mine pretty tender, so a 4-6 minutes boil for me. But if you want crunchier bites, just do an even quicker boil of about 3-4 minutes. Or shorter for super crunchy! You could even leave the cauliflower raw if you wanted too, the oven baking will warm them anyways. Bring a large pot of water to a boil over high heat. Cauliflower: Add the cauliflower florets. Boil for 4-6 minutes or until tender. Do not over-boil, you just want them tender enough to poke with a fork. (Or for crunchier see above note.) Drain water and place boiled cauliflower aside in a bowl to cool a bit.

5. In a blender, add all the spicy sauce ingredients. For the cayenne and salt, start with just a pinch and add more after taste testing. Also start with just 2 tablespoons of vinegar and add more if you want a zestier tasting sauce. Take ¼-1/2 cup of the boiled cauliflower to be used in the sauce. Start with ¼ cup and add more if you'd like. Blend from low to high until the sauce is very smooth. Do a taste test and adjust seasoning to suit your spiciness needs.

6. Pour the sauce into a small bowl and set aside a large baking dish. Grease the baking dish in a bit of oil. Pick up a floret by its stem and dip it in the spicy sauce. The suace should coat the cauliflower nicely. If the sauce is too watery for some reason, you can remedy this by re-blending the sauce and adding more cauliflower to help thicken things up. Nutritional yeast will also thicken. Once the cauliflower is dipped and coated, place it round side up int he baking dish. Repeat this process until all the cauliflower is dipped. There will be leftover sauce. This is to be served alongside the cauliflower as an added dip. You can also serve this sauce as a dressing for other veggeies or a coating/marinade for tofu, tempeh or beans.

7. The 400 degree oven will be nice and toasty. Place the baking dish on the top rack of your oven and bake at 400 for about ten minutes, of until the sauce starts to firm up on the cauliflower. Then turn the oven on broil and allow the cauliflower to cook for about 1-4 minutes, or enough time to blacken the tops and edges of each piece. See pics for examples of the blackening. You do not want to burn the sauce or veggies, just get a nice bronzed color. This also firms up the sauce even more to create a sort of thick coating. Try this -> Use Panko bread crumbs and an added coating to have crispy-crusted bites!

8. If making the ranch dip.. While the bites are baking you can add all the ranch dip ingredients to a mug or cup and whisk briskly until smooth. For extra creamy dip add another dollop of vegan mayo in there.

9. Pull the bites from the oven and allow to cool on the countertop for at least ten minutes before serving. Serve warm with the easy ranch dip and leftover spicy sauce on the side. Veggie sticks are also a nice touch.

Spring Fling Scones

March 23, 2014 by Kathy Patalsky 22 Comments

p22014_03_22_spring-scones_9999_33spring-scones.jpg


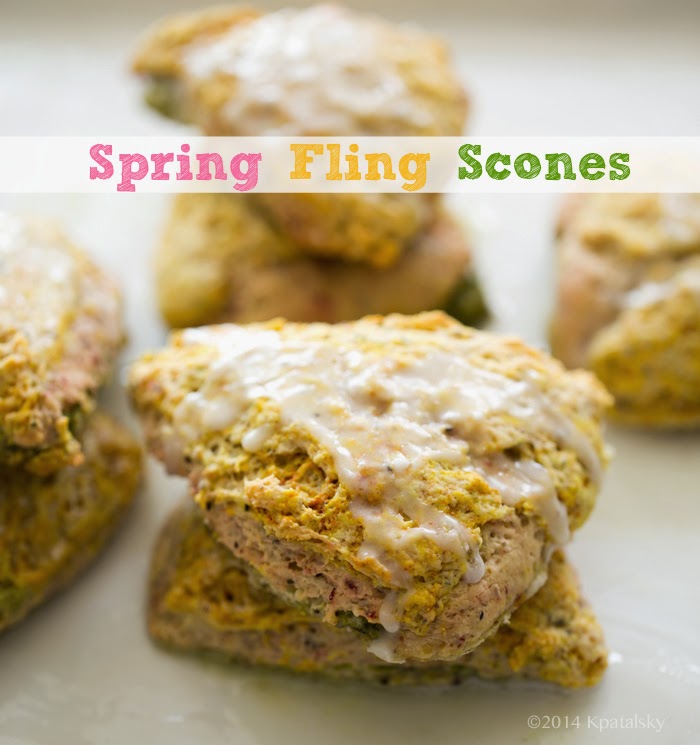
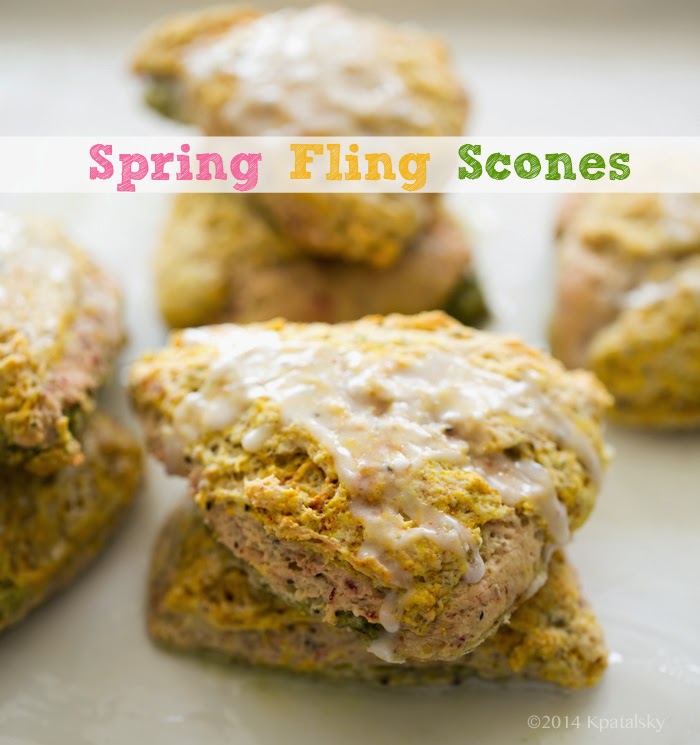
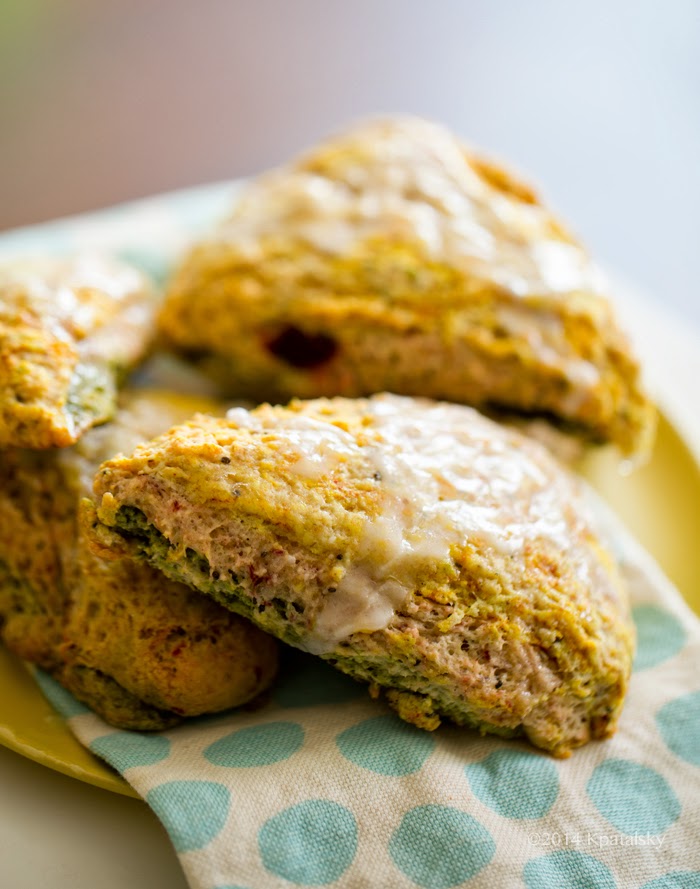
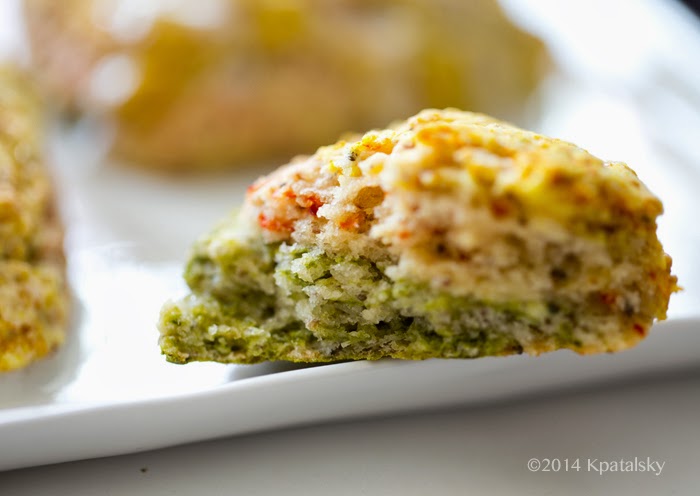
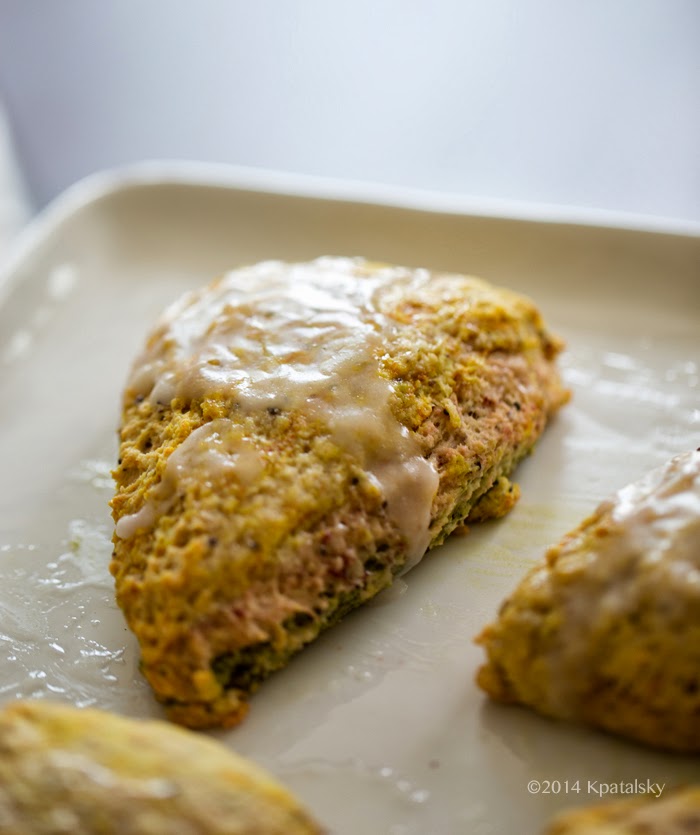
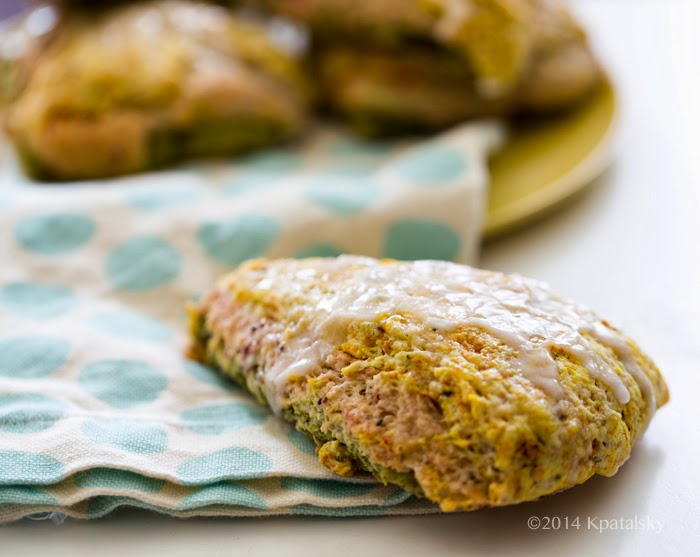
Happy spring! Pretty recipes like colorful salads, fruit-filled smoothies, spring-y pastas and soups, and these fluffy scones are welcome this time of year. They compliment the bright yellow spring sun, pastel flowers and blossoms ready to bloom, happy birds, crisp breezes and cheery disposition of spring. These Spring Fling Scones with a colorful pastel ribbon of pink, green and yellow (all-natural colors) are perfect for pairing with afternoon tea or serving at spring fling brunches. A zesty lemon glaze on top..

These classic-gone vegan scones are pretty simple to make, with ingredients like flour, coconut oil and silken tofu leading the bulk of the dough. The colors come from all natural ingredients including matcha green tea, turmeric (the flavor is barely recognizable..) and a touch of beets or berries.

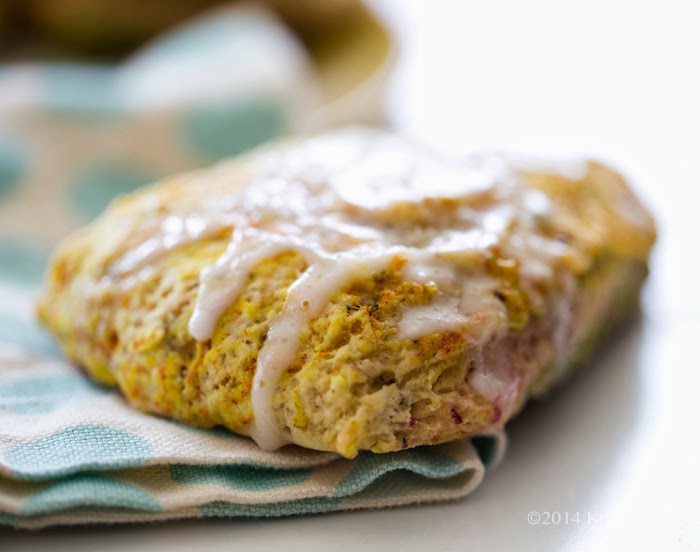
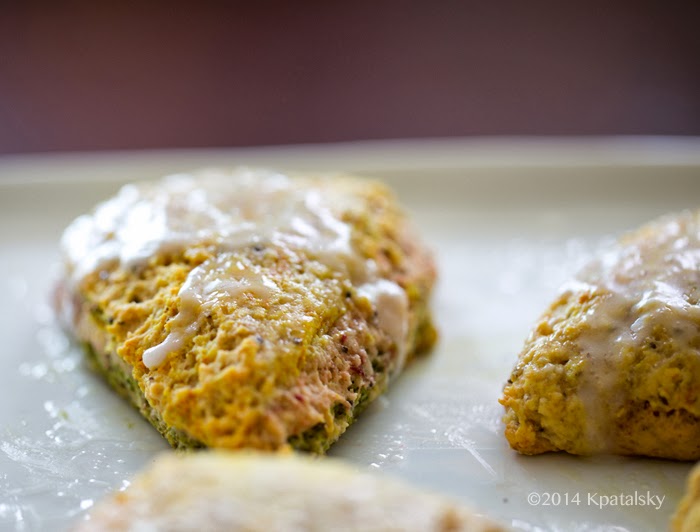
These scones bake up fluffy and moist, with a sweet crinkly glaze on top. Speckles of flax and chia seeds throughout.

You can substitute the organic white flour with your favorite gluten-free or whole grain flour if desired, results will vary a bit.

Spring Fling Scones
vegan, makes 8 large scones

2 cups white flour, organic
1 cup sugar, organic
12oz silken tofu
2 tablespoon flax seeds, ground
1 tablespoon chia seeds
2 tablespoon fresh orange juice + pinch of zest
3 tablespoon extra virgin coconut oil, melted
1 tablespoon baking powder
1 teaspoon salt

coloring:
2 tablespoon matcha green tea, culinary
1 tablespoon beets, grated (you could also use raspberries, same amount)
½ teaspoon turmeric

lemon-vanilla glaze:
1-2 drops vanilla extract
1 cup powdered sugar, organic
1 ½ tablespoon lemon juice
1 tablespoon coconut oil, melted

Directions:

1. Preheat oven to 400 degrees.
2. Combine the flour, baking powder, salt and sugar in a large mixing bowl.
3. In a blender on low speed, combine the silken tofu, orange juice, chia seeds, oil and flax meal. Blend until smooth and thickened, about 1-2 minutes.
4. Fold the liquid mixture into the dry bowl until a fluffy dough forms.
5. Split the dough into thirds, transferring one third to a small bowl and another third to another small bowl.
6. In the large mixing bowl, fold the matcha into one third of the dough. Add a bit of flour if needed to handle. Knead until the matcha distributes creating a green color. (It can be a bit swirled.)
7. On a floured surface, press out the green dough into a round about 7-8 inches across. Form round with your hands. Again, add a pinch more flour if things get sticky. Also, it helps to have your kitchen at a cool temperature so the oil-infused dough doesn't get too melty in texture.
8. Repeat the coloring steps with the yello (turmeric) and pink (beet) thirds of the dough. Place each layer on top of the green in a stacking form so that you end up with one fluffy round of dough, three layers of color. Using your hands pat out and form the dough into a tall fluffy round.
9. Using a chilled or lightly oiled knife, cut out the scones by slicing the dough in half, the in quarters, then again in eighths, just like pizza slices.
10. Place the scones on a lightly greased baking sheet and place in the 400 degree oven to bake for 20-25 minutes, or until the edges begin to brown just a tad and the tops are firm and toasty to touch. The scones will still be quite tender and fluffy on the insides and will need a few minutes to cool before poiring the glaze.
11. Cool scones on a baking rack. Whisk together the vanilla-lemon glaze. Pour the glaze over top the scones after they have cooled a bit. Serve scones warm for best texture and flavor. Store in the freezer or fridge and warm up to serve.

Matcha Green Tea Reviews & Brand Buying Guide

March 19, 2014 by Kathy Patalsky 328 Comments

p7-2014_03_17_matcha_9999_200matcha-review.jpg


Matcha Madness has begun. Let me introduce you the the magical world of matcha in my own special way. Buy reviewing a wide selection of brands, surveying them based on color, price, taste and packaging. And I will give my own tips and tricks for enjoying matcha green tea as a part of your healthy, Zenergized lifestyle. Let the matcha madness begin..

Not all matchas are created equal. If you learn anything from this post, let it be that.

Quick List: My Top 5 Picks*, Best Matcha Brands (no order rank here)

1. Encha Organic Matcha - buy on Amazon
2. DoMatcha - buy on Amazon
3. Taste of Kyoto - buy on Amazon
4. Eden - Buy on Amazon
5. American Tea Room - buy online

* Top 5 from brands reviewed in this post

Disclaimer: This review is not scientific by any means and is based on my personal reviews. Matcha reviewing is, like most food-type reviewing, quite subjective. In other words, you might totally disagree with me, and that's ok. However, colors and numbers don't lie, so that helps a bit.

Matcha Authority. Why do I call myself a sort of matcha expert? Well I will admit I have never been to Japan (where most matcha comes from) and I could not describe to you all the intricate details about the production process, history and more. Though I do know a little from research. But what I am an expert in is taste and use of matcha. In other words, I know a good matcha when I see/taste it!!

So yes, I do have a bit of expertise on matcha green tea since I have been drinking it almost every day for a little over a year now. I bought my first tin of matcha at the American Tea Room in Beverly Hills for about fifty bucks (big splurge on tea!!) after the salesman gave me a very long, very passionate spheel about how amazing it is. Among other things, he said it had a Zen-inducing effect that not only energizes you in a non-jittery way, but calms you to a sort of Zenned out feeling that only amazing matcha green tea can provide. It contains about half the caffeine (or a bit less) as standard coffee, though the normal caffeine jitters you may experience with coffee have never effected me with matcha - even after a giant tablespoon-ful scoop into a smoothie! The release of caffeine is said to be at a slow rate and thus jitter-free.

Basics and FAQs:

What is matcha?
Matcha is green tea, yes. But it is not like the tea you find in tea bags. Matcha is not steeped. it is dissolved because matcha is a very fine green powder. Matcha powder is the ground up leaves of green tea. The leaves are harvested, dried and eventually ground up into powder after going through an extensive and (I think) magical processing process. Matcha powder is ground up green tea leaves, so you are actually consuming the whole leaf. For this reason it is extremely high in antioxidants, thus having a wide array of healthy living claims and supposed benefits.

Why should I drink matcha? I cannot tell you why you should drink it. But I will tell you why I drink it. It successfully switched me over to green tea from coffee in my daily routine. I now drink coffee about 1-3 times a month, as opposed to 1-3 times a day in my old routine about five years ago. Living in NYC, I was a self-proclaimed coffee addict. I'd hit up my fave spots at least once a day to drown my sorrows (or fatigue) in a cup of Joe. Well soy lattes were my thing actually. I finally switched from coffee to chai, but the sticky-sweetness of most coffee shop chais were not satisfying me, so I still dabbled in the dark coffee bean bevies. But finally! Matcha seriously kicked my coffee cravings to the curb. Now I crave the green stuff, packed with antioxidants. The stuff that makes me feel Zenergized. Yes, I like that word. Plus the bright green color brightens my day!

How to drink it? I rarely make matcha in the traditional sense, which is by very lightly (almost) boiling water, then using a matcha whisk to dissolve the matcha into the water. Then you drink the green matcha tea. Once in a while I will drink it like that, but rarely. I drink my matcha in smoothies or lattes - but mostly smoothies! I add about one teaspoon of matcha to a large vegan protein shake. I also love matcha lattes when I go to coffee shops like Urth Caffe and Peets. Even Starbucks makes a great vegan matcha latte if you ask for soy. Non-vegans: do not drink matcha with dairy. It supposedly ruins the whole antioxidant effect. Soy or almond milk are my preferences. Use the search bar on my site to find all my many matcha-infused recipes. My matcha shake is my fave.

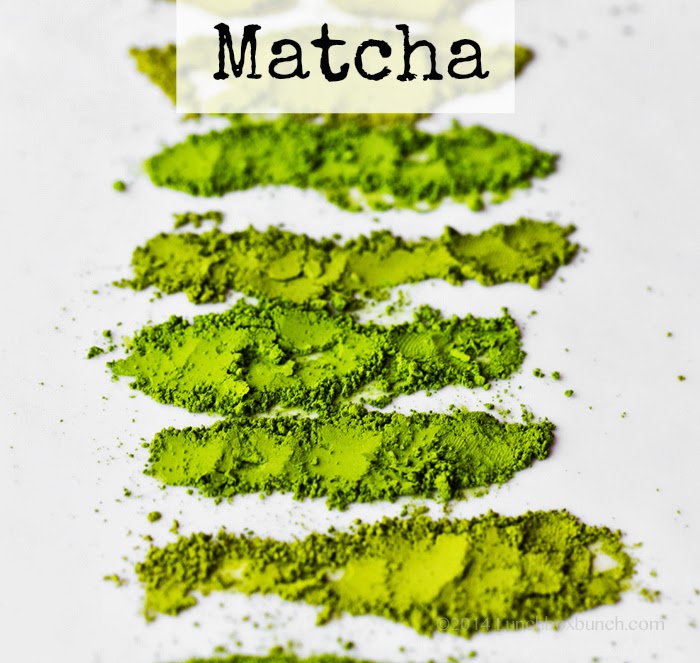
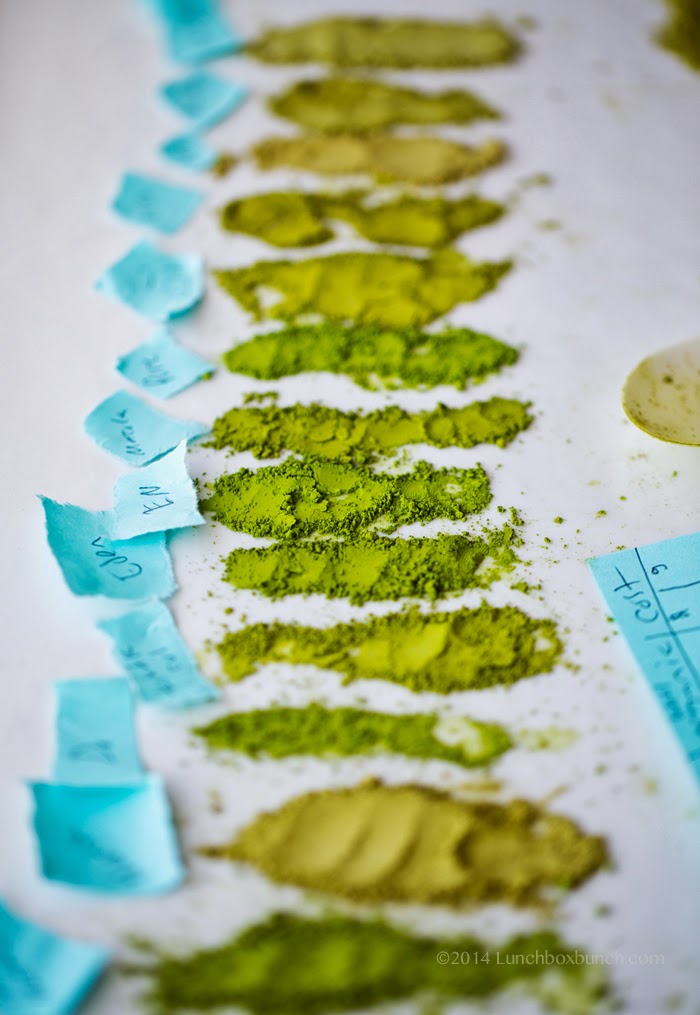
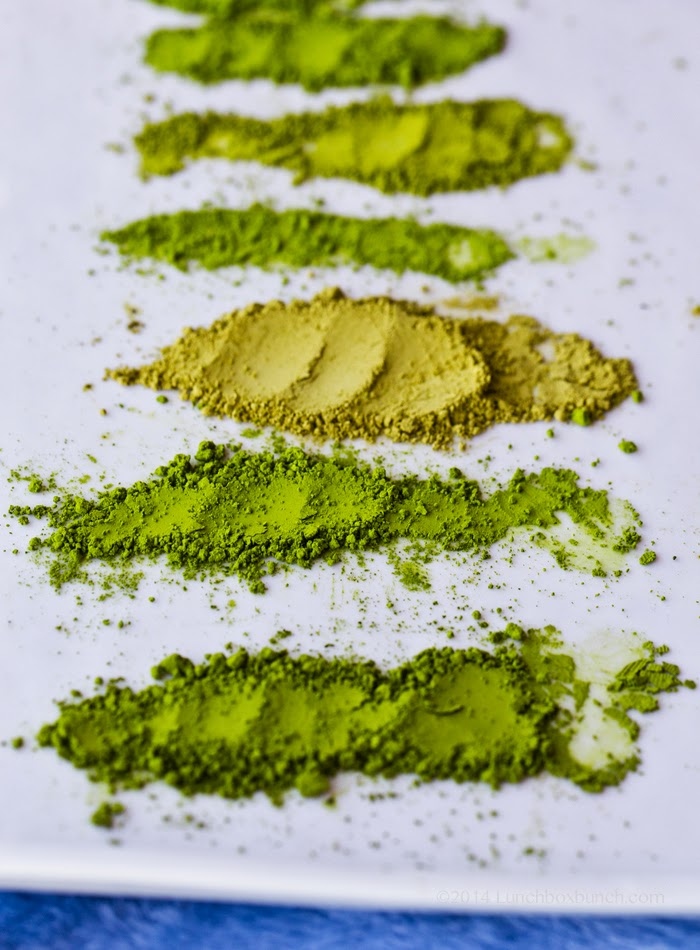
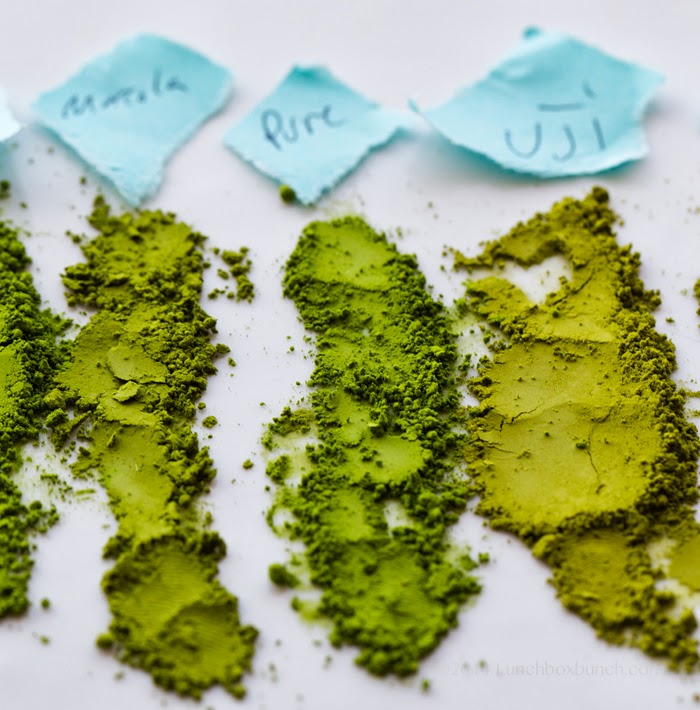
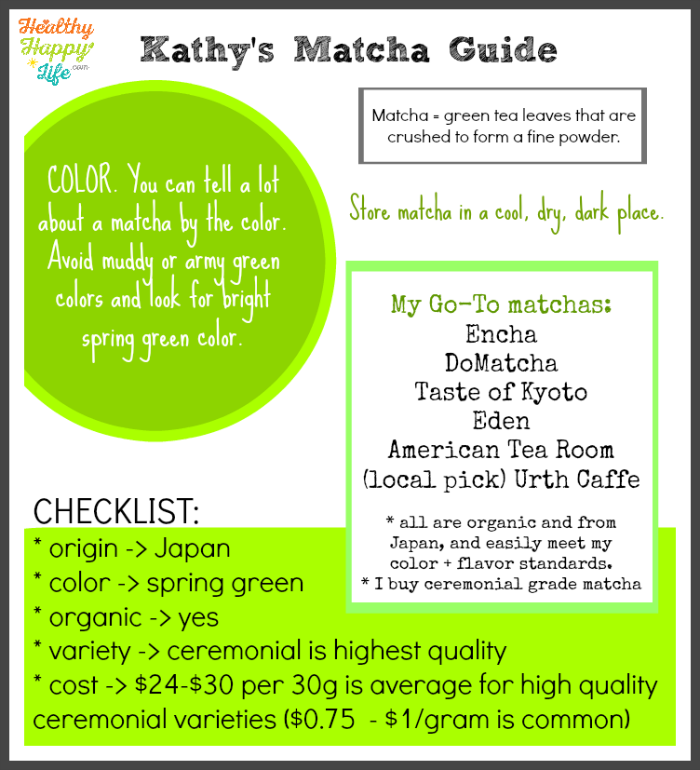
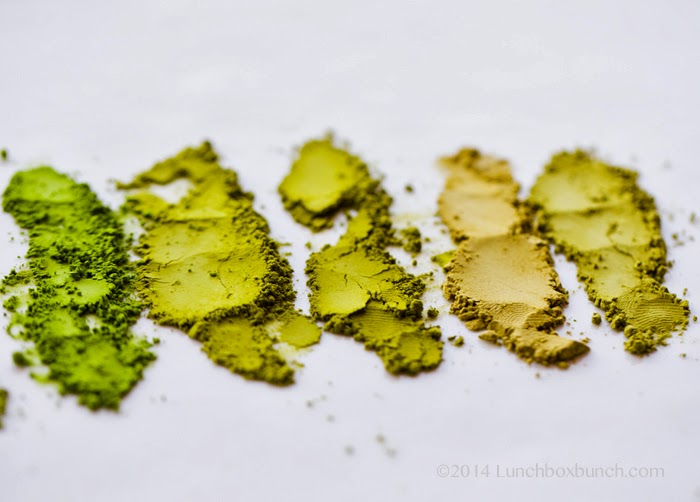
What is good matcha? A high quality matcha will appear bright spring green in color. Color is VERY important when assessing matcha quality. Imagine a bright green bunch of fresh spinach versus a muddy, wilted, army green bunch. Color not only equals better flavor (most times) but it also equals more antioxidant power. I am amazed how poor in quality some matcha is. Muddy brownish matcha is (to be blunt) pretty nasty stuff. So if you have not tried high quality matcha and think you "don't like matcha" -- just find a way to try a high quality variety and then make your true assessment. Not all matchas are created equal!

Organic? I only buy organic matcha, but you can decide for yourself. Organic matchas come in an array of qualities, as you will learn from my review. Organic does not equal high quality, even though organic matcha will be more expensive than a similar non-organic counterpart.

Storage? Keep matcha away from light, moisture and heat. You can store it in a cool dark place along with your tea bags, or in the fridge. You can even store in the freezer if desired. The most important point of fridge storage is to make sure condensation doesn't seep into your matcha (moisture!) or that smells from your fridge are allowed to seep into the matcha .. it easily picks up aromas. I either store it in the "butter" compartment in my fridge, or in a cool dark place. I always consume my matcha within two months, usually one even. The faster you consume it, the fresher the flavor and color will be .. as with most pantry foods. That is why it is actually better to buy matcha NOT in bulk. Smaller amounts will be consumed faster than a huge tub of the stuff.

Price? Matcha is not cheap. And you DO get what you pay for in most cases. Matcha that is super cheap and seems too good to be true, probably is. You can see my guide for price variations. But in general, expect to pay $20-50 for 30g of highest quality matcha. And $20 is pushing it. If $30 for "tea" is out of your budget, think of matcha as a splurge item and buy it once in a while. But buy the good stuff. Nothing is worse than buying a tin of "bad" matcha to save a few bucks, then hating it altogether. If you are going to buy matcha, buy matcha.

Quality? For Americanized shopping purposes, there are two basic words to look for: ceremonial and culinary. Ceremonial matcha is in general (and if labeled honestly) the higher quality of matcha. Culinary is a lesser quality, meaning it may have a more bitter and muddy flavor and less bright green color. However, check out my review for discrepancies. Sometimes brands will also carry a "premium" variety - or something even "better" than ceremonial. This is usually a special origin of tea or has a special preparation. One store I visited has one for over a hundred bucks because it is hand-made by monks (or so the sales guys said). I'm sure it is amazing, but quite a splurge item for matcha lovers!

Origin? I strictly only buy matcha from Japan. I do not buy matcha from China.

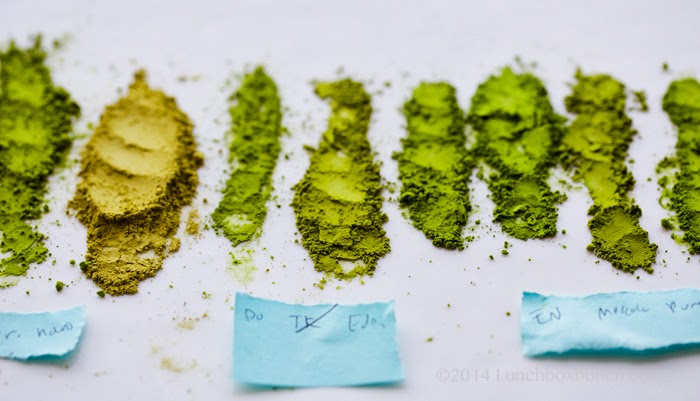
Color is an important indicator of quality. Spring green please..

Nice and green..

Not so much..

Bad batch? In my guide I note how many times I have purchased a certain brand. If only one time is listed, you have to keep in mind that I may have received a bad or good batch. Kinda like wine. Sort've. If matcha has been sitting in a storage warehouse for too long or very freshly shipped it may vary in quality once opened. So if I bash one brand that you tried and love, please let us all know in the comments. Or if I love a brand you didn't care for, tell us that also. Comments will be very helpful to gain a full spectrum of opinions in this review! nd to open eyes to other brands to try. Lets chat matcha!

Brands? There are MANY brands of matcha. This is just a small selection. I will try to add more brands as I try them. If you run a matcha brand and would like to be included in this post, please leave a comment so we can get in touch. I am happy to add more brands to this list. But to be honest, this was a very expensive undertaking, so I will not be buying many more brands to try (well, anytime soon that is!) So donations of samples are much appreciated!

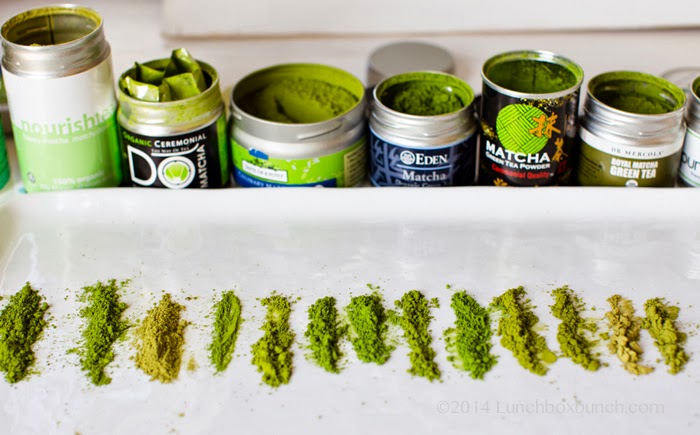
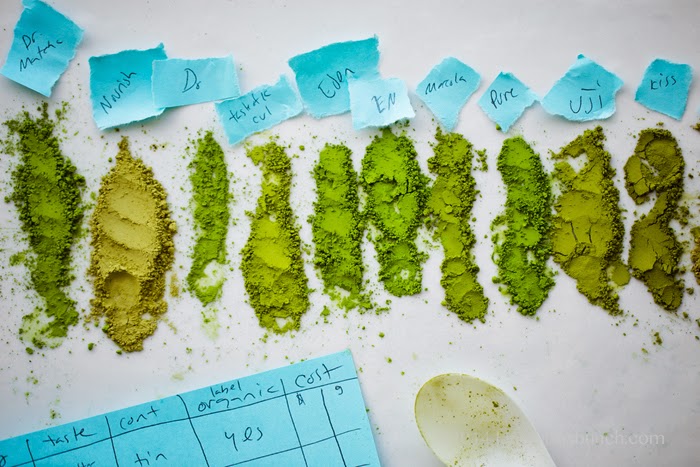
How I reviewed: I opened fresh packages, assessed the color by eye, then spread out a sheet of samples. For taste testing I dry-tasted each brand. The colors are quite obvious to see differences, the taste takes a keener sensibility. I did my best to let my palate judge flavor. All prices are based on what I paid, not retail value.

Japan vs China. With the Fukushima radiation disaster, many green tea lovers became worried if green tea production would be effected. Well, to be honest, I do not think anyone has a 100% answer on this issue, but you can research on many green tea producer sites and read their explanations for how everything is indeed ok. The main reason being proximity to the blast. But even still, some China matcha is avaiable for those who want to steer clear. Me? I 100% choose Japan matcha over China. Simply because I have never really tasted a premium China-origin matcha. Japan is where matcha was born and they have perfected the process from leaf to container. So while I agree it is a scary issue to talk about and analyze, right now, I personally have not seen anything to deter me from Japan-origin matcha.

So are you ready to browse these beauties?.. I was! This was fun. And I will NOT be buying more matcha for a while..

Lets begin!

And here is my one sheet guide! - detailed results follow

Kathy's Matcha Brand Review
Number rating scale: 1-5, 5 being the best
In a hurry: skip down to see my list of matchas I would buy again.

Top Shelf Matchas -- From Japan and Organic

Brand 1: Encha
Info: Encha sources from the best organic farms in Japan. "Encha's principle of selecting matcha grades is identifying the natural strength of pure organic matcha and no need to add sugar in your preferred way of drinking matcha! Directly working with the farmer, we select the perfect strength of pure organic matcha that matches the intended pairing ingredient, it being water, vegan non-dairy milk, fruits or baking ingredients."
Reviewed Blends: Latte Matcha Grade, Ceremonial Matcha Grade
Origin: Japan
Color: 5
Taste: 5

Tasting notes: grassy, bright, uplifting, fresh
Container: thick fresh-lock sealed bag/pouches
Organic on label: yes
Cost/Weight: Ceremonial Grade: $24.95/30g or $45.95/60g -- Latte Grade: $30.95/60g
Cost per gram: .83/g or .77/g -- .52/g
Number of times I have purchased it: I have auto-ship set up! (many times)
Bottom line review: I tried the latte variety first and was not expecting much from a "latte grade" but this was off the charts impressive for the price of this matcha. The ceremonial grade was also superb! Top notch. I could not imagine a better matcha. The color was a beautiful, perky spring green. Very impressed with this company and I adore their branding and communication with their customers about the organic farms that they source from. New fave for sure!
Would I buy it again? Yes
Buy it: Encha Online Store

Brand 2: DoMatcha
Info: DoMatcha may look familiar to you if you shop at Whole Foods, because it seems to be one of their main matcha brands they carry. DoMatcha comes in both organic and non-organic varieties. This is my go-to matcha when I need to buy one in-store on a grocery shopping trip because I know Whole Foods will always carry it! (may vary by location) DoMatcha has a wide variety of products including matcha to-go packets and even a super high quality "Master's Blend" variety for $50.
Reviewed Blend: DoMatcha Organic Ceremonial Matcha
Origin: Japan
Color: 5
Taste: 5

Tasting notes: bright and grassy
Container: Tin with an inner bag, pull-tab can
Organic on label: yes
Cost/Weight: $29/30g
Cost per gram: $0.96/g
Number of times I have purchased it: 10+
Bottom line review: Love this brand. I have never been disappointed in the quality. I always buy the organic ceremonial variety. Beautiful color and sturdy bright flavor.
Would I buy it again? Yes
Buy it: DoMatcha Green Tea, Organic Matcha

Brand 3: Urth Caffe
Info: A popular cafe here in Los Angeles, Urth sells matcha in a variety of grades. I love both the expensive organic variety as well as the less expensive variety (Harayama matcha I think).. Note: when you order a matcha latte at Urth, you by default get the less expensive blend, but you can ask to upgrade to the higher quality variety for an added cost. Highly advised!
Reviewed Blend: Urth blends
Origin: Japan
Color: 5
Taste: 5

Tasting notes: bold, grassy, light bitterness
Container: tins with interior bags
Organic: Yes.
see store for cost
Number of times I have purchased it: 5+
Bottom line review: Love this brand, the matcha is not the best I have ever tried, but very high quality and the brand seems highly dependable. I am excited to splurge on their premium blend at some point.
Would I buy it again? Yes
Buy it: in store or matcha gift set online

Brand 4: O-Cha
Info: Direct from Japan matcha! This is not organic, boooo, but quite lovely. The same company does sell an organic matcha that I would love to try in the future. It is only $25 for the same amount so I would guess that the grade is less premium, but I do not know for sure right now.
Reviewed Blend: Super Premium Matcha, Ceremonial Grade
Origin: Japan
Color: 5
Taste: 4.8

Tasting notes: grassy, bright, creamy, mellow
Container: tins with iner bag and plastic seal tab
Organic on label: yes
Cost/Weight: $29.25/30g
Cost per gram: $1/g
Number of times I have purchased it: 1
Bottom line review: Fabulous matcha at an excellent price! Not as spring green as the two matchas above (in direct comparison) but very deep dark green with much lightness.
Would I buy it again? Yes
Buy it: Hibiki-An Matcha

More resources - online stores that are not on Amazon - matcha shipped directly from Japan:
O-Cha
Hibiki-an

Brand 5: American Tea Room
Info: This premium tea store has a variety of matchas and carries the first ceremonial matcha I ever tried. In the black tin. Amazing. I was hooked at first taste and view of that spring green-mazing color! Well, it better be good for $50, right? 🙂 On the website: "Handcrafted almost entirely from gyokuro leaves, this rare, organic matcha has a gorgeous chartreuse color with a profoundly sweet, fresh aroma and a light iodine note."
Reviewed Blend: Ceremonial Organic Premium Matcha
Origin: Japan
Color: 5
Taste: 5

Tasting notes: grassy, bright, creamy
Container: tins with interior bags
Organic on label: yes
Cost/Weight: $50/30g
Cost per gram: $1.67/g
Number of times I have purchased it: 3
Bottom line review: Super lovely. If you really want to try amazing matcha without any risk of poor quality, give this brand a try. They often offer sales and coupons if you join their email list.
Would I buy it again? Yes. And if you ever need to buy me a gift, this will surely suffice 🙂
Buy it: ATR

Brand 6: Taste of Kyoto
Info: Taste of Kyoto is another organic brand that I have love. It offers a variety of matcha products including reserve and culinary. I have tried both and will review both below.

Reviewed Blend: Taste of Kyoto Reserve Organic Matcha
Origin: Japan
Color: 5
Taste: 5

Tasting notes: bright and grassy
Container: Tin with an inner bag
Organic on label: yes
Cost/Weight: $42/60g
Cost per gram: $0.70/g
Number of times I have purchased it: 2
Bottom line review: Excellent high quality matcha at a premium price. I wish they had a smaller size than 60g, but the cost per gram is great for this quality.
Would I buy it again? Yes
Buy it: TASTE OF KYOTO Matcha Green Tea, Reserve

Reviewed Blend: Taste of Kyoto Culinary Organic Matcha
Origin: Japan
Color: 3.5
Taste: 4

Tasting notes: bright, mild
Container: Tin with an inner bag
Organic on label: yes
Cost/Weight: $26/60g
Cost per gram: $0.43/g
Number of times I have purchased it: 2
Bottom line review: This is probably my favorite "culinary" variety of matcha. Normally you think the quality will greatly suffer with a culinary blend, but this brand really stands up. Granted it is not as good as the reserve variety, but for the price, it far exceeds my expectations.
Would I buy it again? Yes
Buy it: Organic Ceremonial Matcha 30 Grams

Brand 7: Dr. Mercola
Info: We all know of Dr. Mercola, health guru and wellness authority, yes? Well now he has a matcha. I am certain he has slapped his label on a high quality matcha supplier, but he found a good one!
Reviewed Blend: Dr. Mercola's Royal Matcha - see it on DrMercola.com
Origin: Japan
Color: 4.9
Taste: 5

Tasting notes: bright, grassy
Container: Tin without an inner bag, pull-tab can
Organic on label: yes
Cost/Weight: $28/30g
Cost per gram: $0.93/g
Number of times I have purchased it: 1
Bottom line review: High quality matcha, if you are a Mercola online store shopper or Mercola fan, give this one a try.
Would I buy it again? Yes
Buy it: Royal Matcha Green Tea (Organic)

Brand 8: Pure Matcha
Info: Pure Matcha is a fun brand because they offer high quality organic matcha but they also have a black tea powder and a red tea powder.
Reviewed Blend: Pure Matcha Organic Ceremonial Matcha
Origin: Japan
Color: 5
Taste: 4.9

Tasting notes: bright, light, grassy
Container: Tin without an inner bag, pull-tab can
Organic on label: yes
Cost/Weight: $21/30g
Cost per gram: $0.70/g
Number of times I have purchased it: 2
Bottom line review: Great, dependable high quality matcha.
Would I buy it again? Yes
Buy it: Pure Matcha, Premium Ceremonial Grade Matcha

Brand 9: Eden
Info: Eden is a popular and expansive brand of organic products. Eden is a favorite of mine for everything from canned lentils to tamari. Eden only carries one matcha, but it is quite impressive, not to my surprise.
Reviewed Blend: Eden Organic Stone Ground Matcha
Origin: Japan
Color: 5
Taste: 5

Tasting notes: bright and grassy with calm flavor
Container: Tin without an inner bag, pull-tab can, outer box
Organic on label: yes
Cost/Weight: $37/30g
Cost per gram: $1.23/g
Number of times I have purchased it: 1
Bottom line review: This is a great matcha at a premium price. The quality you expect from Eden products is on display here. Beautiful!
Would I buy it again? Yes
Buy it: Eden Organic Matcha Tea, Green Tea Stoned Ground 1 -Ounce Tin

Brand 10: Teavana
Info: Teavana is a well known brand with stores in the United States and beyond. From the brand: "Thoughtfully harvested and handcrafted, our pure, organic Imperial Grade Matcha is made from the highest-quality ingredients available, providing outstanding flavor while promoting feelings of focused vitality."
Reviewed Blend: Teavana Matcha Japanese Green Tea, 40g
Origin: Japan
Color: 5
Taste: 4.9

Tasting notes: rich flavor and sweet grassiness
Container: Tin without an inner bag, pull-tab can, screw on/off lid
Organic on label: yes
Cost/Weight: $45/80g or $25/40g
Cost per gram: $0.56-0.62/g
Number of times I have purchased it: 1
Bottom line review: Great product and very good price - high availability due to store locations where - you do not have to pay shipping if you buy in person. I was not expecting this high quality with this price, but Teavana succeeds!
Would I buy it again? Yes
Buy it: 80g container -- 40g container

Bonus Added Brands: (Updates to post)

Brand A: My Matcha Life
Info: This amazing brand was founded on the principles of the matcha tea drinking ceremony: harmony, purity, respect and tranquility. Love that! The founder has dedicated much time and research and knowledge into this new brand. She has traveled extensively throughout Japan and North America, in the name of matcha.
Reviewed Blend: Tea Lovers' Organic Matcha
Origin: Japan
Color: 5
Taste: 5

Tasting notes: bright, sweetly grassy, smooth
Container: Tin without an inner bag, pull-tab can
Organic on label: yes
Cost/Weight: $29.99/30g
Cost per gram: $1/g
Number of times I have purchased it: 1, donated from the brand
Bottom line review: Gorgeous quality matcha from an amazing, passionate company. New brand to try and love. The variety I tried was super high quality and gives you everything you could want from an organic/Japan origin top grade matcha. The pricing is competitive, but there are a few brands with lower prices. Bonus: great website with helpful matcha info.

Buy it: My Matcha Life

---- End of my top shelf list picks - Below brands may not be organic and from Japan ----

Brand 10: Aiya
Info: Aiya is a brand I recently discovered. They have high quality matchas, and carry a variety of blends. They offer a ceremonial matcha (reviewed) as well as a premium blend which is even more expensive at about $50 for 30g, so I imagine it is amazing. They also offer a less expensive cooking grade blend. Their online store sells a variety of matcha accesories too.
Reviewed Blend: Aiya Organic Ceremonial Matcha
Origin: Japan
Color: 4
Taste: 4

Tasting notes: bold, grassy, light bitterness
Container: Tin without an inner bag, pull-tab can
Organic on label: yes
Cost/Weight: $24/30g
Cost per gram: $0.80/g
Number of times I have purchased it: 1
Bottom line review: Give it a try! Great color and flavor. A sturdy high quality matcha.
Would I buy it again? Yes
Buy it: Organic Ceremonial Matcha 30 Grams

Brand 11: Hibiki-An
Info: Direct from Japan matcha. This is sadly not organic, but quite lovely. The same company does sell an organic matcha that I would love to try in the future. It is only $25 for the same amount so I would guess that the grade is less premium, but I do not know for sure right now.
Reviewed Blend: Super Premium Matcha, Ceremonial Grade
Origin: Japan
Color: 5
Taste: 5

Tasting notes: grassy, bright, creamy
Container: tins with pull tabs, no bags
Organic on label: no
Cost/Weight: $38/40g
Cost per gram: $1.05/g
Number of times I have purchased it: 2
Bottom line review: Beautiful green tea at an excellent price! If you do not mind not having your matcha organic, this is a great find.
Would I buy it again? No. I would however, try the organic version which is only $25/40g... interested to try that next!
Buy it: Hibiki-An Matcha

Brand 12: Doctor King
Info: Doctor King calls its matcha the "finest organic ceremonial matcha" and lists a variety of health claims in their marketing.
Reviewed Blend: Organic Ceremonial Matcha
Origin: Japan
Color: 3.5
Taste: 3.5

Tasting notes: muted, a bit grassy, mild bitterness, not very bold
Container: plastic container with an interior silver bag
Organic on label: yes
Cost/Weight: $21/30g
Cost per gram: $0.70/g
Number of times I have purchased it: 1
Bottom line review: I had high hopes for this brand but... The UK website is a bit unimpressive with its excessive health claims. This matcha had really great color, but the flavor was not matching the color, which was odd. I am not a fan of the plastic packaging and sloppy labeling either.
Would I buy it again? No
Buy it: DOCTOR KING Ceremonial Organic Japanese Matcha Green Tea

Brand 13: NourishTea
Info: NourishTea is an impressive brand that carries a wide variety of teas. They only offer one matcha variety.
Reviewed Blend: Organic Happy Matcha (no type specified)
Origin: Japan
Color: 2
Taste: 2

Tasting notes: muddy flavor
Container: Tin with an interior bag
Organic on label: yes
Cost/Weight: $23/80g
Cost per gram: $0.29/g
Number of times I have purchased it: 1
Bottom line review: I love this brand and I know for a act that their other teas are impressive - I have tried a few loose tea blends - but this matcha just doesn't measure up. I'm glad they tried to reach out to matcha fans, but maybe they should find a new supplier and up the price if need be to ensure quality.
Would I buy it again? No way
Buy it: Nourishtea happy matcha

Brand 14: Maeda-En
Info: This is another matcha brand you may spot at Whole Foods. It is actually the second brand I tried. I wanted to save a few bucks so I purchased the "cheapest" brand at Whole Foods. It (the Skiki variety) was not impressive. However, for this review, I bought the ceremonial blend and was very impressed. But it is not organic.
Reviewed Blend: Maeda-En Ceremonial Quality Matcha
Origin: Japan
Color: 5
Taste: 5

Tasting notes: creamy and bright, grassy
Container: Tin with an inner bag, plastic lid
Organic on label: no
Cost/Weight: $20/28g
Cost per gram: $0.70/g
Number of times I have purchased it: 1
Bottom line review: This is such a great ceremonial matcha, however it does not appear from the labeling or website to be organic, which is a huge bummer and deal-breaker for me purchasing it again. However, if you do not mind non-organic, give this a try. Just be SURE to buy the ceremonial quality variety. I have only seen the lesser quality variety at my local Whole Foods stores, so buying online is advised.
Would I buy it again? No because it is not organic.
Buy it: Maeda-En Mtcha Cermonial Quality

Brand 15: Tealux
Info: Tealux is a brand that carries a wide variety of teas and a wide variety of matchas. I clearly bought a lower grade matcha from Tealux, as their website calls this cooking matcha, so I would be excited to try their ceremonial variety, as I am guessing it will far exceed the one I tested here.
Reviewed Blend: Tealux Uji Premium Organic Matcha (not the ceremonial blend)
Origin: Japan
Color: 3
Taste: 3

Tasting notes: muddled, bitter
Container: opaque bag
Organic on label: yes
Cost/Weight: $23/113g
Cost per gram: $0.20/g
Number of times I have purchased it: 1
Bottom line review: This is cooking matcha for sure, I would never advise drinking this specific variety. For use in baking, yes. The Tealux brand is obviously an authority on tea, so I am anxious to try the higher quality version.
Would I buy it again? No (But a the reserve variety is worth trying)
Buy it: Premium Organic Matcha Green Tea Powder Uji Kyoto Japan By Tealux (4oz) *Tealux fans, see the links below this post to buy the ceremonial blend version, which is probably much higher in quality..

Brand 16: Matcha Source
Info: This premium matcha is ceremony grade and comes at a premium price. But it is worth it!
Reviewed Blend: Kama Matcha, Ceremonial Grade
Origin: Japan
Color: 5
Taste: 5

Tasting notes: grassy, bright, creamy
Container: tins with pull tabs, no bags
Organic on label: no
Cost/Weight: $48/30g
Cost per gram: $1.60/g
Number of times I have purchased it: 1
Bottom line review: Super lovely. I was all ready to RAVE about the color and flavor of this matcha but then noticed that it is not organic. At this price, I would've expected it to be!
Would I buy it again? No. At this price I can find an organic brand, although if you are not concerned about organic, this is a lovely matcha.
Buy it: Kama Matcha

-----

Matcha From China -- my personal view: not advised to buy

Brand 17: Kiss Me Organics
Info: Kiss Me Organics appears to only sell one variety of matcha: culinary grade. It is a bulk bag. I was eager to try this brand in hopes that it would be a good value opportunity. This is a Chinese-origin matcha.
Reviewed Blend: Organic Matcha, Culinary Grade
Origin: China
Color: 3
Taste: 2.5

Tasting notes: light grassiness, mellow yet somewhat bright
Container: metallic opaque bag
Organic on label: yes
Cost/Weight: $25/113g
Cost per gram: $0.22/g
Number of times I have purchased it: 1
Bottom line review: I find it a bit misleading that the website does not clearly state that this matcha is from China. You have to read the fine print on the package to find that info. For a culinary matcha, this product was average. However, this was the best China-origin matcha that I reviewed in my selection.
Would I buy it again? Maybe for a bulk matcha baking project
Buy it: Matcha Green Tea Powder - ORGANIC

Brand 18: Matcha DNA
Info: This is an organic brand from China with individual matcha packets. I was super excited about trying a per-packet brand, but sadly, this brand did not deliver.
Reviewed Blend: MatchaDNA Organic Matcha
Origin: China
Color: 1.5
Taste: 1.6

Tasting notes: muddy, bland
Container: opaque bag with individual packets
Organic on label: no
Cost/Weight: $24/85g
Cost per gram: $0.28/g
Number of times I have purchased it: 1
Bottom line review: This was not good matcha.
Would I buy it again? No
Buy it: MatchaDNA Certified Organic Matcha Tea

Brand 19: Swanson
Info: Swanson is an online store with a variety of products like vitamins and suplements. This matcha says it is "Dr. Bob" approved because it refers to Dr. Robert DeMaria, an author of Dr. Bob's Guide to Optimal Health. The brand looks sound and trustworthy, however the matcha doesn't speak to that.
Reviewed Blend: Swanson Organic Matcha
Origin: China
Color: 1.9
Taste: 2.3

Tasting notes: bitter, lightly grassy, a bit bland
Container: plastic container with a scooper included
Organic on label: yes
Cost/Weight: $18/50g
Cost per gram: $0.36/g
Number of times I have purchased it: 1
Bottom line review: No very impressive.
Would I buy it again? No
Buy it: 100% Certified Organic Matcha Green Tea

Brand 20: EatGreenTea.com
Info: An online store with one variety of matcha from China. They also sell edible green tea leaves
Reviewed Blend: Organic Green Tea Powder
Origin: China
Color: 2.5
Taste: 3

Tasting notes: bitter, a bit grassy
Container: metallic opaque bag
Organic on label: yes
Cost/Weight: $25/100g
Cost per gram: $0.25/g
Number of times I have purchased it: 1
Bottom line review: Love this brand, the matcha is not the best I have ever tried, but very high quality and the brand seems highly dependable. I am excited to splurge on their premium blend at some point.
Would I buy it again? Yes
Buy it: Organic Green Tea Powder

Brand 21: UJIDO
Info: From the brand, "In 1832, a humble tea farmer decided to start a tea business in Uji, Kyoto Japan — where our current Japanese Tea production method was first developed. That tea farmer’s name was Tune-emon Takizo, and we, his family, have continued to produce superior Green Tea every generation since.

In 1952, we opened our retail shop in Uji, Kyoto, Japan and it is still open today. We are so honored to carry on an ancient tradition that is also our family heritage for nearly two centuries after our humble beginnings, we enjoy bringing authentic Matcha tea to the world!"
Reviewed Blend: basic offering
Origin: Japan
Color: 3.5
Taste: 3

Tasting notes: mostly bright and grassy, but slightly bitter
Container: large metallic opaque bag
Organic on label: no
Cost/Weight: $6.50/1oz
Cost per gram: $0.21/g
Number of times I have purchased it: 0 (free sample)
Bottom line review: Good sturdy brand as a good value price, but not organic so I personally wouldn't buy it
Would I buy it again? No
Buy it: ujido

--

Bottom line review: Here are matchas I rate highest..
(note: I personally buy organic + ceremonial grades)
Encha, DoMatcha, American Tea Room, Taste of Kyoto (any variety), Aiya, Dr Mercola, Eden, Pure Matcha, Maeda-En, Urth Caffe, Matcha Source Kama Matcha, Hibiki-an, O-Cha,

What brands am I missing? What are your faves? Comments section open.

*Amazon links are either products I mentioned above or products I have tried. The quality varies. Please read full reviews to see which products I personally like best. I have not tried vitalife, but plan to because it gets good feedback..

2016 UPDATE: The BizJournals names matcha as a wellness trend for 2016. I am not surprised! Green tea provides an antioxidant-filled boost to your day without the normal jitters that espresso beverages often bring. The article reads..

"Wellness trend: Matcha everything — You’ve probably seen this powder version of green tea at various coffee and tea places, including Starbucks, a lot recently. It's actually been kicking around in wellness circles since the 90s and again as part of the raw food movement in the aughts.."

Not a sponsored post: When first doing this post, I purchased every single matcha in my survey (no freebies!) so you know I have nothing to gain in calling one brand better than another. In the following months a few brands sent me free samples, and some were added to the reviews.

Disclosure: I provide links to Amazon available products from my review, and I am an Amazon affiliate.

This page will occasionally be updated as more matchas are tasted.

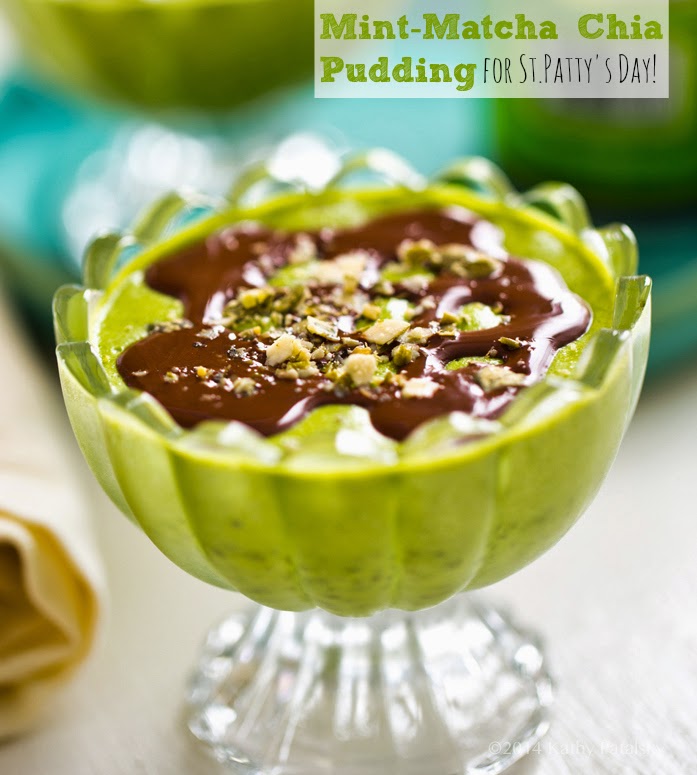
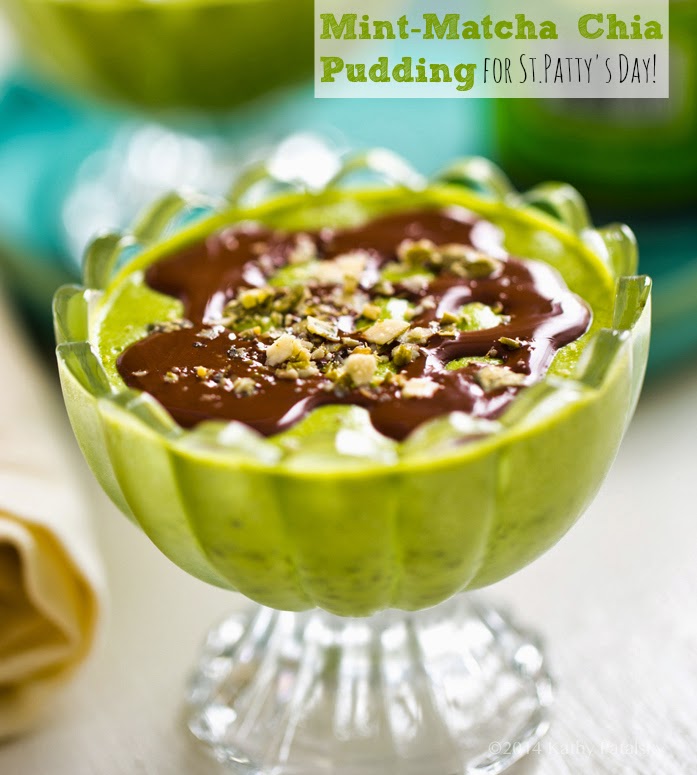
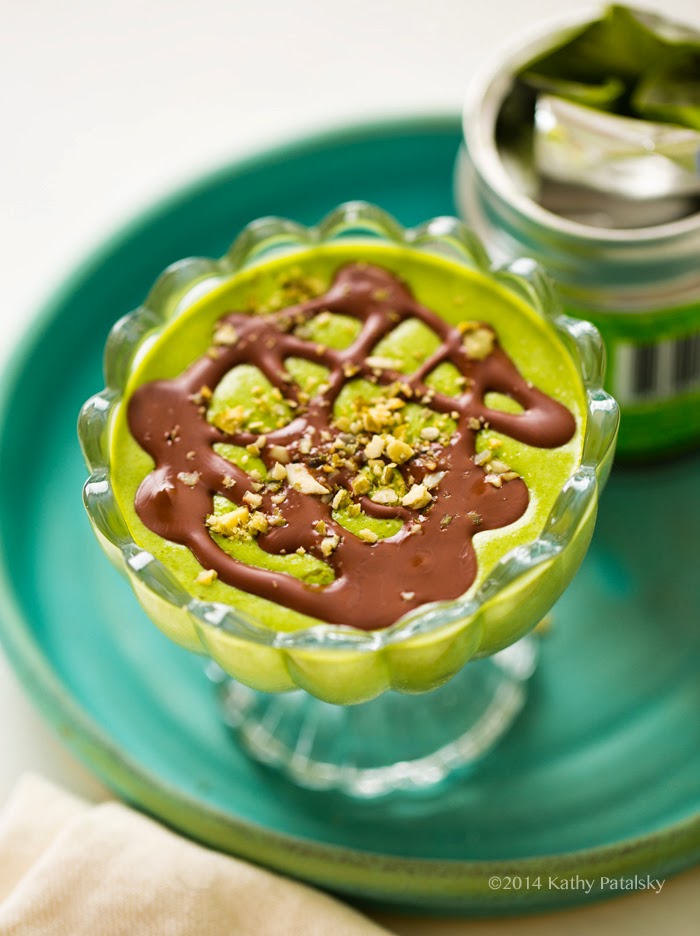
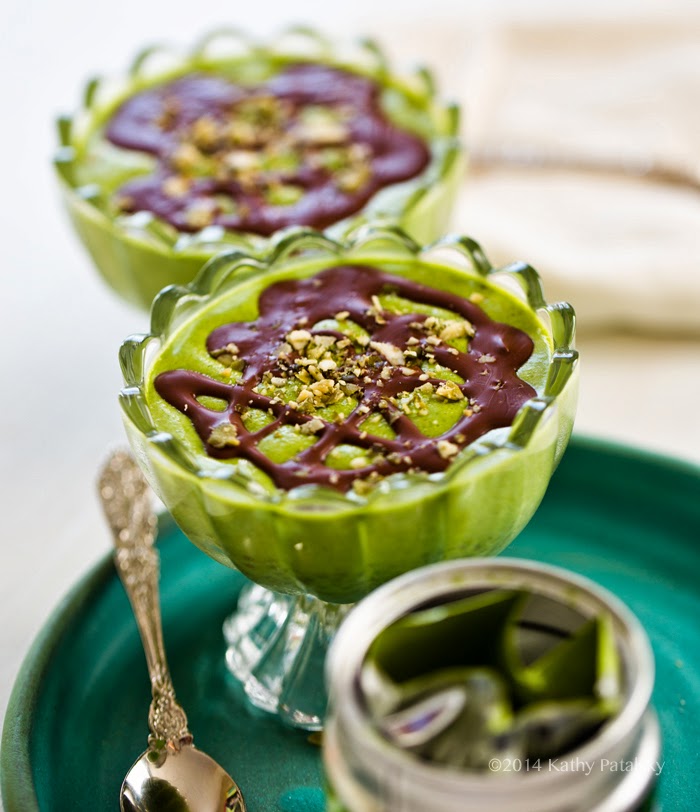
Mint-Matcha Chia Pudding with Dark Chocolate Drizzle

March 14, 2014 by Kathy Patalsky 32 Comments

p1-2014_03_06_matcha-cereal_9999_10matcha-chia-mint-pudding.jpg


My dairy-free, vegan Mint-Matcha Chia Pudding with Dark Chocolate Drizzle is a sweet spring treat that you can prep in a flash and be enjoying in a few hours or the next day. For this spring-approved dessert or sweet snack, healthy chia seeds combine with coconut oil, dark chocolate and a cool breeze of peppermint. Plus there is a nice boost of green tea goodness in each spoonful..

Matcha Madness. I know I have been featuring A LOT of matcha green tea recipes lately. But there is a reason! In the next week (hopefully) I will be posting a guide to matcha brands since readers are always asking me which brand(s) I love and how to find a matcha brand in stores. What to look for, etc. So look for that post soon! I just ordered (WAY!!) too much matcha from Amazon and will be reviewing a few new brands for my post. And there may be a giveaway involved too!

Matcha recipes on HHL:
* Matcha Shake
* Matcha Latte
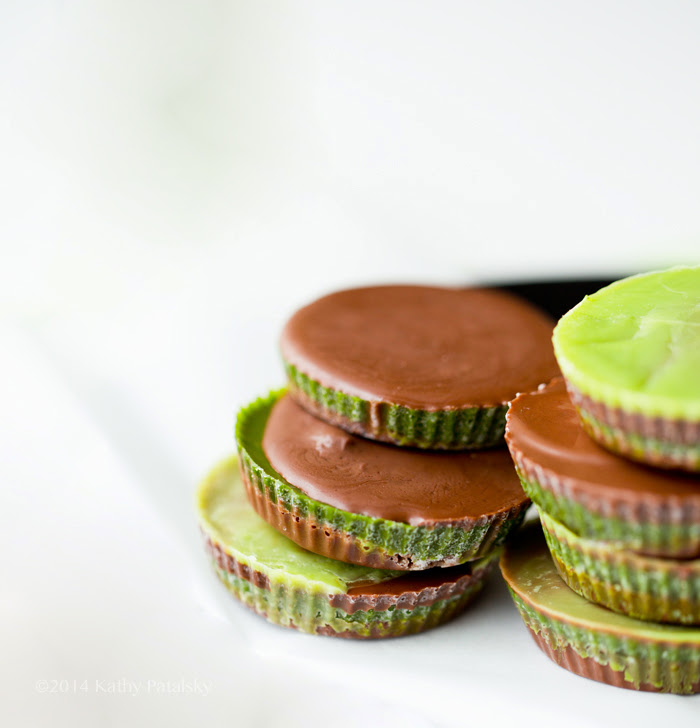
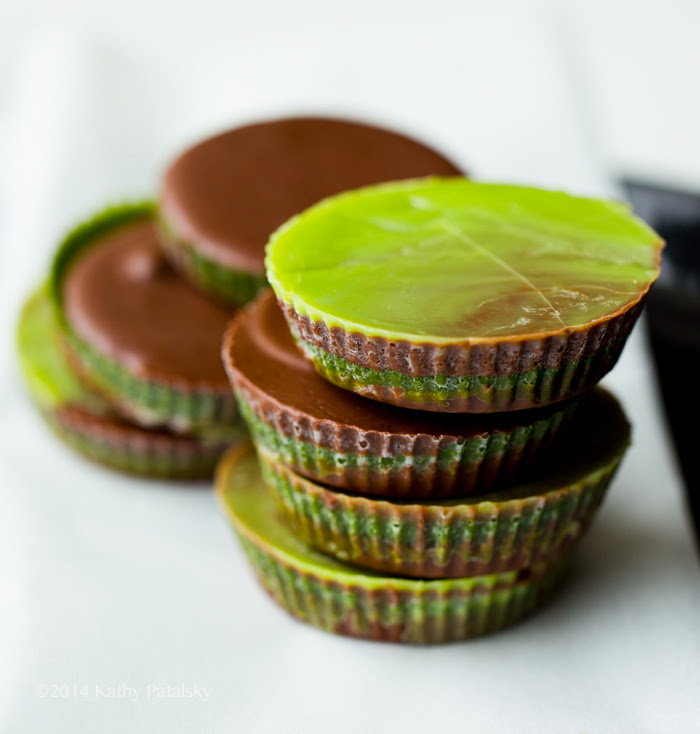
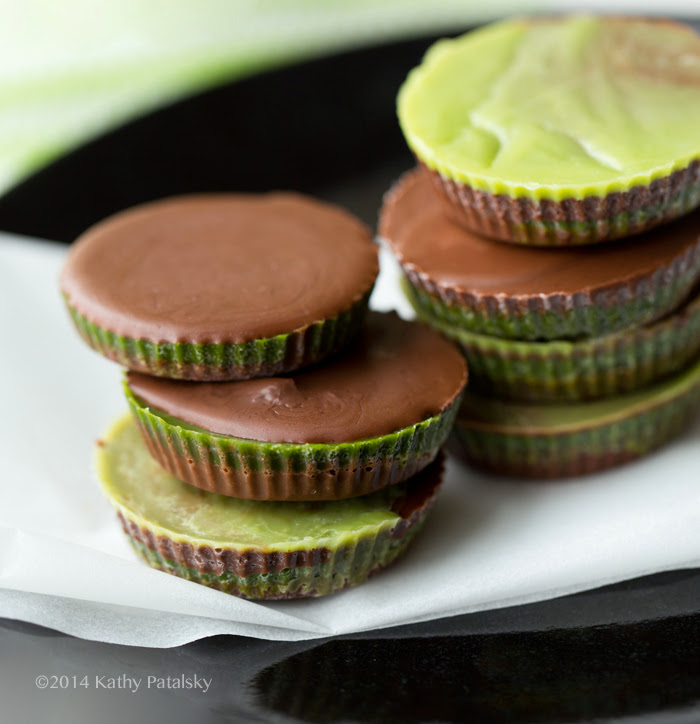
* Mint-Matcha Cups
* Matcha Granola
* Matcha Ginger Waffles

Minty Chia Pudding! This healthy dessert recipe has St.Patrick's Day written all over it! In shades of spring green. And deep mint chocolate too. These simple and cheerful dessert cups are easy to make and rich in healthy fats, protein and charm. Share the yum and a little luck by making these cups for you and a friend!

You can easily adjust the thickness of your chia seed pudding by adding more or less little seeds - or adjust the chilling time. The longer they soak/chill, the plumper they will get!

And some fun.. My fave instagrams from the past week:

I look at this photo at least once a day because it ALWAYS makes me giggle. Oh Mr.White cat..

And this news about FindingVegan.com just makes me giddy..

And this weekend I head out to my first Pure Barre fitness class with a friend! All part of my "more-exercise-this-spring" resolution. Any Barre fans out there? I'll let you know how it goes!

Happy soon-to-be-spring!..

Mint-Matcha Chia Pudding with Dark Chocolate Drizzle
vegan, 2 servings

1 ¼ cups non-dairy milk (room temperature)
1 teaspoon extra virgin coconut oil, melted
½ - 1 teaspoon matcha green tea
4 tablespoon chia seeds
⅛ teaspoon peppermint extract
1 tablespoon agave or maple syrup
pinch of pink salt

Chocolate drizzle:
2 tablespoon vegan chocolate chips
1 teaspoon extra-virgin coconut oil

topping, optional:
1 teaspoon raw pumpkin seeds or pistachio nuts, finely chopped

Make it RAW! You can make this a raw dessert by using raw homemade almond milk, raw agave syrup as the sweetener and making a chocolate drizzle out of coconut oil and cacao powder. The peppermint flavor? You can easily use fresh mint leaves too! Simply blend a few sprigs into the matcha almond milk before adding the chia.

Directions:

1. Add the non-dairy milk and matcha to a blender, blend until the matcha has dissolved. Tip: Use a softer to sift out any clumps in the matcha.
2. With the blender on its lowest setting, pour in the melted coconut oil, chia seeds, sweetener, peppermint and pinch of salt. Allow the mixture to blend for a minute.
3. Pour chia mixture into two serving glasses or one large container. Place in the fridge and stir the mixture ever 15 minutes for the first hour to disperse the chia seeds.
4. Chill for at least four hours. Overnight is best. The longer you chill, the thicker the pudding will get. I find my ideal time is overnight - at least 8 hours for silkiest and plumpest chia seeds. Note: I will admit that I did not let the photographed pudding soak long enough (for my tastes) I did only about 4 hours. So the seeds were plump but not as plump as they could possibly be. As you become a chia seed pudding expert, you will discover your sweet spot for soaking time!
5. When ready to serve, you will prep your chocolate drizzle by melting it with the coconut oil. Drizzle the melted chocolate over top the chilled pudding, the chocolate should firm up a tiny bit upon hitting the chilled surface. For fully hardened chocolate, place pudding cups back in the fridge for a few minutes.
6. Crush seeds or nuts and crumble over top. Serve!

Peanut Butter Caramel Bars

March 12, 2014 by Kathy Patalsky 40 Comments

p1-2014_03_09_caramel-bars_9999_140caramel-bars.jpg


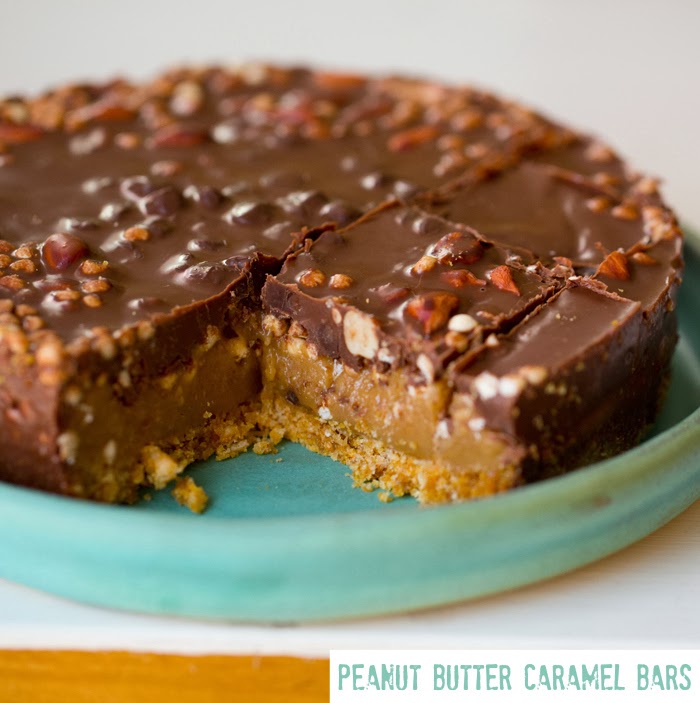
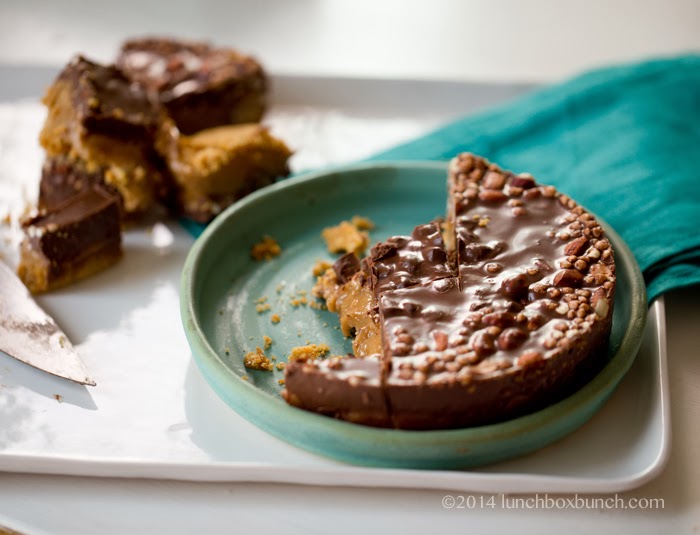
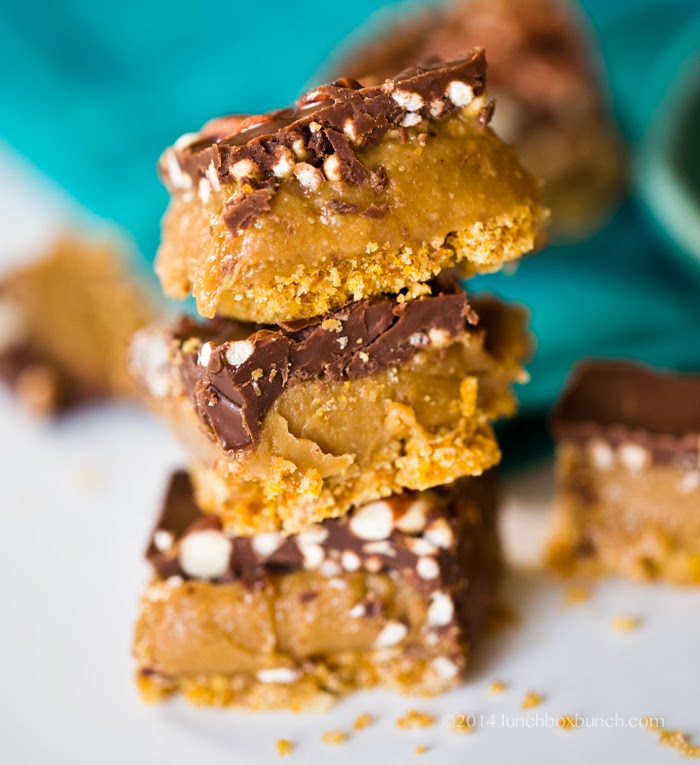
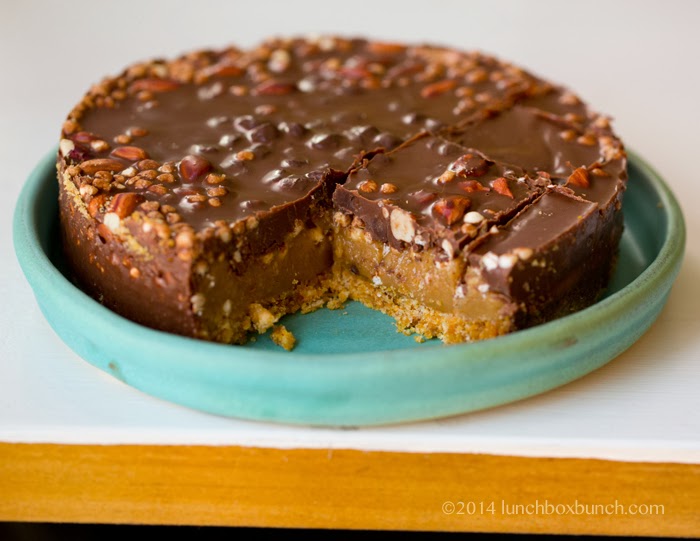
I call these lovelies my Golden Crunch Peanut Butter Caramel & Chocolate Bars. Or just Peanut Butter Caramel Bars for short. Since the peanut butter caramel filling is really the star of the recipe show here. These squares are perfect for a nibble-style treat. A little nibble goes a long way. Simply cut out a cube, straight from the fridge or freezer, and peanut butter-chocolate crunch bliss is yours..

I call this a nibbler's dessert. You can store these sweet squares in the freezer (or fridge) and grab a nibble whenever you crave a sweet treat. I love nibbling a square of these bars after dinner in place of a big or fancy dessert, or as an energizing afternoon sweet treat.

The creamy coconut oil-infused dark chocolate gently hugs the velvet-y, chewy peanut butter caramel as a thick crunch of crushed cereal flakes lines the bottom edge. This is a no-bake dessert that is gluten-free and rich in healthy fats from the extra virgin coconut oil and nut butter.

You can use any size dish to make these bars. Square or circular. Just make sure that the bars are layered thickly enough. I like at least a ⅓ inch for the top and bottom layers and at least ¾ inch for the nut butter middle.

If you just want to make a small amount, use a small dish. For a large crowd, you can make a giant casserole dish filled with these bars. The recipe below filled a 4" mini round cake pan, generously. Since I just know we will all be using different sized pans and dishes here, you can guesstimate how much of each layer you want. Simply double, halve, triple (or more!) of my recipe below. This recipe is very forgiving in measurements!

Start with the crunchy crust, add as much as you'd like, then add the peanut butter filling. You can always make more filling if you want a thicker layer.

For the caramel, you can make as much or as little as you need, follow this basic ratio recipe..
1 part extra virgin coconut oil
1-2 parts agave syrup
4 parts nut butter

Golden Crunch Peanut Butter Caramel & Chocolate Bars
vegan, no-bake, makes about 20 small cubes

corn crust layer:
1 cup crushed corn flakes (lightly sweetened)**
1 tablespoon agave syrup
1 teaspoon melted coconut oil
**You could also use other 'flaked' cereals like ancient grains or spelt.. I used Kashi's 'Simply Maize' cornflakes because they are nice and crunchy, lightly sweetened

chocolate layer:
1 cup vegan chocolate chips (semi-sweet chips)
1 tablespoon coconut oil

Peanut Butter Caramel Layer:
1 cup peanut butter, softened (or almond butter)
¼ cup coconut oil
⅓ cup agave syrup

In-between:
crunchy cereal, puffed cereal or nuts
I used ¼ cup puffed millet cereal and 1 teaspoon peanuts

Directions:

1. Blend the cereal in a blender until finely processed. Pour cereal crumbs into a bowl. Toss the crumbs with the melted oil and sweetener. They should get thick and sticky now.
2. Grease your dish or pan with coconut oil. Pour the crushed flakes into the dish and press down until a thick layer forms. If the crumbs are not sticking and patting down, add another drizzle of sweetener or oil to help wet them so they can easily be pressed down.
3. Add the pb caramel ingredients to a small bowl and microwave until warmed. Stir briskly until a thin and silky mixture forms. Heat again if there are still clumps. Under a minute should fully melt the caramel ingredients.
4. Pour the caramel over top the flaked crust, you want about ¾ inch thick layer. Place this dish in the freezer until firm.
5. Melt the chocolate ingredients in a small bowl. Pull the firmed caramel-layered dish from the freezer and slowly pour the chocolate layer over top, about ⅓ inch layer. Sprinkle the "in-between" ingredients over top and press them into the chocolate. They should sink a bit.
6. Place the container back i the freezer until all the layers have fully firmed up - about 30 minutes should do it for a small dish like mine.
7. Warm the dish by placing it in a hot water bath, loosen the edges with a butter knife, them place a plate over top the dish, flip it and allow the entire dessert to fall onto a plate for slicing. You could also slice though the bars still in the dish if you have trouble removing the entire thing at once. Note: As the bars warm they soften. You want to serve your bars still chilled, but slightly warmed so the chocolate is soft to bite and the caramel nice and creamy to chewy. Store leftovers in the freezer or fridge, covered.

Marly McMillen VGP Interview!

March 11, 2014 by Kathy Patalsky 4 Comments

vgp-2013NamelyMarly2520Bio2520Photo.jpg

To close out my latest collection of amazing vegan ladies via my Veggie Girl Power Interview Series, I chat with the amazingly talented Marly McMillen, of the blog Namely Marly. Marly has so many insights and tips to share!..

Vegan Breakfast Casserole - photo and recipe by Marly

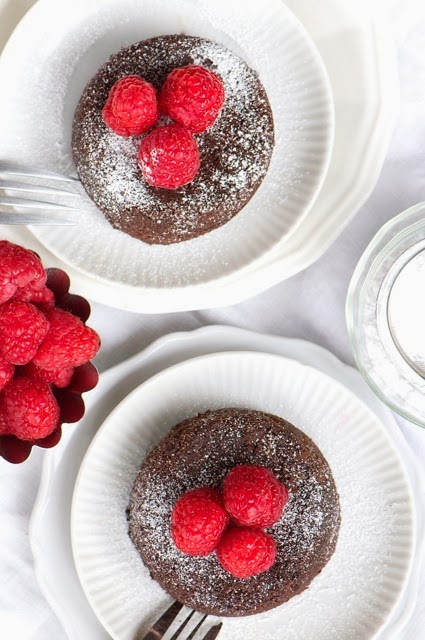
GF Molten Chocolate Cakes with berries - photo and recipe by Marly

I "met" Marly online a few years ago, her beautiful food photography and utterly delicious and creative recipes caught my eye! I was thrilled to chat with her when she featured me in an interview, she calls them "name interviews" and they are SO fun and fascinating. It really makes you think about your relationship with your own name and how it may have shaped your personality, life or even the way others first see you. Her name interviews are certainly worth browsing along with her yummy vegan recipes.

I am so happy to feature here in today's post.

Veggie Girl Power Interview: Marly McMillen, NamelyMarly.com

Q1: Back to Basics. When and why did you go vegan? We love a good "this is why I went vegan" story.

Marly: I was vegetarian for several years before I even considered or understood the concept of veganism. It’s really so easy to be vegetarian nowadays, but I live in the heart of beef country so I still felt like an outlier. Then one day I read John Robbins’ book, Diet for a New America, where I learned about factory farming and the impact of animal-based products on our bodies and our environment. That planted a seed of thought; I knew then that I wanted to become vegan, but it seemed impossible.

So I decided to take little steps, beginning by giving up eggs. That was relatively easy since, if you really think about it, eating eggs is kind of disgusting. Eggs are the by-products of a bird’s reproductive system. Gross! Within a year I was down to two last strong-holds, mozzarella cheese (read…pizza!) and milk chocolate. But I was committed to making progress so I joined a local vegetarian meet-up group to meet other vegans. Right about that time they introduced us to a local restaurant that made vegan pizza. That’s what I was looking for and I took the plunge and went whole-hog (pardon the reverse pun) vegan. Soon after that I met the man who is now my husband. He had been vegan for at least a couple of years at that point. Can you believe it? Meeting a vegan in KC? My vegan diet felt like more than a new way of eating…it was a leap to a new life!

Q2: Help a Girl Out. The vegan transition can be tough for some! What sisterly advice can you give to new or transitioning vegans?

Marly: My advice is to be easy on yourself. Because I have a blog where I offer a lot of vegan recipes, I get questions from people and sometimes they express a lot of guilt over not staying strictly vegan 24/7. Here’s what I say - don’t live your life in some box living by restrictive rules. I do the best I can every day. Some days are not so good, but other days are great and those are the ones I focus on and strive for. Everything is about balance. Overall, you know you’re making decisions that are so much better for your body, animals, and the environment. It’s all good. With time your taste buds will catch up with you and you won’t even crave mozzarella cheese anymore. I promise.

Q3: Traveling Vegans. In your neck of the woods, what are the local vegan hot spots to visit/shop at/dine at? Traveling vegans want to know!

Marly: The NY Times published an article last year about how difficult it is to be vegetarian or vegan in Kansas City, which the author referred to as the “Mecca of Meat.” I think that article was wacko! Yes, Kansas City is known for its meat and BBQ, but the idea that it’s unfriendly to vegetarians is not the case. We have vegan restaurants, vegetarian restaurants, and plenty of health-food focused markets. We have farmers’ markets, international cuisine, and even a local pizza chain that serves vegan and gluten-free pizza. I don’t know what else a person could want for! So come to Kansas City, and when you do, be sure to try out some of my favorite joints. Tell them Marly sent you!

Marly’s favorite KC veggy restaurants:

* Füd, a plant-based vegan restaurant that features lots of good super foods and raw living cuisine. Their cashew soft-serve ice cream is the bomb!
* Blue Bird Bistro, Organic cuisine that highlights vegetarian, gluten-free-friendly and vegan friendly options. They have a veggie burger that always makes me smile!
* Eden Alley Vegetarian Café is one of my favorite places to eat with such a variety of vegetarian and vegan options and a dessert tray that will knock your socks off.
* Café Gratitude, Kansas City – This is a new favorite vegan eatery in Kansas City. It’s a sign that vegan eating is a great investment in the heart of the midwest.
* There are several other eateries that are not exclusively vegetarian or vegan, but are very accommodating. Like Waldo Pizza (for vegan and/or gluten-free pizza) and Blue Koi for some of the best tofu dishes around. Waldo Pizza and BlueKoi

When traveling, my favorite resource is Happy Cow. I go there to find great veg-friendly restaurants. I love testing out new places when I travel. My husband’s parents live in Phoenix part of the year so I have the great fortune of regularly going to Green in Tempe. Green is the home of vegan comfort food and if you haven’t been there yet, I highly recommend it! Their soft serve creamy desserts make it a meal to die for! HappyCow Green Vegetarian

Q4: On Food. What is a typical day of vegan eating for you? Fave eats?

Marly: I love to cook, but I typically save most of my big meal preparations for the weekend. So I’ll make a batch of cheesy tofu scramble on the weekend and have a little of that over toast for breakfast each morning.

My lunch usually involves something like a black bean burger with a great big salad on the side. I love salads. And I’m fanatical about fresh so I make a super quick salad dressing with vegan mayo, vinegar, agave nectar and whatever spice I’m in the mood for (like garlic and basil).

Dinner may include something like fried rice or my hubby’s famous “Shawnchilatas” – a mixture of black beans, rice, potatoes and corn that we serve burrito style or over a dark green leafy salad.

And what’s a day without a little dessert? For me that could be freshly popped popcorn mixed with dark chocolate chips (dark chocolate has now reigned supreme on my taste buds!). Or it might be a slice of vegan chocolate cake (again, something I typically make over the weekend and we eat throughout the week).

I have many pantry staples. Some of my favorites are ground flax seeds, nutritional yeast flakes, smoke sauce, turmeric, sage, sea salt, Sriracha and chickpeas. I have a thing for chickpeas, what can I say?

Q5: Words of Wisdom. Here is your chance to create your own quote. "Veganism is....."

Marly: Veganism is…a chance to redefine your life for yourself. Think about it. How many decisions do we make in a typical day that really are ideas or concepts we’ve adopted from others around us. This is true for the names we go by, the language we speak, all the way to the food we eat. Not all of that is bad, of course, but when life presents an opportunity to redefine things for yourself, it is a gift that should not be overlooked.

People in other countries think it’s ok to eat dogs or cats; something most of us in the U.S. would definitely frown upon. How much of your food choices are conditioned based on culture? How much do we know about how our food is produced? Taking the time to reflect on my choices led me down a path to become vegan. It’s a decision I’ve never regretted; not even when I’m passing by foods I used to love, like pizza!

Q6: On What is Hot. Share people, brands, books and more that you like to rave about.

Marly: Well, I would be remiss not to say that I love Lunch Box Bunch and Finding Vegan. Those are two wonderful resources for anyone venturing into vegan eating, whether part- or full-time. I also highly recommend Kathy Freston's books for anyone who is thinking about veganism but who is not entirely certain. If you would like to see the evidence-side of veganism, then John Robbins’ book Diet for a New America is a great read.

Jane Goodall’s books Reason for Hope and Harvest for Hope are well-written, thoughtful books about the environment, respecting animals, and how our life choices impact that. They have both been a great source of inspiration in my life.

Q7: Soapbox! Go for it ...Soapbox away...

Marly: You’re so right. This reminds me of a line from the Indigo Girls song, “Mystery” where they sing, “There must be a thousand things you would die for, I can hardly think of two.” I’m in the thousand-things category. But if you asked me to pick just one, it would be finding a way to be healthy as part of a real life. To me that means, finding new ways to add healthy options to my every-day life. Sometimes that might mean adding chickpeas to my latest cake so it has some healthy fiber or playing tennis with my hubby in the evening to have fun while working out. It doesn’t mean living on a pristine island of health, although that does sound nice.

It’s just that for me, that’s not possible. I can’t afford to pay $300 a day on “pristine” diet food or go to expensive spas on a regular basis. This is why my tag line is “where health meats life,” because I strive to find and share with my readers ways to take steps – big or small – to be healthy every day. And if you can make today a little healthier than yesterday, hurrah!

Q8: What upcoming projects are you working on? Please share!

Marly: This year I partnered with Arrowhead Mills to create gluten-free recipes. I was thrilled to be a part of that project because I really respect their brand. I’m also expanding my blog to include more green-living tips and healthy living posts, in addition to vegan recipes and interviews with people of interest. I’m also working on an e-book called 101 Things to Do with Chickpeas based on a series I’ve had going on my blog. I consider my life a continuous path of self-improvement and learning so I’m also inspired to expand my cooking and photography skills and to participate in some vegan cooking videos this year as well.

Q9. Smoothie love! I would love to hear about YOUR favorite smoothie recipe..

Marly: I love smoothies in just about any variety they come in. I’ve recently discovered Vega protein powder packets, which means my go-to smoothie right now combines a little sweet and a little healthy with the staying power of protein. Check out my Vegan Banana Protein Shake.

Q10. Do you think veganism is the diet of the future? Why?

Marly: It used to be I had to explain veganism to people as they looked at me like I might be trying to explain how to grow crops on Mars. But things are starting to change. You can hardly go anywhere lately without hearing something about veganism. So, yes, definitely veganism is the diet of the future – both for the health of the people, animals and the environment. It’s a movement I’m proud to be a part of!

Follow Marly!..
NamelyMarly blog
On Twitter
On Facebook

Be sure to read all this year's VGP interviews coming up. VGP 2013-14

VGP kickoff: Cookbook Interview Chloe Coscarelli
Simone Reyes, of Running Russell Simmons / Animal Advocate
Doron Petersan, of Sticky Fingers Bakery
Angela Liddon, of Oh She Glows website
Elizabeth Castoria, Editorial Director VegNews Magazine
Katie Higgins, of Chocolate Covered Katie
Laura Beck, of Vegansaurus and more / writer
Emily Von Euw, of This Rawsome Life website
Marly McMillen, of Namely Marly website
Sara Sohn, of Sweet & Sara Vegan Marshmallows

*all photos were provided courtesy of Namely Marly

Lucky Charmless Vanilla-Green Tea Latte Granola

March 10, 2014 by Kathy Patalsky 35 Comments

p7-2014_03_07_matcha-cereal_9999_102matcha-granola_edited-1.jpg


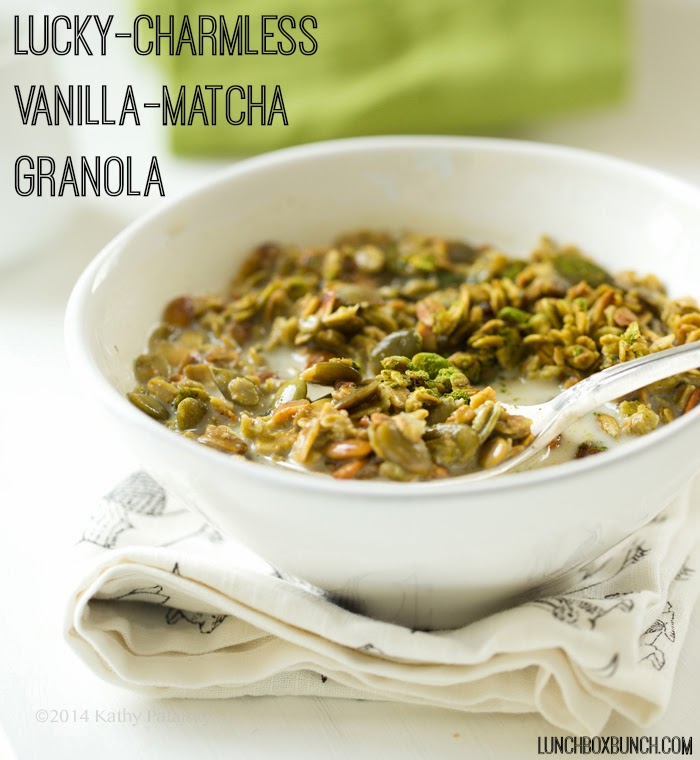
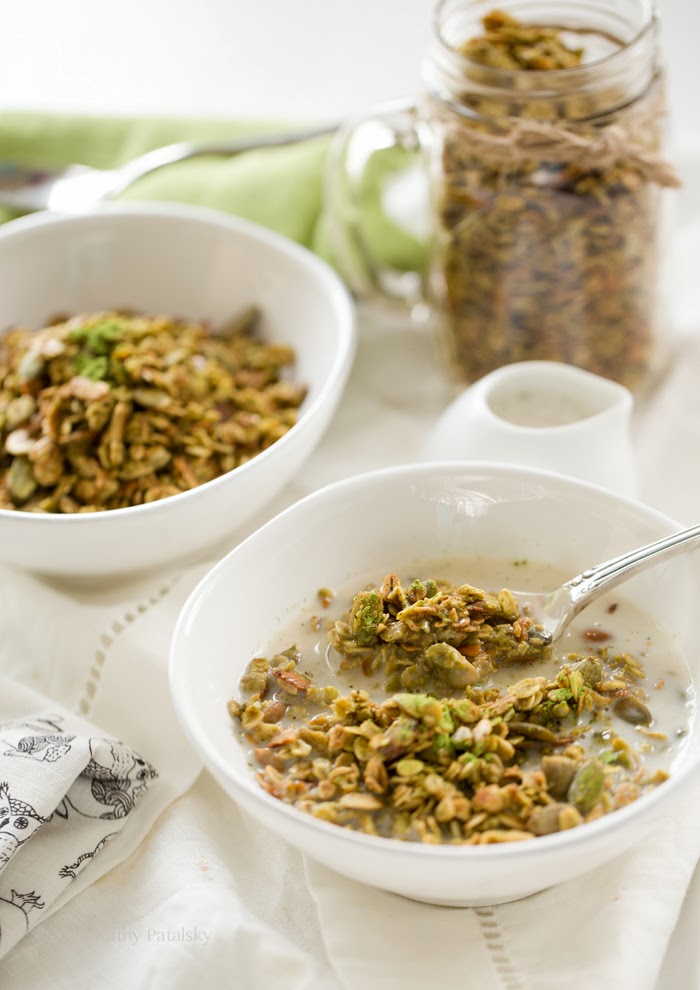
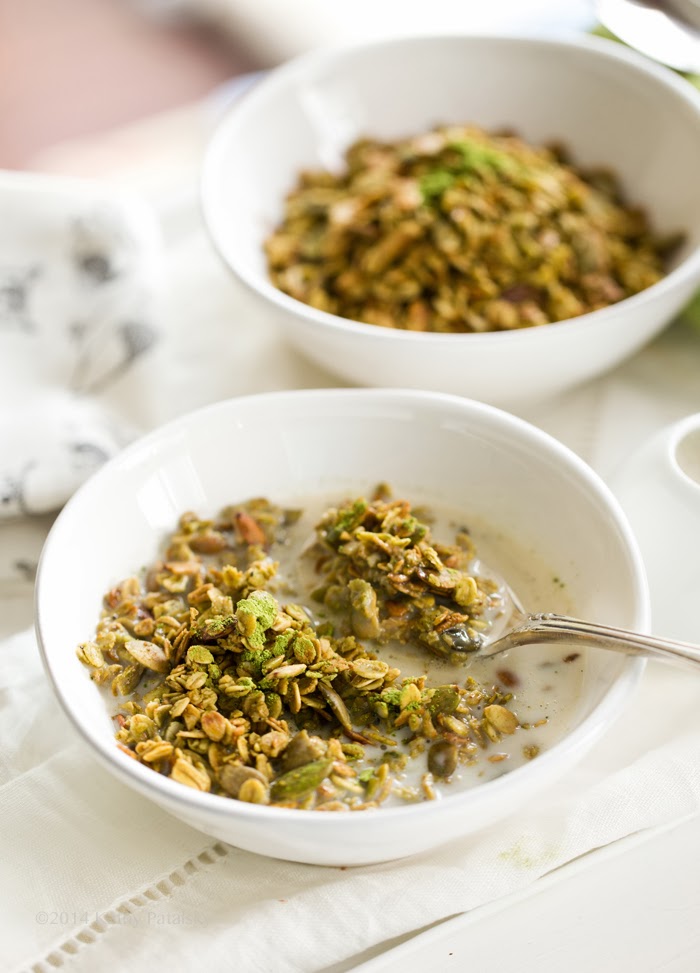
Granola isn't usually too surprising in flavor and texture. Some spice, lotsa crunch, plenty of nuttiness and richness from the baking (or dehydrating) process. But this granola feels different to me and I get excited just writing about it. This crunchy granola is so easy to make and carries a unique flavor profile from earthy-sweet matcha green tea, vanilla and nutty, buttery pumpkin seeds. And to me, these flavors actually taste very familiar. Like a cereal from my childhood even. And yes, there is a whole story behind why I say that. Check out my Lucky Charmless Vanilla-Green Tea Latte Granola! Perfect for springtime crunching in the morning!..

So you will think I am nuts at first glance. But I am telling you, this is my vegan version of Lucky Charms cereal. Ya, I know. There are no rainbow colors. No fluffy marshmallows. Not charms at all even. But close your eyes, take one bite and see what I mean. (Well, imagine much much less sugar too..) Here is how I came to this recipe and cereal revelation..

Backstory. Every time I order a matcha latte from Starbucks or Urth Caffe or Peets they usually use vanilla flavored soymilk, or sometimes I add vanilla syrup. But every time I sip my matcha-with-a-hint-of-vanilla latte I have the weird flavor memory of Lucky Charms cereal milk. Slightly nutty, but mostly sweet and creamy. It is odd, really, but the next time you sip your sweetened matcha latte at least consider this taste connection. I am curious, is it just me?? 🙂

Anyways, so this lead me to think that vanilla-sweetened matcha, all creamy and lovely, resembles Lucky Charms. So, I decided to make it into a cereal. But instead of processed grains and such I just went all whole foods on it and did granola.

Best part: This recipe is SO simple. Oh and totally healthy since it contains whole grain rolled oats and whole, raw pumpkin seeds - rich in a plethora of minerals like magnesium and healthy fats too.

This bowl, I totally love it. I let it sit and soak at least ten minutes before eating so it has a soft-meets-crunchy texture.

It is my very healthy version of kids cereal 🙂

And the green color is perfect for spring eating! Wake up to matcha in your bowl!..

Lucky Charmless Vanilla-Green Tea Latte Granola
5 servings, about 4 cups

2 ½ cups rolled oats
1 ½ cups raw, unsalted pumpkin seeds (whole and some chopped)
¼ - ⅓ cup agave syrup (sweeten to taste if desired)
¾ - 1 teaspoon matcha green tea
1 ½ - 2 tablespoon melted extra virgin coconut oil
½ teaspoon vanilla bean powder (or use a vanilla bean pod or real vanilla extract)
*I bought my Vanilla Bean Powder from OneLuckyDuck.com
a few pinches of cinnamon
¼ teaspoon pink salt

Directions:

1. Preheat oven to 375 degrees.
2. Add all ingredients to a large mixing bowl and toss very well.
3. Spread the tossed granola on a parchment paper-lined baking sheet - a rimmed baking sheet is easiest for tossing granola.
4. Bake granola for 25-35 minutes, tossing it every ten minutes. (Or bake until toasted and lightly browned.) The granola will firm up a bit as it cools because of the coconut oil.
5. Allow the granola to cool at least 15 minutes before serving or transferring to storage jars or baggies.
Serve as cold cereal, over top smoothies, parfaits and more! You could even soak overnight for overnight oats.

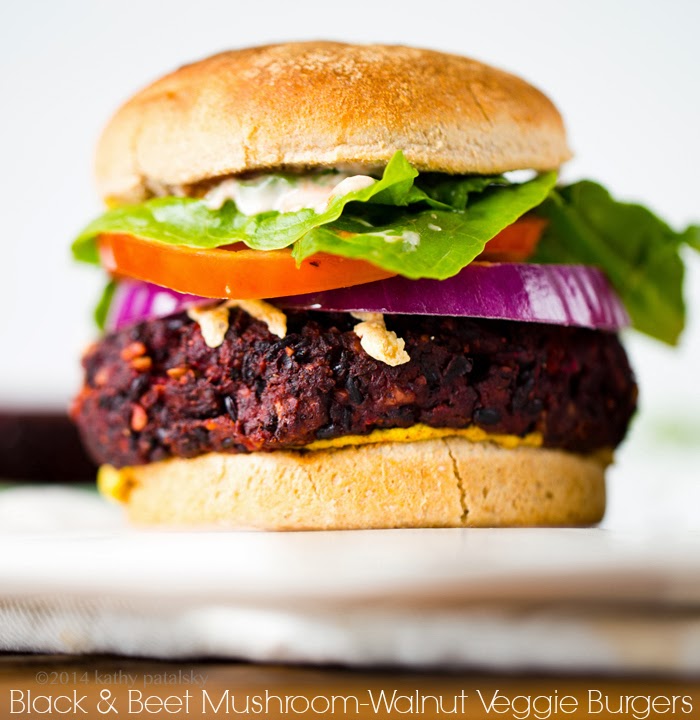
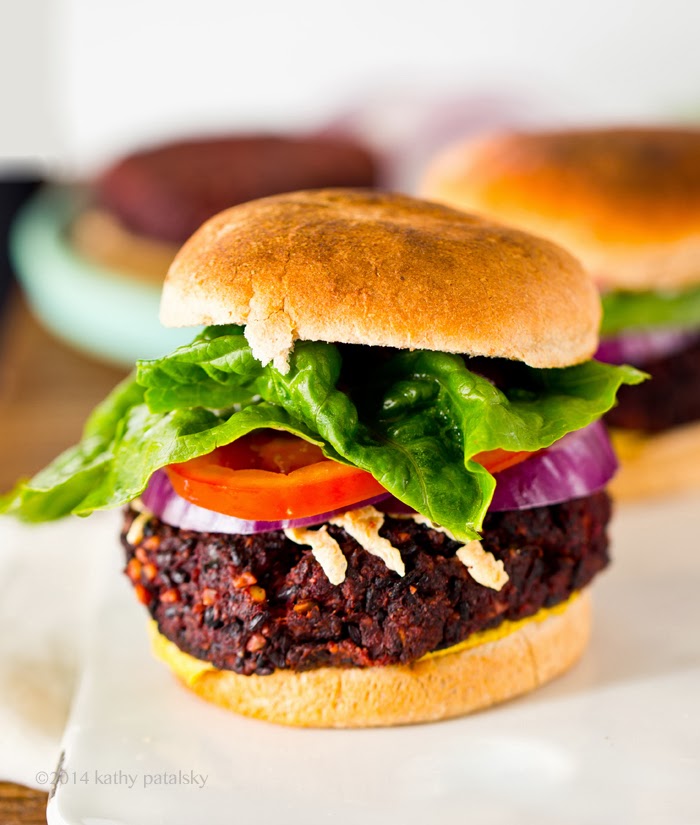
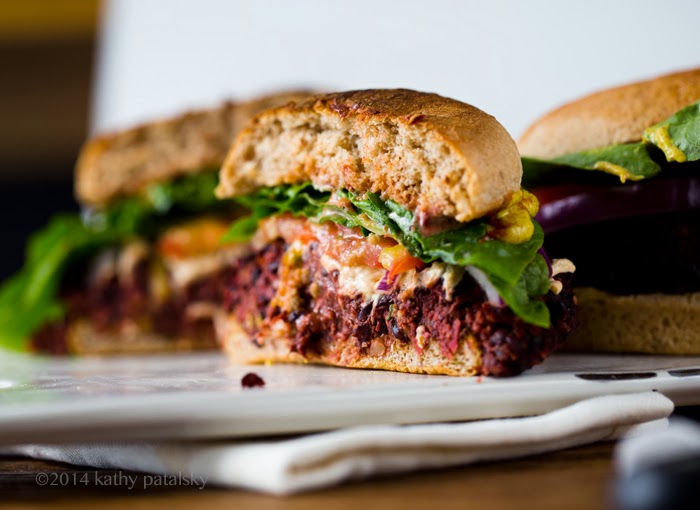
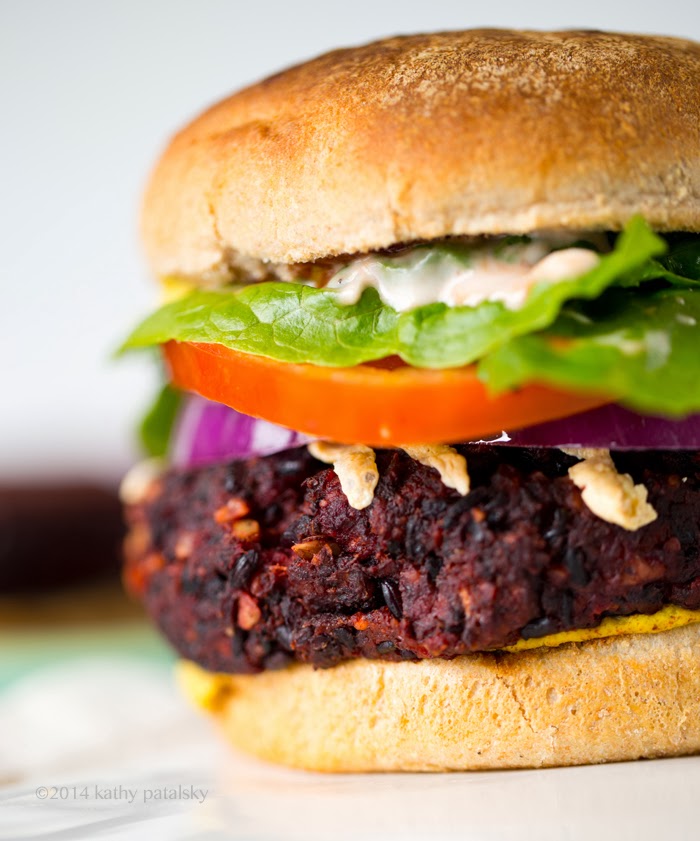
Black & Beet Mushroom-Walnut Veggie Burgers

March 6, 2014 by Kathy Patalsky 54 Comments

p72014_03_05_beet-burger_9999_105beet-burger.jpg


This oversized, thick and bold veggie burger is perfect for anyone who craves a burger bash! Bring on the burger toppings, my Black & Beet Mushroom-Walnut Veggie Burgers recipe ahead..

before baking..

pink plump patties..

Baked into this..

And this..

Burger bash is on..

Last week I went to an awesome baby shower. It was a rainy, stormy, cloud-covered, grey day. The type of day where all you really want to do is curl up under a blankie and sip hot cocoa while watching old movies. But also the type of day that makes going out, venturing into the mess of bad weather a sort of challenge, making the destination somewhat magical once you get there. And it was. Being inside a warm and cheerful home filled with loads of friendly faces was perfection. Now this wasn't your typical, throw all the guys out so all the girls can get high on estrogen and gush at the sight of tiny pink baby clothes and the sweet mommy bump. Sure that all kinda happened anyways, but the guys (and puppy dogs) balanced things out quite nicely. See, this was a "beer & burgers" BBQ style baby shower. Totally guy approved. However, not vegan approved. Which was totally fine by me, I was perfectly happy sipping mugs of almond-milk infused hot lemon-Zen tea and nibbling veggie sticks, hummus and crackers. But the burgers were everywhere and everyone had a burger-filled plate. It was hard to ignore the sight of them, really. So I had to stare a bit and ponder one thing..

HOW COULD I MAKE THESE EXACT PLUMP, BLACK-N-PINK, JUICY BURGERS IN A VEGAN VERSION?

You know me. Always secretly veganizing. I see a food that people WANT and I want to stand up and shout, oh my goodness I could TOTALLY veganize that for you if you give me a shot! But obviously I'm not THAT kind of girl at a baby shower. So I quietly ignored the featured entree and prepared to veganize for my next veggie burger feast.

I noticed that the burgers had black spots from the charcoal BBQ-ing, they were textured and bumpy and the tones ranged from black to purple to brown and pink and red. OK, ok sorry hard core vegans, I do not mean to get so meat-detailed but this is important!

Why?

Well if VEGAN burgers could easily sit next to non-vegan burgers and not only rival them in flavor (easy) but truly rival them in appearance, well that is a great thing! So this BBQ inspired me to create a veggie burger that was not only delish, but also looked a bit like those non-vegan burgers.

I call this creation "The Contender" aka my Black & Beet Mushroom-Walnut Veggie Burgers. These plant-based babes could easily be placed in the ring with any beef-y burger.

These burgers contain a few black ingredients to give the burger appearance some depth. Black rice and black beans. I find that pink beet burgers do not usually have the tone and color contrast to look like a classic non-vegan burger, so the black helps there.

Oh, and I know some vegans hate it when bloggers try and create VEGAN recipes that LOOK LIKE MEAT. And I am normally not a big fan of that idea either. BUT the whole point of this is that I wanted to create something that I could actually set on a party table right next to the meat option and maybe someone would be so interested by the similarities of the two, they just might give the vegan version a try. And the best part about this burger is that it is made using WHOLE foods. No processed soy or TVP. Just whole, good, healthy ingredients like beans, walnuts, rice, seeds, spices. So dive in or serve up a platter of these burgers at your next burger bash.

Black & Beet Mushroom-Walnut Veggie Burgers
vegan, makes 3-4 fat & large burgers (or 4-6 smaller burgers)

1 ¼ cups canned black beans, drained, rinsed & mashed
1 cup cooked black rice, (½ cup uncooked)
¼ cup raw beets, grated on a microplane
1 ¼ cups fresh shiitake mushrooms. processed until crumbly, thick stems removed
½ - ¾ cup walnuts, processed until fine and crumbly
1 teaspoon smoky spanish paprika
1 tablespoon spicy brown mustard
½ teaspoon apple cider vinegar
½ teaspoon salt
a few pinches of pepper
flax liquid: 1 ½ tablespoon veggie broth + 1 ½ teaspoon ground flax seeds

Directions:

1. Preheat oven to 375 degrees. Line a baking sheet with parchment paper or grease the pan. I use coconut oil.
2. You can do this step beforehand for easiest prep: cook black rice. I use about ½ cup of rice and 1 cup of water or veggie broth. Add a pinch of salt if using water. Cover with lid and bring to a boil, then reduce heat to a simmer for about 25-35 minutes or until rice is tender. Check on the rice about 20 minutes into cooking and add another splash of water if you the rice looks a bit too dry.
3. In a large mixing bowl, add the rinsed beans. Mash them well with a fork.
4. In a blender or food processor, process the walnuts until they are crumbly and powdery. Add them to the mixing bowl.
5. Process the shiitake mushrooms the same way you did the walnuts, only the mushrooms with just be very crumbly, not powdery. Add them to the mixing bowl.
6. Add the cooked rice, beets, spices and all other ingredients for the veggie burgers to the mixing bowl. Start mashing with a fork and fold for about 5 minutes. You really want a very mashed and thick consistency.
7. You should be able to directly handle the mixture and form into patties. If the mixture is too wet you can either fold in a bit more walnuts, a spoonful of oat flour or you can place the mixture in the fridge to chill up a bit. If the mixture is too thick for your tastes, you can add in a tiny splash of veggie broth, until it thins out a bit.
8. Form patties and place on the baking sheet.
9. Spray or brush the tops of the patties with coconut oil or EVOO. (optional - adds a nice crispness to the tops.)
10. Bake patties at 375 for 25 minutes. Cool a bit before transferring to buns. Serve with any burger toppings you'd like!

Cookbook Review: The Oh She Glows Cookbook + recipe, giveaway

March 5, 2014 by Kathy Patalsky 149 Comments

oh-she-glows-cookbook-Collage.jpg


I am thrilled to be reviewing Angela Liddon's first cookbook, The Oh She Glows Cookbook. A book based on her amazing blog Oh She Glows. Check out my review and try a recipe from the book and a book giveaway!..


photo credit: Angela Liddon


photo credit: Angela Liddon

Review: The Oh She Glows Cookbook: Over 100 Vegan Recipes to Glow from the Inside Out

When I first opened my package containing an advanced copy of Angela's book I was greeted with a photo of humble rainbow carrots striped across the cover. And then when I opened the book my jaw literally dropped as I was paralyzed in excitement for the beautiful (gorgeous!) photos gazing back at me as I flipped quickly through the pages.

At first glance, the book is stunning. The polished photos could easily rival Martha Stewart - and so could the recipes! This is not just an amazing vegan cookbook, it is an amazing cookbook, period! I think anyone who holds this book in their hands will see that.


photo credit: Angela Liddon, The Oh She Glows Cookbook - recipe page 141, cream of tomato soup with roasted italian chickpea croutons

At deeper glance, here are my fave features about the book:

* The photos. Seriously GORGEOUS.
* I love how each new chapter lists all the recipes in that chapter in list format for easy browsing.
* I love the "homemade staples" chapter which contains every vegan's fave go-to recipes like cashew cream, homemade flours and almond milk.
* I love the recipes! They echo the creativity, beauty and deliciousness found on Angela's blog.
* It has a few amazing smoothie recipes 🙂 you know me... I made one this morning!..

Basically, if you are in the market for a new vegan cookbook and happen to pass this book in the store, GRAB IT. I can not gush enough about how great this book is. Profound words escape me because all I want to do it turn away from my computer and keep flipping through the pages discovering new nooks and crannies of the vegan yumminess and inspiration that can be found.

Angela, congratulations on such a beautiful masterpiece. I am so excited for the world to see your book. I know your recipes will inspire an even wider audience now and help more and more people make the switch to vegan - or simply add more vegan recipes to their diets. Smoothie glass cheers to you and the brilliant Oh She Glows Cookbook!

Enough gushing now, yes?

Lets share a recipe from the book!


photo credit: Angela Liddon, The Oh She Glows Cookbook

When flipping through the pages, this yummy salad recipe caught my eye and I am thrilled to be able to share it with you.

Walnut, Avocado & Pear Salad with Marinated Portobello Caps & Red Onion
pg. 103, The Oh She Glows Cookbook - re-printing permission courtesy of Angela Liddon

2 large portobello mushrooms
½ red onion, thinly sliced
1 recipe Effortless Anytime Balsamic Vinaigrette (Angela's recipe below)
1 5oz. box mixed greens
2 ripe pears, peeled, cored, chopped
1 avpcao, pitted and chopped
⅓ cup walnuts, toasted

Intro from Angela: This salad was inspired by a dish at a local restaurant where my girlfriends and I meet for lunch once a month. With buttery pear slices, grilled marinated red onion, portobello mushrooms, toasted walnuts, and creamy avocado, it's a delicious mix of my favorite flavors and textures, and it's filling, too. Each portobello mushroom packs in around 6 to 8 grams protein, so add one or two and you have yourself a protein-packed salad that will go the distance.

serves 2 prep time: 15 to 20 minutes, cook time 8 to 10 minutes
gluten free, soy free, refined sugar free, grain free

1. Gently rub the outside of the mushrooms and remove and debris. Remove the stems by twisting the stem until the top pops off; discard it or freeze it for another use, such as stirfry. With a small spoon, scrape out and discard the black gills.
2. In a large bowl, combine the mushroom caps, onion, and half of the balsamic vinaigrette and toss until fluffy coated. Marinate the mushrooms and onion for 20 to 30 minutes, tossing every 5 to 10 minutes.
3. Heat a grill pan over medium high heat. Place the mushroom caps and onion on the pan and grill for 3 to 5 minutes per side, until grill marks appear and the vegetables are tender. Reduce the heat if necessary. Remove the pan from the heat and set aside until the mushroom caps are cool enough to handle, then slice the mushroom caps in long strips.
4. For each salad, place a few handfuls of mixed greens in a large bowl and top with half of the chopped pear, avocado, walnuts, and grilled mushrooms and onion. Drizzle the salad with some of the remaining balsamic vinaigrette and enjoy!

Effortless Anytime Balsamic Vinaigrette
¼ cup apple cider vinegar
3 tablespoon flaxseed oil or EVOO
2 tablespoon balsamic vinegar
2 tablespoon unsweetened applesauce
1 tablespoon pure maple syrup
1 ½ teaspoon Dijon mustard
1 clove garlic, minced
¼ teaspoon fine grain sea salt, or to taste
freshly ground black pepper

1. In a small bowl, whisk together all of the ingredients or simply combine them in a jar, screw on the lid, and shake. This dressing will keep in an airtight container in the fridge for at least 2 weeks.

GIVEAWAY. Pin this review to enter. Gain more entries for liking.

And psst.. there are TWO covers for the book. So those in Canada will see a different front cover view, FYI.

amzn_assoc_ad_type = "product_link";
amzn_assoc_tracking_id = "thecoconutwat-20";
amzn_assoc_marketplace = "amazon";
amzn_assoc_region = "US";
amzn_assoc_placement = "1583335277";
amzn_assoc_asins = "1583335277";
amzn_assoc_show_border = true;
amzn_assoc_link_opens_in_new_window = true;

All photos credited to: Angela Liddon. The head shot of Angela, credit: Dave Biesse

Want more of Angela? Check out her Veggie Girl Power Interview here on HHL!

Magic Mint-Chocolate Matcha Cups

March 3, 2014 by Kathy Patalsky 11 Comments

p1-2014_03_01_CHOCO-MINT_9999_96mint-cups-matcha.jpg


These easy-to-make, simple-ingredient, melt-in-you-mouth Magic Minty-Chocolate Matcha Cups are rich in chocolate flavor with a silky center of minty-matcha green tea bliss. Sweet and cool, I store these little cups in the freezer and grab one when I have a chocolate craving. The hint of mint is super refreshing and the green tea accent adds color, antioxidants and a cravable flavor you simply must try...

Mint Cool Down. These cups instantly chill your mood and calm your craving for something sweet. And this perky green color is perfect for those spring-is-coming daydreams you have been having.

Mint Memories. The inspiration for this recipe is a bit random, but here it goes. When I was a teen, I used to babysit quite a lot. And I was the go-to gal for one family in particular. And as every GOOD babysitter knows there is more to a successful babysitting session that simply watching the kids and having fun. Once those kids are tucked into bed and the house is quiet and cleaned it is just you, master of the house. What to do now? Number one, an excellent couch to TV setup is a must-have. Number two must have item: snacks! And this family had the best snacks. Cherry-peach seasonal muffins from the farmer's market, freshly baked bread puffing up in the bread machine and a fully stocked snack pantry. And the lovely mom of the house always INSISTED that I dive into whatever I wanted.

But the one thing that I really remember from that kitchen was in the freezer. They always put those "After Eight" mint chocolate square-skinny candies in the freezer. Cold from the freezer they were rich, chewy and addictive! I think I nibbled more than my fair share of those mints on a few occasions.

So that brings me back to today's sweet treat recipe that reminded me of those freezer-stored chocolate mint treats.

These matcha-infused cups are super easy to make with just a few ingredients and quite amazing. I love a hint of mint after dinner and these sweet cups deliver. The recipe is very forgivable since the ratio of chocolate to coconut oil and such doesn't have to be perfect. And you can add the mint and matcha to taste.

Magic Minty-Chocolate Matcha Cups
vegan, makes 9-10 cups

chocolate layer:
½ - ¾ cup semi-sweet chocolate chips*
2 tablespoon extra virgin coconut oil
*start off with ½ cup of chips and if you want thicker cups or need more, simply melt more -- add a hint of coconut oil each time you melt the chocolate.

matcha layer:
½ - 1 teaspoon matcha green tea (more matcha adds a darker color and stronger flavor)
1 teaspoon agave
2-3 drops peppermint extract
¼ cup extra virgin coconut oil

Directions:

1. In a small mug, warm the chocolate layer ingredients for 30-60 seconds in the microwave or until silky and melted.
2. Spray your candy cup mold -- or use cupcake tins lined with cupcake liners for the pretty crimped edges. I like to lightly spray with coconut oil.
3. Pour ½-3/4 teaspoon into the cups to create a thin bottom layer. Place container in the freezer to fully chill.
4. Melt the matcha layer coconut oil, then whisk in the matcha green tea, peppermint extract and agave syrup. Tip: Start off with just a ¼ teaspoon matcha and add more as desired.
5. Pull the chocolate from the freezer and pour in the matcha layer. You can add a lot of a little. You could even skip the top layer of chocolate and swirl the matcha on top. You can get creative with your layering, as you can see I did from my photos. If you want a top chocolate layer, simply freezer the matcha-added cups until firm and add the chocolate layer.
6. Chill your completed cups in the freezer until ready to pop out of their molds and serve. Store covered in the freezer. They should be delicious for more than a few weeks in the freezer.

Nutrition: These cups are rich in dark chocolate antioxidants and contain matcha green tea. They are around 100 calories per cup, depending on how thick you layer your chocolate.

Today's Cozy: Coconut Mocha.

March 1, 2014 by Kathy Patalsky 9 Comments

p1-2014_02_27_choco-fri_9999_95mocha-cococa.jpg


This Cozy-Wozy Coconut Mocha was my treat on a stormy, blustery Friday morning. Silky melted semi-sweet chocolate chips and rich, freshly brewed espresso combine to create the perfect luxurious base. (Oh the aroma!) Add in some special spiced accents and a swirled in dollop of coconut cream and mocha bliss has begun. Cradle this steamy, frothy, chocolate-y mug today!..

Today's morning treat. Chocolate. And coconut. With espresso.

I had a wonderful few days this week with miss Gena of Choosing Raw. We went to Disneyland, enjoyed some creepy rides and coasters and settled into our Disneyland Hotel room to pass out around 10pm. We party hard! But we did work in a few quickie workouts at the gym, which was a nice exercise boost for me, the gym-phobe. I actually went to the gym today for the first time in ages, so thank you Gena!

We also stopped by Cafe Gratitude and had a fabulous lunch with Kristy of Keepin it Kind. We are all working on cookbooks so there was tons of chatter to be enjoyed.

Check out my Instagram for loads of lovely photos chronicling the fun!

Here is one...

So this morning, as a crazy wave crashing, wind howling, sideways rain sweeping storm moved in I whipped up a cozy mug. Here is the recipe!..

Vegan Coconut Mocha
1-2 servings

1 cup non-dairy milk
1 ½ - 2 tablespoon semi-sweet chocolate chips
¾ teaspoon extra virgin coconut oil
pinch of cayenne
pinch of cinnamon
1 teaspoon agave (if your non-dairy milk is not sweetened)
1 oz. espresso

coconut whip:
¼ cup chilled coconut milk (use the hard coconut cream)

nutritional info: The entire recipe is around 400 calories, plenty of plant-based fat from that delicious coconut milk cream. You can use less coconut cream to reduce the calories and fat if desired. Or do what I did and split this yummy mug with a friend!

Directions:

1. Combine the chocolate chips and oil in a small bowl. Microwave for 20-30 seconds until slightly melted. Stir briskly until mostly melted.
2. Make you fresh espresso and pour the espresso into the chocolate mixture, It will smell AMAZING right now.
3. Pour the chocolate-espresso mixture into a blender.
4. Heat your non-dairy milk in the microwave until steamy hot. Pour into blender. Add the cayenne and cinnamon as well. (And optional sweetener)
5. Blend on low to high until this mixture id nice and frothy.
6. Pour frothy mocha into serving cup(s).
7. Add the coconut cream to the blender and blend just until it is whipped and fluffy. Spoon into a small dish.
8. To serve, stir in a small spoonful of the coconut cream whip of simply dollop it on top and let it melt on its own. Serve warm.

How to Master Overnight Oats + Chia Bowls (Mocha Banana Parfait)

February 25, 2014 by Kathy Patalsky 27 Comments


I love grab-n-go breakfasts. But I also love a cozy, nutrition-filled grain bowl in the morning. Overnight Oats has all the convenience you need on a busy morning, plus all that homestyle, "real meal" goodness you crave. No protein bars here! (Not that I mind a yummy grab-n-go protein bar once in a while.)

There are soooooo many variations for overnight oats / chia seed breakfast puddings. The best part (besides being supremely delicious) is that on the morning you enjoy them there is virtually no prep and definitely no cooking involved. Grab-n-go. (With a few accent ingredients tweaks being optional.)

How is this amazingness done? Well, all the magic happens while you are fast asleep in bed, dreaming of cuddly kittens, endless bowls of coconut cream ice cream, aqua waves crashing on a white sand beach or maybe just sparkly clouds and cookie dough pancakes. Whatever you dream about at night, you will be also dreaming about your breakfast! Overnight Oats + Chia Bowls (made however you like them!) awaiting you at sunrise.

Here is one of my fave energizing "mocha bowl" recipes and a few how-to tips to get you started!.. (Oh, and some gratuitous kitten photos too..)

Dive into a chia-oat parfait tomorrow morning. I will show you how!

And kitty lovers, do not miss the kitten pics at the end of the post too 🙂

How to Master Overnight Oats / Chia Bowls

Intro: I call these overnight oats AND chia bowls because I most always add some chia seeds to my overnight oats. I find that it thickens up the texture even more and I love all the healthy benefits of chia seeds like healthy fats, fiber and more. So lets go. Once you have youR ingredients you can get started!..

Base ingredients: oats and chia seeds (I like to lightly process my oats for a smoother texture!)
Liquid: Any non-dairy milk
Seasonings: sweeteners (maple, agave, coconut sugar..), spices like cinnamon, nutmeg, ginger, salt, vanilla
Add-ins: Nuts, seeds, crumbled cold cereal, granola, cacao nibs, dried fruit, superfood powders, protein powders even!
Fruit: Fresh fruit, any variety
Other Ideas: coconut milk, espresso, cacao powder, fruit purees and juices, peanut butter, almond butter, matcha green tea and more! -> creativity is key!

A Few Master Tips:

* The Ratio. The ratio of oats to liquid is generally a 1:1 ratio. Then with a bit more research you will find that most people are making non-vegan oats and do ½ cup oats, ½ cup milk and ½ cup yogurt. Well to veganize this classic ratio you can either use vegan yogurt OR do what I usually do, sub chia seeds and more liquid for the yogurt -- since the chia seeds thicken very well. So no matter what your recipe, just remember that adding chia seeds soaks up a lot of liquid so either add a splash more liquid or be prepared for a thicker texture. Also, adding in other dry ingredients will soak up some liquid too.

I personally think it is better to over-estimate the liquid when first starting out trying overnight oats, simply because you can always add in dry crunchy ingredients (ideas above) to thicken things up when serving. Over time you will figure out what your personal liquid to oats ratio is. How thick or thin you prefer it. And that goes for chia pudding too. Some people like it quite watery and others need it super-spoonable and thick. But 1:1 (oats to non-dairy milk) is an easy starting point, and easy to remember too. You do not need the "yogurt" but if you do add it in a vegan version, the texture will be a bit creamier and silkier like pudding. But like I said, I solve the yogurt problem by adding chia seeds and an extra splash of liquid.
* Those Oats.. My preference is to actually use oats that have been lightly processed in my Vitamix. It makes my mixture so much more creamy and thick the next day. I do not process it to flour consistency, just lightly pulsed for a few seconds. You can also use whole rolled oats, unprocessed. Just do not use steel cut oats! That will not work..
* Liquid: Homemade almond or cashew milk is the best for an amazing flavor. But you can also use store bought if needed. I like to use plain or original flavors so that I control the sweetness and vanilla flavor. I use fortified brands when using store bought since they will be rich in nutrients like vitamin B12 and vitamin D.
* Salt! You should lightly salt your mixture. Oats are quite bland to begin with and a few pinches of salt really goes a long way.
* Fruit Tips: If you are using berries or bananas you can easily layer them into a parfait the night before. But if you fear soggy fruit (even at all) you should probably add the fresh fruit right before serving.
* Flavors! There are so many ways you can flavor your "oat/chia" base. Try classic vanilla with a hint of cinnamon and maple. Try cacao-blended for a chocolate-y boost. Try nut butter blended if you are nut butter obsessed, or try something fun like mocha with a hint of espresso like I did in today's recipe!
* Crunch! A little crunch to accent the creamy is a must for a yummy bowl. Try vegan granola, nuts or seeds.
* Sweetener: Do not be too worried if you under-sweeten your mixture before letting it set overnight. Actually it is probably BEST to under-sweeten the night before because you can always add an extra drizzle or two of sweetener to serve. Plus first thing in the morning your taste buds will be more sensative to sweetness than perhaps the night before and it is always better if you can add less sugar in the end.
* Warm Bodies: If you HATE the idea of cold oatmeal, you can warm up your overnight oats in the microwave for a few seconds before serving or even in a pot on the stove. The oats will be nice and hydrated so you do not have to cook them, just warm them. What I usually do is actually warm up a side serving of non-dairy milk to pour over the cold oats in the morning. It adds a nice warm-meets-cold flavor that I personally love! But you can do whatever you love.
* Green Me! OK, so this is for you hardcore healthy eaters out there, those of you who just cannot imagine your morning without a green smoothie. 🙂 Well I did this once and loved it. You blend a side thick green smoothie then blend your (plain flavored, lightly sweetened) overnight oats with the green smoothie. It turns into a REAL monster of a green monster bowl. It might sound weird, but it is actually yummy if you love innovative bowls. I did a banana-kale-orange-coconut water green smoothie, blended thickly and layered it with my overnight oats in a parfait glass. It was kind of like an acai bowl... only green and with oats 🙂
* Just Chia? Yes you can just use chia seeds to make a chia pudding mixture. For that recipe see details here.

Overnight Oats/Chia Bowl Basic Steps:

1. Add 1 part rolled oats (whole or processed) to a small bowl or jar. Add one part non-dairy milk. Add in a spoonful of chia seeds and another splash of liquid. If not adding chia seeds, do not add in the extra splash -- unless you want your oats a bit more moist, then an extra splash is a good idea too. Add a pinch of salt too. I like pink salt.
2. Stir briskly.
3. Fold in sweeteners, spices and anything that you want to be hydrated by the liquid mixture overnight. For crunchy-texture nuts, granola and seeds, add them the next day before serving.
4. Pour mixture into jar(s) and place covered in the fridge to set overnight. In eight hours your breakfast is ready!
5. To serve, add any fresh fruit and nuts you'd like and add additional spices or sweetener as desired. Add additional liquid if desired.

And now for a recipe to try!..

Mocha Banana Chia-Oatmeal Breakfast Parfait
2 servings - halve recipe for just one person

1 tablespoon cacao powder
1 cup almond milk
1 tablespoon chia seeds
1 cup rolled oats, processed slightly in a blender or fp
pinch of pink salt
2-3 teaspoon maple syrup, grade B
1 shot (1oz.) warm espresso (if not using espresso, sub chai tea or more non-dairy milk)
½ vanilla bean, seeds scraped or ⅛ teaspoon vanilla extract
⅛ teaspoon cinnamon

1 banana, sliced
1 tablespoon walnuts, crushed
maple syrup to taste to serve

1. Add ½ cup of the almond milk, cacao powder and warm espresso to a blender, blend on low until smooth. Once the cacao has dissolved, you can blend in the remaining non-dairy milk, spices and sweetener. You could also whisk briskly until the cacao dissolves, but you may need to warm the non-dairy milk to get the cacao to dissolve properly.

2. Combine chia seeds, oats and sweetened and seasoned cacao liquid in a small bowl or jar. Add a pinch of salt. Stir briskly.

3. Slice you banana and crush your walnuts.

4. In one or two serving jars, layers the mixture with the banana slices, top with the crushed walnuts.

5. Place in the fridge overnight, serve chilled or warmed. Sweeten to taste to serve.

estimate:

And now for some gratuitous kitten pics. Sochi LOVES his carrot, given by the lovely Cat of RabbitFoodForMyBunnyTeeth... 🙂 Thanks Cat!

Fighting. Playing. Same thing. Over the carrot.

Sochi knows you have to REACH for what you want in life..

Until you get tired, that is..

OK, that's all. Bu-Bye from Sochi!..

Baked Farro with Caramelized Onion, Butternut Squash & Garlic

February 23, 2014 by Kathy Patalsky 4 Comments

p1-2014_02_06_thurs-feb_9999_267vday-recipes.jpg


This easy and pretty simple Baked Farro dish features caramelized onions, roasted butternut squash and a hint of garlic. Perfect as a compliment to a veggie side dish, soup or green salad, the tender nutty farro is accented by the sweetness of squash, some peppery spices and optional ingredients like chopped nuts, mushrooms, chopped dates or dried fruit and more. Fresh herbs like sage, parsley or rosemary are lovely options too. If you haven't discovered farro yet, please seek it out and fall in love!..

I adore farro. I use it for breakfast porridge, entree grain salads, tossed into green salads or even into soups. It is reminiscent of barley, but oh so much better in my opinion. To me it feels like a cross between tender risotto rice, nutty short-grain brown rice and larger grained barley. But really, it is so unique I think it easily stands out from the crowded array of healthy grains available to us today.

Farro is a low gluten, nutrient dense alternative to wheat and other grains. Farro is more protein-rich than most grains and has a nice amount of fiber. One fourth cup of dry (uncooked) farro contains 170 calories, 1g fat, 5g fiber and 6g protein.

A few more farro recipes:

* Farro Tortilla Salad
* Cracked Farro Porridge

Baked Farro with Caramelized Onion, Butternut Squash & Garlic
vegan, serves 4

1 cup farro, dry
2-3 cups veggie broth or water + ⅛ teaspoon salt (or do half water, half broth)

1 small sweet onion, chopped
½ of a whole butternut squash (about 2 cups, cubed)
1 teaspoon maple syrup - toss with onions before baking
1 teaspoon extra virgin coconut oil (optional)
2 cloves garlic, roughly chopped or ¼ teaspoon garlic powder
½ teaspoon orange zest (optional)

To bake: ¼ cup fresh orange juice (or water or veggie broth)

Seasoning: salt and pepper to taste + any herbs you'd like (rosemary, sage, parsley, cayenne, turmeric, cinnamon, dried or candied orange peel or orange zest and more are all lovely with this dish) You can also add a drizzle of extra virgin olive oil or more coconut oil.

Other ideas..

Nuts or dried fruit: chopped dates, slivered almonds, walnuts or dried cranberries, pistachios, orange slices would all be delish in this dish.

Mushrooms: 1 cup of sliced shiitake mushrooms and a pinch of truffle salt or oil tossed with the onions to roast would be an amazing add-in!

1. Preheat oven to 400 degrees.

2. Slice one butternut squash into two long halves.

Note: You will only be using one half for this recipe, but you could either bake both halves and double the recipe, use the other baked half for soup or simply store the other uncooked half in the fridge for the next day or two.

3. Remove seeds from the squash halve(s) you will be baking, brush the surface in a ½ teaspoon of coconut oil and sprinkle some salt and cinnamon over top. Place the squash in a roasting pan and roast flesh side up.

4. Chop your onion and toss the chopped onion with the maple syrup, other half teaspoon of coconut oil and the garlic. Lightly spray a small roasting dish with cooking spray or rub with a bit of oil. Place onions and garlic in the dish, laying them flat in one layer.

5. Roast the butternut squash until tender enough to poke with a fork. This usually takes 30-45 minutes depending on how large your squash is. You onions only need about 15-20 minutes to caramelize, so you can either put them in the oven later or pull them early.

6. While the squash is roasting, you will prepare the farro. Place 1 cup of dry farro in a small pot along with 2 ½ cups of either water or broth. If you use broth you will not need to salt the farro grain. If you use water, add a pinch of salt to the pot now too. Bring to a boil over medium-high heat, cover with lid and reduce to a simmer. Simmer on low for 20-30 minutes or until the liquid is absorbed and farro is tender. You will want to check on the farro about fifteen minutes into cooking, and again at 20-25 minutes. If the farro is still a bit al dente and the liquid has been absorbed, add in another ½ cup of liquid and keep simmering, covered, until tender.

7. When onions are caramelized (blackened edges and translucent) and squash is tender baked, pull everything from the oven but do not turn oven off.

8. Slice squash into cubes and discard skin. You can actually eat butternut squash skin, but I prefer it without skins. Add rge squash, onions and cooked farro to a large mixing bowl. Add in the salt and pepper to taste as well as any fresh or dried herbs and spices. You can add a wide variety of flavors to this easily customizable dish. I added in a few torn age leaves, some cayenne and plenty of black pepper. More garlic or garlic powder is also nice.

Note: If you want your dish a bit richer, add in a drizzle of oil.

9. Toss all the ingredients together, farro, onions, squash and additional nuts or fruit and all the seasonings. Now is when you will add the additional baking liquid, toss in the orange juice or veggie broth. The juice adds a sweeter flavor, the broth more savory. Then transfer mixture to a medium or small casserole dish, cover with lid or foil and bake covered for about fifteen minutes or until all the liquid has absorbed and the flavors mix and marinate.

Serve warm

per serving estimate:

3-2-1 Weeknight Broccoli Bisque!

February 20, 2014 by Kathy Patalsky 25 Comments

p92014_02_18_kittens-cuties-dayout-and-soup_9999_149soup-and-kittens-broccoli.jpg


This 3-2-1 Weeknight Broccoli Bisque is pretty easy and quite delish. With just three main ingredients (in 3-2-1 quantities) it is easy to remember for a healthy soup in a flash. This creamy green wellness soup has zero added oil or sweeteners and super simple prep. You can be whipping this up in a few minutes and enjoying a cozy warm bowl in no time. (Bonus. Try these off the menu uses too: this "soup" actually makes a super sauce for pasta or veggies or a dressing for salads!) Get my anytime broccoli bisque recipe..

THIS soup is divine. Simple, healthy, yummy.

I whipped this recipe up during a foggy, oh-so-perfect, kitten sort of afternoon.

Because it is kitten week here at my house. Not too bad, no? It is the first week that the new kittens are OUT of the bathroom and free to roam around. So they have been playful as can be. And this was their first time observing one of my cook 'n shoot blog photo sessions so it was quite funny when I was shooting this soup and suddenly a fuzzy paw pops up in my view! Sochi wanted a taste of this broccoli bliss. But I intervened before this got messy!..

And these videos you may have seen if you follow me on Instagram. Kittens!

The two personalities..

Hungry kittens..

Yes, it is a joy having these guys around as I work..

That soup looks like it is for me, yes?
(No Sochi)

OK, fine, I'll just watch and look adorable.

More kitten adorableness..

Hello Mr.White! Sweetness..

SO much to explore. Like window ledges. WOW!

But back to the soup!

Broccoli is one of those veggies that we should all be eating more of. It is anti-cancerous and a true green veggie superfood. This soup is a delicious way to eat more broccoli!

Bisque vs. Soup? Upon ordering a "butternut squash bisque" soup recently I was wondering just what would be truly different about it compared to a butternut soup. Well it was a bit extra creamy, thicker. Silky smooth. So you probably guessed right that bisques are basically smooth and more and cream-based. Or in vegan versions - more creamy based, without actual dairy heavy cream. But you do not have to use dairy or even non-dairy milk to achieve a creamy texture and taste! This soup is soy free. "Milk" free. I used soaked cashews to achieve a super creamy "bisque" soup. And I blended on a high speed to smooth things out.

There is a hint of garlic and pink salt and some optional spices like smoky paprika and cayenne. And you can easily make this a CHEEZY soup nust by adding in some nutritional yeast. Yum. Vegan cheezy broccoli bisque. Yes.

Spoon dive in..

3-2-1 Weeknight Broccoli Bisque
vegan, 2 servings

3 cups steamed broccoli (mostly florets, some stem)
2 cups vegetable broth
1 cup soaked/drained raw cashews (about ¾ cup measured before soaking)

accents:
1 clove garlic (I like the mild spiciness that raw garlic adds)
salt to taste (about ⅓ teaspoon for me)
pepper and other spices to taste
1-3 tablespoon nutritional yeast for cheezy flavor
smoky paprika on top for me

*add broth to taste, more broth, thinner consistency. But you know this 🙂

Directions:

1. Soak raw cashews in salted water for 6-8+ hours.
2. Wash and split broccoli, removing and really tough stem, but the stem can also be blended too! But I like mostly florets for richer green-ness. Steam or lightly boil the broccoli until tender enough to blend.
3. Drain and rinse your cashews.
4. Add the cashews, broth and broccoli to a high speed blender. Blend until smooth. Add in the accents and blend. Taste test and adjust to taste.
5. Pour soup in a small soup pot and simmer until ready to serve.

estimate:

More kittens if you don't mind 🙂

California Sunset Salad

February 17, 2014 by Kathy Patalsky 10 Comments

sqFG2014_02_16_sunsetsalad_9999_88sunset-salad_edited-1.jpg


This fresh-from-the-organic-farmer's-market salad is packed with healthy goodies. Everything is heavily chopped using a sturdy chef's knife. The kale shredded into skinny slices that are ready to absorb lots of flavor, the beets cubed and chopped into tiny crunchy bits and the carrots diced too. This is a chop-chop-chop chopped style salad. It is lightly dressed and easy to make. The light and lovely flavors are energizing and cleansing. Each bite is bursting with vitamins A and C, iron, fiber, calcium, protein and plenty of sunshine. A generous dollop of fresh guacamole of top, some antioxidant-rich purple rice too. This Sunset Salad will have you daydreaming of dinnertime.

The goodies? Finely chopped organic dinosaur kale, diced organic carrots, diced organic red beets, chopped pistachios, apple cider vinegar, sweet agave or maple syrup, lemon juice, diced tomato, fresh guacamole, satsumas and a few spices too. Warm black/purple rice on the side boosts the oomph of this salad a bit. Even more oomph? Add some cooked beans, tofu cubes, skillet-popped lentils or tempeh bacon slices. Get my California Sunset Salad recipe ahead...

These guys sleep all day and wake up at sunset.

But I like to start thinking about dinner as the golden glowing sun starts to dip beneath the horizon.

chop, chop, chop..

Sunset Salad. This always happens to me. I spend a good hour chopping, smiling and spinning in the kitchen making something slowly, happily and casually. Then it turns out to be something I want to share with you guys here on my blog. Then I lift my head and all I see is a golden, pink glow out my window. Sunset! Great for dinnertime, bad for food photography. Well despite the sinking sun, I whipped out a few shots to share this energizing, healthy, glow-infusing salad with you all. It was an amazing dinner spread: this salad, side of black rice and a creamy roasted sweet potato soup to start.

California Sunset Salad
3 servings

1 large bunch dinosaur kale, organic - finely chopped (6-7 cups)
1 beet, peeled and finely chopped
4 medium carrots, organic - diced
⅓ cup pistachios, chopped

dressing:
2 teaspoon apple cider vinegar
1 lemon, juiced
2-3 teaspoon walnut oil (or extra virgin olive oil)
2 teaspoon liquid sweetener (agave, maple, brown rice..)
¼ teaspoon coriander
a few pinches of salt and pepper (to taste)
optional: 1-2 teaspoon tahini or melted nut butter for added richness

easy guacamole:
1-2 avocados
1 lemon or 2 limes
¼ teaspoon garlic powder
a few pinches of salt and pepper
cayenne to taste

black rice:
⅓ cup dry black rice
⅔ cup water
pinch of salt

garnish on top:
1-2 satsumas, peeled and sliced
1 small tomato, organic - diced

Directions:

1. Start off by washing your veggies in warm water very well. Rinse in cold water to finish. I love using fruit and veggie wash when using farmer's market veggies.

2. Start chopping! This is a prep-heavy salad because part of the deliciousness is that all the veggies are finely diced, chopped and shredded. I spent a good 2-3 minutes finely chopping the kale into little bits. This way it is almost like a shredded "chopped" salad. Easier for flavors to mingle and absorb.

3. Add all the prepped veggies into a large mixing bowl. Then add in the vinegar, juice, oil and seasonings. Toss very well.

4. Place the salad in the fridge to marinate for at least an hour for best flavor.

5. Prep your side of purple rice and guacamole topping right before serving salad.

6. Serve salad in a bowl with guac on top, rice on the side and diced tomatoes on top too. Add more dressing if you'd like or add one of my vegan salad dressing here!

calorie estimate (with rice and guac) per serving (3 servings total)

Sochi & Mr.White: A Kitty Adoption Love Story for Valentine's Day!

February 14, 2014 by Kathy Patalsky 78 Comments

p-22014_02_09_sochi_9999_29sochi.jpg


In honor of Valentine's Day, I share with you some warm and fuzzy news. Kittens are in the house! Need I say more? OK, yes I must.

I have two new men in my life this Valentine's Day. Here is Sochi and Mr.White: A Kitty Adoption Love Story!..

Meet Sochi.. (drying off in his first sunbean after his first bath at his forever home)

He likes to sleep in my cosmetics trolly in my bathroom..

And I just sit. And watch him sleep. Because he wiggles and sprawls. Slumps and rolls. Adorable.

And this is Mr.White. He is two days behind Sochi on getting acclimated to his new home, so he spends a lot of time sprawling his long lean body in his fluffy salmon-colored tent. (He is a bit camera shy right now and who can blame him! He grew up on the mean streets of South LA, young and scared.)

StoryTime.

Walk through my apartment and you will see images of my sweet Nelly cat everywhere. On just about every wall is a tiny framed photo, a painting, a snapshot. Signs that my husband and I still think about her everyday. Miss her desperately every morning when we wake up to a quiet room, and every night when we go to bed without her fuzzy paws kissing our toes, her little body draped between us like a warm blanket.

Losing Nelly, my best friend for thirteen years, so suddenly to kitty cancer last November was one of... No, actually I think, the hardest thing I have ever gone through. That feels odd saying considering the other struggles I have gone through in life. But this was the first sadness that I could never mend, never resolve and had absolutely no control over. It stung so painfully and seared a gash so deeply in my heart. As I've explained before, Nelly was a special cat who came to me at a special time. I grew up with her. I went from being a silly, confused, somewhat broken 20 year-old to being a married, justified, whole woman. Every step, Nelly was there.

The hole she left has been hard to manage, but I am surprised to say that I have found strength in myself. I almost think that Nelly watches over my now more powerfully in spirit than she did here on Earth. She is my guardian kitty. OK, ok, enough of the heavy. Did I lose you? I hope not. Because here comes the HAPPY part..

So the past few weeks I have started looking in the mirror during my workdays, and the face staring back at me seemed oddly lonely and sad. (I had never done this work-from-home thing without Nelly. She was my best co-worker ever!) There was less glow and twinkle in my eyes. And I knew why. I missed Nelly. But even more simply, I missed having a sweet animal to communicate with and smile at all day long. After she left us, I realized how much laughter and light Nelly truly brought to our cozy little world. And all the pet owners out there I'm sure can agree that animals provide an indescribable salvation to your day. A warmth and level of comfort that no human can ever match. Animals operate on such a unique plane in this world. Their energy is so sweet, genuine and honest. They want nothing more than to love and be loved. Kisses, meals, cozy spots and afternoon naps. Such simple things. In return, they provide you with something more valuable than anything: unconditional love.

So.

Last Friday night as the Olympics in Sochi began, I had a deep feeling that it was time. Time to, well, at least go look at kitties up for adoption. So last Saturday, after an amazing brunch at Real Food Daily my husband and I casually strolled to a kitty adoption session that happens every weekend at a local pet store. We studied the stacks of metal crates filled with fuzzy, wide-eyed cats and kittens. So many precious cats in need of homes. I saw two lush orange cats cuddled on top of each other, with wise eyes and sweet silent meows. A long-haired, beautiful grey and white cat with a sturdy, playful stance. A rambunctious white kitten whacking the heck out of a stringy toy as giggling store customers looked on. And then in two side by side cubes there were two quiet small kittens draped in their kitty hammocks, looking as chill as can be.

I hunched over and started talking to the bright-eyed tabby cat and his sparkling yellow-green eyes gazed back at me, as he movied his little nose up to the grated cage to sniff my scent. The adoption volunteers asked if I wanted to hold him. I looked at my husband and smiled widely. Uh-oh. So wrapped in a thick sack blankie, out came Tomas (whose name I changed to Sochi. I pronounce it so-chee, even though my husband confirmed that the correct pronunciation of the city Sochi is Saw-chee.) I cradled him for a good twenty minutes before giving my husband a look of, "I want him!"

I was suddenly filling out adoption forms and feeling like I was jumping into this a bit, but I couldn't help myself. Was this nuts? A cat will be a 10, 15, 20, or more year commitment! Was I ready to do this again? I was diving heart-first. Even though, to be honest, my overly analytical brain was telling me I wasn't quite ready for a "new" cat.

Then Sochi's foster mom, a very sweet older woman who has a house full of cats in need (amazing lady!), explained to me how "sweet" these two kitties were. Utterly SWEET. And that the little black kitty in the other cage was Sochi's brother and they were snuggle buddies. I saw the little black face peeking over his hammock wondering why his brother was in my arms. My heart MELTED. I had a feeling this wasn't over. But out the door I went with Sochi. It felt scary standing in the brisk parking lot, the twilight sky overhead, a wide-eyed, confused kitten in a carrier in my arms. But off we went!

So why didn't I adopt the black kitty too? Well I just didn't think of two. That seemed like too much at first thought. But as I have learned, two cats can actually be easier!

Anyways, Sochi's first night alone in my bathroom was good. Even though he cried a bit the first two nights. I called the foster mom on day two and she said that Sochi's brother was even worse off! He had to be moved into a new cage and was being whacked at constantly by two older cats. And he is SUCH a passive and sweet cat that when he gets whacked at he literally just melts down and goes limp. No defenses.

Well this BROKE MY HEART. So I took a long hot bath and thought things through. Then called back Sochi's foster mom and said I would love to do a trial of the two kitties. I met her at their first vet appointment and the rest is history. After about two hours with Mr.White (the black kitty with a tiny white tip on his tail) I knew we had to keep him.

I never planned on adopting TWO kittens, let alone ONE so soon. But I honestly cannot believe how much happier I feel with these two crazy kittens rolling around in my bathroom. They have taken over what was my cosmetics trolly and turned it into a bunk bed of sorts. They are too small and a bit too scared and mischievous to adventure around the rest of our place yet, so bathroom buddies they are for now.

brothers..

Oh and the reasons for the names?

Sochi: I thought this would be such a cute name, and it commemorates the time when I decided that I was ready to save another kitty. During the 2014 Sochi Olympics!
MrWhite: Ha. OK, so I promised my husband that if he was OK with two cats he could name the second one. We loved the show Breaking Bad so he was calling the black kitty Heisenberg for the first day, then we switched it to Mr.White simply because the kitty is so prim and proper and polite that he looks like a "Mr" something. Mr.White stuck.

Nelly is still a very visible part of my life and I still talk to her in spirit every day, and kiss her photo by my bed goodnight. I have always loved cats, we had them everywhere when I was a kid. But I have to thank Nelly for teaching me that I can open my heart to animals for the rest of my life. And never feel guilty or sad for moving on, but truly grateful that I was gifted such a special creature to motivate and fill my heart in so many ways. Forever. Thank you Nelly.

And to all the pet owners out there, thank you for loving your animals. It is not always easy to have a pet. But the rewards in the end last forever.

So Happy Valentine's Day everyone! Much love from our busy kitten home to yours.

Katie Higgins, Chocolate Covered Katie's VGP Interview

February 14, 2014 by Kathy Patalsky 9 Comments

Chocolate-Covered2520Katie-vgp.jpg

I have a huge apology to two lovely ladies. Marly and Katie! They are part of my Veggie Girl Power Series that started last summer and was paused when Nelly got sick and my priorities shifted. I have been meaning to post their two amazing interviews for months now and I am so happy I am finally doing it. So sorry ladies! I will be sharing Katie's interview today and Marly later this week. They are talented, inspiring vegans - so please check these gals out!

First up in my continued Veggie Girl Power Interview Series is Katie Higgins, the fun, creative and lovable lady behind the popular website Chocolate-Covered Katie. Get ready for some healthy-dessert inspiration!...

I came across Katie's site via her submissions to Finding Vegan. Her creative sweet vegan treats are so easy to make and always have a very healthy spin. She specializes in uber-fun and not-so-fancy recipes (and that is why we LOVE her, yes?) Things like cake batter, single serving cupcakes, chocolate for breakfast, amazing cookies and all sweet things in between. Get to know the sweet girl behind this booming website!

A few of Katie's recipes..

Healthy Cookie Dough Dip:

"Reeses" PB Eggs:

One-Minute Chocolate Mug Cake:

No-Bake Peanut Butter Pie:

Veggie Girl Power Interview: Katie Higgins, Chocolate Covered Katie

Q1: Back to Basics. When and why did you go vegan? We love a good "this is why I went vegan" story.

Katie: After watching Charlotte’s Web and realizing the Wilbur I loved from the movie was the very same Wilbur engulfed between two slices of bread in my ham sandwich, I became a proud vegetarian at age seven. This lasted about a week! But my love of animals remained, and I gave up meat for real when I was fourteen, with absolutely no intention of ever going vegan. Vegans were weird and extreme… and they couldn’t eat chocolate! (Or so I believed.)

Fate intervened, however, when my family moved to China a year later. Milk products are not prominently featured in Chinese cuisine, and I thus cut my dairy intake drastically without even realizing it. Suddenly, giving up my beloved ice cream and cheese didn’t seem so daunting; I tentatively decided to give veganism a try.

Eleven years later, I still consider it one of the best decisions I ever made.

Q2: Help a Girl Out. The vegan transition can be tough for some! What sisterly advice can you give to new or transitioning vegans?

Katie: If the cold turkey (cold tofu?) method works for you, that’s great. But no one says you must give everything up at once. Try designating one or two vegan days per week, and work up from there. Look at it as a challenge, not as deprivation. Investing in one or two all-purpose vegan cookbooks can help tremendously, and it’s also a great idea to buy a book on nutrition basics (this goes for everyone, not just vegans).

Don’t attempt to replicate cheese immediately. Expanding your horizons with foods that are completely new to you (Polenta! Kabocha Squash!) is easier than trying to “replace” old favorites with a substitute. After a while, you really do lose your taste for cheese and dairy milk. If I accidentally take a bite of something made with cheese (yes, it does happen on occasion), I can tell right away; the food will have a disgustingly-sour aftertaste, and this former cheese addict does not miss it at all!

Q3: Traveling Vegans. In your neck of the woods, what are the local vegan hot spots to visit/shop at/dine at? Traveling vegans want to know!

Katie: Dallas is not the most vegan-friendly city on earth, and it doesn’t hold a candle (café) to places like Portland or New York. (A vegan doughnut shop with Butterfinger doughnuts?! Not fair, NYC!) But it’s getting better every day: we even have a gas station with non-dairy softserve (The Green Spot), and the world’s first 100%-vegan college dining hall—open to the public—is located just a half-hour away.

Q4: On Food. What is a typical day of vegan eating for you? Fave eats?

Katie: One of the best things about veganism is that there is no typical day for me. Whereas before I ate the same rotation of burgers, steaks, and chicken, now any given day might find me indulging in Thai coconut curry, butternut enchiladas with cashew cream, Vegan Macaroni and Cheese… paradoxically, my diet is much more exciting and varied than it was before I gave up meat.

A sample day (yesterday): started with a pre-run snack of grapefruit slices and a few handfuls raw pistachios. Breakfast: large bowl of peanut butter and banana oatmeal. Lunch: soba noodle soup, steamed broccoli with a quick almond-butter dipping sauce, and some dark chocolate. Snack: cherry-chocolate smoothie and coconut melties (basically just coconut butter frozen in candy molds. Weird, but so good!). Dinner: homemade black bean burger on an Ezekiel bun, big salad with Goddess dressing, and crispy sweet potato fries. (I make a giant batch of sweet potato fries at once, so I can pull them from the freezer whenever I’m short on time.) Night snack: chocolate Jocalat bar and almondmilk.

I also do a lot of taste-testing throughout the day, both for the blog and cookbook. Really, I’m just always eating!

Q5: Words of Wisdom. Here is your chance to create your own quote. "Veganism is....."

Katie: I feel like I’m supposed to say something really profound here, but the right words seem to be eluding me. Clearly I haven’t eaten enough chocolate yet today.

Q6: On What is Hot. Share people, brands, books and more that you like to rave about.

Katie: Tofu is hot. No, really! If you don’t believe me, just google “Justin Timberlake SNL tofu.” See? Tofu is hot. Even hotter than tofu (and even hotter than Justin Timberlake. Sorry, Justin Timberlake) is chocolate. Chocolate will always be hot, especially Sweet Riot chocolate, Taza chocolate, Endangered Species chocolate... all chocolate really, as long as it's vegan. (Everyone knows dark chocolate tastes better than milk chocolate anyway.)

And the ice cream from Lula’s Sweet Apothecary is really, really hot. Even though it’s cold.

Q7: Soapbox! Go for it ...Soapbox away...

Katie: Veganism is great for the health benefits, the awesome food, and the endless energy it gives you. (I literally have not been sick in 5 years.) But my main reason for being—and staying—a vegan is because I don’t want to look into the eyes of an innocent being and tell him that the reason he’s being beaten, tortured, and eventually slaughtered is to satisfy my craving for a hamburger.

I must put in a plug for The Catskill Animal Sanctuary, a safe haven for formerly abused and neglected animals who have never known love or kindness. Some people will try to tell you that farm animals can’t feel like we can. But spend just one minute with any of the animals at CAS and you’ll know without a doubt this isn’t true.

Q8: What upcoming projects are you working on? Please share!

Katie: I’m working on my first cookbook, to be published in late 2014. It will be all desserts, with an emphasis on chocolate!

Q9. Smoothie love! I would love to hear about YOUR favorite smoothie recipe..

Katie: My favorite changes all the time... Right now, it might be this recipe: Vanilla Chai Breakfast Shakes.

Q10. Do you think veganism is the diet of the future? Why?

Katie: I hope it’s the diet of the future, for the sake of the environment, the animals, and our own health. It certainly seems to be more mainstream than it was ten years ago. Back then, people looked at me like I was crazy for voluntarily giving up meat and dairy. Now… well, most people here in Texas still look at me like I’m crazy. But at least there are a lot more of us crazies running around. Ellen DeGeneres and Bill Clinton are vegan now. You can’t get more mainstream than that!

Follow Katie:
Pinterest
Facebook
Twitter

------------

VGP 2013

VGP kickoff: Cookbook Interview Chloe Coscarelli
Simone Reyes, of Running Russell Simmons / Animal Advocate
Doron Petersan, of Sticky Fingers Bakery
Angela Liddon, of Oh She Glows website
Elizabeth Castoria, Editorial Director VegNews Magazine
Katie Higgins, of Chocolate Covered Katie
Laura Beck, of Vegansaurus and more / writer
Emily Von Euw, of This Rawsome Life website
Marly McMillen, of Namely Marly website
Sara Sohn, of Sweet & Sara Vegan Marshmallows

*all photos were provided courtesy of Katie Higgins

19 Vegan Valentine's Day Recipes to Swoon Over!

February 11, 2014 by Kathy Patalsky 4 Comments

p8vday-2014-vegan-PicMonkey2520Collage.jpg


As I browsed through my past Valentine's Day approved vegan recipes I was reminded of how much I love V-Day recipes. Lots of pink. Chocolate. Beets. Strawberries. Elegance. Fun. And love! What's not to love? So whether you are celebrating this week of love with your soul-mate, potential soul-mate, best friends, family or just your amazing awesome self, these 19 vegan Valentine's Day recipes (some savory, some sweet) will turn on the charm!..

19 Vegan Valentine's Day Recipes

1. Double Chocolate Ganache Strawberry Layer Cake

2. Citrus & Spice Melted Chocolate Mousse

3. Almond + Coconut Oil Heart Sugar Cookies

4. Pink Cauliflower Soup

5. Homemade Berry Jam & Silk Chocolate Pudding

6. Pink Beet-Walnut Dip (Appetizer!)

7. Pink Power Smoothie for Two!

8. Chocolate-Frosted Banana Cupcakes

9. Chocolate-Covered Strawberries

10. Strawberries + Avocado Pink Heart Salad

11. Chocolate Epiphany Pie

12. Chocolate Avocado Mousse

13. Chocolate Swirl Raspberry Cheesecake

14. Cozy Harvest Butternut Squash Risotto

15. Simple Silk Chocolate Pudding

16. Romantic Roasted Beet Salad

17. Red Hot Bruschetta Platter

18. Rose (Red) Velvet Cupcakes

19. Simple Strawberries & Cream (Coconut Cream)

Happy Valentine's Day!

Citrus & Spice Melted Chocolate Mousse. Vegan.

February 9, 2014 by Kathy Patalsky 11 Comments

p22014_02_06_thurs-feb_9999_33vday-recipes.jpg


Chocolate is a go-to date night dessert winner. Nothing caps off a romantic meal better than something dark, dreamy, chocolate. And maybe a hint of spice too. My Citrus & Spice Melted Chocolate Mousse fits the bill...

This vegan chocolate mousse is a little spicy, very silky, a little citrus-y and maybe even a little sultry. Valentine's Day perfect. Citrus spins with rich chocolate in this Aztec-spiced, no-bake dessert. This velvety mousse is dairy-free, easy to make, protein-rich and is everything your chocolate mousse dreams are made of. Whip up this elegant dessert in just a few minutes and be a dessert superstar at the end of your next romantic feast.

Or, OK, make this for yourself and spoon-dive, in unabashed chocolate bliss.

Two ways to enjoy this mousse: chia seeded or chocolate satin versions. Citrus (and spice) and everything .. chocolate!

Hello silky chocolate bliss..

Fluffy, rich, chocolate mousse..

Date night just got dreamier. And yummier.

Vegan Citrus and Spice Melted Chocolate Mousse

By Kathy PatalskyPublished 02/17/2014Vegan Citrus and Spice Melted Chocolate Mousse
This vegan, dairy-free chocolate mousse is filled with citrus and spice accents. Velvety soft and rich with chocolate flavor.

Ingredients

  • Melt These:
  • ½ cup vegan chocolate chips or bars
  • 2 tablespoon virgin coconut oil
  • 2-3 tablespoon sweetener, maple or agave syrup or coconut sugar
  • Blend These:
  • 14oz. silken tofu, pressed dry (nonGMO, organic)
  • ½ teaspoon salt
  • ⅛ teaspoon cayenne
  • ¼ teaspoon cinnamon
  • ½ teaspoon mesquite powder (optional)
  • pinch fine black pepper (optional)
  • ½ teaspoon orange zest
  • 2 tablespoon cacao powder
  • (also blend in the melted chocolate mixture from above)
  • Garnish with:
  • candied citrus
  • orange slices
  • agave or maple syrup

Instructions

  1. Add the "melt these" ingredients to a small bowl or mug. Microwave for about thirty seconds and stir briskly to start the melting process. Place back in the microwave in fifteen second intervals, stirring at each stop until the chocolate is melted.
  2. Warm the silken tofu in the microwave for a few seconds if it was pulled from the fridge. You want all the ingredients to be room temperature or warmer so the coconut oil and chocolate do not firm up too quickly during the blending process.
  3. Add the tofu to the blender and turn on low. Slowly pour in the melted chocolate mixture. Stop blending and scrape down sides to move things along if needed. Add in all the remaining accent ingredients in the "blend these" section. Blend until silky smooth. Do a taste test and sweeten, spice and salt to taste as desired.
  4. Pour the pudding into the serving glasses. You should get about 4 servings, depending on your serving size. Place in the fridge to chill for at least two hours. These can be made a day ahead of time, but no longer than that - and be sure to cover dishes well with plastic wrap.
  5. While the mousse is chilling, you can prepare the candied oranges. This is easy! Simply toss the orange slices in maple or agave syrup. Place in an oven-safe dish and roast at 400 degrees for about ten minutes - or until you notice then darkening in color and shrinking up a bit. Tip: Grease the baking dish with coconut oil to avoid a sticky citrus situation when pulling the roasted oranges.
  6. Serve mouse with orange slice garnishes and fresh orange zest over top. Grated chocolate shaving on top is also a nice touch if you have a chocolate bar on hand.

Yield: 4 servingsPrep Time: 00 hrs. 15 mins. Cook time: 00 hrs. 10 mins. Total time: 25 mins. Tags: dessert,vegan,chocolate,mousse,recipe,citrus,

Nutrition estimate per serving (4 per recipe, classic version)

Vegan. Dairy and egg free! Enjoy!

Rustic Carrot-Banana Bread

February 6, 2014 by Kathy Patalsky 22 Comments

p82014_02_04_carrot-bread_9999_161carrot-banana-bread.jpg

It’s like carrot cake. And banana bread. All in one. Two faves.

This Rustic Carrot Cake (meets) Banana Bread tastes delicious paired with a warm mug of tea or your favorite latte. And I'd included an optional accent of cinnamon cream if you want to turn each slice into a sweet, dessert-worthy treat.

Gluten Free or Not?

You have the option of using gluten free flour or not. If you do, I would use one of the 1:1 blends that mimics that same consistency and ratio of a wheat flour.

Carrot Cake Meets Banana Bread

This Rustic Carrot Banana Bread is loaded with healthy-delicious flavor. You can choose between making it with traditional all purpose flour or gluten free flour.

This Rustic Carrot Cake Banana Bread is vegan.

The flavor of this bread combines classic banana bread with nutty-golden carrot cake. This Rustic Carrot Cake Banana Bread has a favorable, rustic texture from the walnuts, shredded carrots and whole oats. It tastes like you would be served this loaf in a cute little bed and breakfast in the countryside.

Golden raisins, coconut shreds or chopped dates would be nice add-ins too!

This Rustic Carrot Cake Banana Bread tastes delicious paired with a warm mug of ginger or chai tea or your favorite latte. And I’d included an optional accent of cinnamon cream if you want to turn each slice into a sweet, dessert-worthy treat.

Fan Favorite

This recipe somehow became a huge fan-fave hit! Maybe it's the texture, maybe it's the nutrition profile or maybe it's just because it sounds pretty yummy. I love this recipe and I am so glad you guys do to. If you have made it - please tag me on IG with a pic! I have already seen a few and you guys are amazing!

Healthy Bake

This bread contains a wide variety of healthy, nutrient-loaded ingredients.

  • Carrots add fiber and loads of vitamin A.
  • Bananas are rich in fiber. potassium and magnesium. Bananas are a whole food way to sweeten this loaf.
  • Walnuts are a great choice for healthy fats.
  • Oats are a fiber-rich whole grain.
  • This recipe has minimal added sugar - and is only sweetened with maple syrup and bananas and carrots.

My Chocolate Chip Banana Bread is another favorite recipe.

Rustic Carrot Cake Banana Bread for an anytime snack. Pairs well with tea!

p82014_02_04_carrot-bread_9999_161carrot-banana-bread.jpg
Print Recipe
3.98 from 199 votes

Rustic Carrot-Banana Bread with Walnuts

This moist and rustic carrot cake has lovely texture and warmly spiced carrot flavor. Subtle sweetness, perfect for an anytime snack.
Prep Time15 minutes mins
Cook Time35 minutes mins
Total Time50 minutes mins
Course: baking
Cuisine: American
Keyword: carrot
Servings: 8
Calories: 279kcal
Author: Kathy Patalsky

Ingredients

Dry:

  • 1 ⅓ cups flour gluten free optional
  • 2 teaspoon ground flax seed
  • ½ teaspoon salt
  • 2 teaspoon baking powder
  • 1 teaspoon cinnamon

Wet:

  • ⅓ cup maple syrup
  • 3 whole bananas mashed
  • 2 tablespoon avocado or olive oil
  • ¼ cup orange juice + pinch of zest
  • ½ teaspoon fresh ginger minced - optional
  • ¼ cup vegan egg replacer

Fold in:

  • 1 cup carrots grated
  • ¾ cup rolled oats
  • 1 cup walnuts chopped

Instructions

  • Line a loaf pan with parchment paper or grease with coconut oil.
  • Preheat oven to 410 degrees.
  • Combine the wet ingredients in a large mixing bowl, mashing the bananas very well with the sweetener, citrus juice and oil.
  • Fold in the dry ingredients until a thickened batter forms.
  • Fold in the fold-in ingredients.
  • Pour batter into pan and sprinkle a few rolled oats over top. I like to add a sprinkle of coarse sugar or a drizzle of sweetener over top too.
  • Bake at 410 for twenty minutes, then reduce heat and bake for an additional 15 minutes at 350. The loaf will firm up a bit as it cools, but keep in mind that this is a hearty, more dense loaf because it is gluten-free and contains a lot of knobby, dense ingredients. Tons of texture in each bits.
  • Cool a bit, slice and serve. Store leftover, covered, in the fridge or freezer and re-warm to serve.

Nutrition

Calories: 279kcal | Carbohydrates: 35g | Protein: 6g | Fat: 14g | Saturated Fat: 2g | Polyunsaturated Fat: 8g | Monounsaturated Fat: 4g | Sodium: 160mg | Potassium: 304mg | Fiber: 3g | Sugar: 9g | Vitamin A: 2677IU | Vitamin C: 1mg | Calcium: 89mg | Iron: 2mg

Carrot-Ginger Roasted Potato Bowl with Collards & Spiced Chickpeas

February 5, 2014 by Kathy Patalsky 19 Comments


Bowls. Bowls are instant comfort food. A vegan bowl is an entree that is made up of a bunch of yummy dishes. All working together to make one delicious meal. Today's bowl is a feast. Carrot-ginger sauce is drizzled generously over top garlic-roasted red potatoes, spiced chickpeas, garlic-olive oil collard greens and sassy satsuma slices. Making this bowl is easier than you may think, and you can have this warm and healthy, vegan dinner on your table in about a half hour. Get my recipes for this Carrot-Ginger Roasted Potato Bowl and have a bowl-tastic night..

Start with these..

Then you get these..

Add some of these spiced chickpeas..

Bowls need a good sauce. A dressing. A puree. The drizzled-over-top, velvety, golden sauce for this bowl is carrot ginger. Made from boiled carrots and fresh raw ginger it is mildly spicy and super creamy, yet totally fat-free. It is a cross between a carrot puree soup and carrot-ginger dressing. You could even use this dressing over top a traditional salad, or any grains or legumes.

So everything gets the sauce. Drizzled, generously. Carrot ginger flavor in every bite.

Dive in hungry feasters!..

Another look at the base of this bowl, red potatoes, diced and roasted to crispy-tender-spiced perfection..


Grains + Avocado too?
Another note, I was going to add some brown rice or farro to this bowl, AND some diced avocado over top but quite frankly, I forgot. I was so wrapped up in how amazing things were turning out I skipped those extras. But you can certainly add them if you'd like.

Or add some vegenaise-slathered sprouted grain toast on the side, like I included.

PS. Oh those collards! You may feel the urge to use kale or chard or spinach in this recipe. But please give collards a try! They are so yummy when they mingle with a bit of oil, plenty of apple cider vinegar and tender chunks of garlic. Plus collards are incredibly healthy. Just one cup contains nearly 50% your RDA of vitamin A, and they contain vitamin C, fiber and calcium. They are tender, yet meaty. I adore them!

Carrot-Ginger Roasted Potato Bowl
vegan, serves 3

Greens:
1 large bunch of collard greens,organic - chopped
*thick stem vein removed (about 6 loosely packed cups - collards shrink significantly when cooked)
1 teaspoon extra virgin olive oil
1 teaspoon apple cider vinegar
2 cloves garlic
pinch of salt and pepper

Chickpeas:
1 ½ cups cooked chickpeas (1 can)
½ - 1 teaspoon extra virgin olive oil
1 teaspoon maple syrup
pinches of these spices:
black pepper
smoky paprika
turmeric
cayenne
garlic powder
salt

Garlic Potatoes:
4 cups diced tiny red potatoes, organic
2 tablespoon extra virgin olive oil
2 teaspoon lemon juice
½ teaspoon garlic powder
⅛ teaspoon smoky paprika and/or cayenne
pinches of salt and pepper
optional: nutritional yeast to taste

Carrot Ginger Dressing:

1 ¼ cups boiled carrots, organic
2-3 tablespoon water or non-dairy milk
1 tablespoon lemon juice
1-2 tablespoon maple syrup
¼ teaspoon freshly grated ginger (or to taste)
pinch of orange zest
salt and pepper to taste
for extra spice, add a few pinches of cayenne

1 satsuma, peeled and thinly sliced- optional

*for all components feel free to spice to taste, especially adding plentiful spices and seasonings to those potatoes and chickpeas.

Directions:

1. Preheat oven to 420 degrees.
2. Start out by washing and scrubbing your potatoes. Then slice them into quarters or smaller. Add them to a large mixing bowl and toss with the olive oil, lemon juice and salt and pepper. Lay flat on a large baking sheet or casserole dish. Bake until tender and crispy. About five minutes before the potatoes are done, open the oven, pull out the oven rack and sprinkle the garlic powder and paprika over top. Toss a bit. Roast potatoes for another five minutes or so. I like to broil for a few minutes to really toast up those edges.
3. At the same time you are cooking your potatoes, you can be roasting your chickpeas. You drain and rinse the canned chickpeas and toss with all the spices and oil. Lay them flat on a baking sheet and roast until the edges crisp and toast up. You could also do this in a skillet on your stovetop, whichever you'd prefer. Note that the chickpeas should only take ten or so minutes to roast, they should be pulled from the oven before potatoes.
4. While the chickpeas and potatoes are roasting, bring a large pot of water to a boil and add the carrots. Boil carrots until tender. Drain water and place them in a high speed blender or food processor. Add in all carrot-ginger dressing ingredients and blend until smooth. Pour and set dressing aside.
5. While the chickpeas and potatoes are roasting you can also quickly make the collards. Finely chop your washed collards and set aside. Add the oil and garlic to a pot on the stove over high heat. When the oil is hot, add in the collards and cover with a lid to cook for one minute. Then turn off heat and toss the collards in the hot oil and with the garlic. Pour in the apple cider vinegar and add the pepper. Toss well. Collards should be nice and wilted now, but not mushy.
6. Plate your bowls! Add the collards, sliced satsumas, roasted chickpeas, potatoes and dressing over top. Serve warm.

Pink Power Smoothie. Lycopene-Rich.

February 4, 2014 by Kathy Patalsky 4 Comments

1p32014_02_02_pink-juice_9999_47pink-power_edited-1.jpg


Thanks to Valentine's Day, February becomes a month of love, hearts and pink! Well start crushing on yourself (and someone special) with this frosty pink sip. This "I Heart You & Me" Pink Power Smoothie is a sweet, citrus-infused blend that is rich in lycopene, potassium, fiber and vitamin C. This heart-healthy blend is a sunny way to start your day or energize in the afternoon. Learn more about lycopene and get the recipe!..

Lycopene is an antioxidant in the carotenoid family that has been studied to improve prostate health, guard against breast cancer and improve heart health - among other things. Lycopene is commonly known to be found in tomato-rich foods like marinara sauce. But lycopene is also abundant in other red-pigmented foods like pink grapefruit and watermelon. Tomatoes may not be your favorite breakfast food, so enjoying lycopene-rich fruits is a yummy way to include lycopene in your AM meals and snacks!

Here are the breakdowns for lycopene in fruits and veggies - source:

1 cup of watermelon, 6.89mg
1 cup of tomatoes, 7.30mg
1 cup of grapefruit, 2.61mg
1 cup of guava, 8.59mg
1 cup tomato puree, 54.39mg

Experts, like Dr. Weil, seem to advise 9-10mg of lycopene a day for general health benefits. So if you drink both servings of today's recipe, you are covered! And even one serving will have you at about 7-8mg. This is a refreshing, low-calorie smoothie so you could easily drink up the whole blender-ful. (Or share it with your favorite smoothie sipping companion!)

When selecting these foods, look for pieces rich in their pigments.

Eat the rainbow is always good meal-planning advice.

I Heart You & Me Pink Power Smoothie with sprouted pumpkin seeds
1-2 servings

1 ½ cups pink grapefruit flesh, rind removed
1 ½ cups watermelon cubes, chilled or frozen
1 banana, frozen
¼ cup coconut water (or try guava juice for more pink power!)
1 teaspoon liquid sweetener (optional)
2 teaspoon sprouted raw pumpkin seeds, salted

spicy version: add cayenne or some raw grated ginger

Directions: Add grapefruit, coconut water, optional sweetener and watermelon to blender. Blend until smooth - high speed will be needed to puree smoothly. Add in the frozen banana and blend until frosty and smooth. Pour and add pumpkin seeds over top to serve.

Lycopene per recipe: about 15mg

Nutrient info per serving if you split this recipe into two servings:

Happy Birthday Cake Batter Truffles

January 30, 2014 by Kathy Patalsky 35 Comments


Today is my birthday. Du-na-na-na-na. Happy birthday to me...

Cake Batter Truffles. These truffles are made using creamy soaked cashews and coconut oil. Vegan sprinkles add that "cake batter" coloring and a hint of vanilla bean does the rest. But before my bday treat (recipe below), a few bday wishes.

Birthday wish: pink sunsets, always.

And many wishes for my favorites: kitties! (And all animals, really.)

Happy busy birthday to me. This is probably the least amount of attention I have paid to my birthday in all my life. Mostly because in just ONE day I turn in a huge project, cookbook#2 (yay!) and so I have been manuscript editing, photo editing and basically pulling all nighters like a college student during midterms. And it feels very strange, but come February 1st I will literally have the first pause in my schedule in a very very long time. After Nelly's kitty cancer fight, I literally dove right into cookbook writing. It was strange really. But I was glad to have a project to keep me super busy. But come February, I get some true pause, reflect and centering time. I plan on seeing lots of friends and soaking in this time before round two of cook-booking comes along. Oh, the editing phase...

But anyways, enough about me.

For my birthday this year I wanted to do something nice for my favorite furry friends. Since we still are not ready to adopt a new kitty (though we hope to soon) I decided to "adopt" a kitty. And remind all of you guys that YOU can help too if you want to. There are so many ways to give love to animals. And yes, going vegan is one of them.

For this bday, Blind Cat Rescue stole my heart...

"Blind cats do not know they are blind, they know they are cats. They act like cats. Blind cats can do pretty much everything that a seeing cat can do. They can climb trees, climb up on to the top of cabinets and get into places that you can not figure out how they did it!" - Blind Cat Rescue

So.. Meet Gallie! The kitty I "adopted" via Blind Cat Rescue. Aw, head rubs. Though I will never actually meet this sweetie pie, I am so happy to know that I am helping her in a tiny way.


*photo credit: Blind Cat Rescue

About Gallie from BCR: "Gallie came to us from Brevard County Animal Control in Florida. We were notified by a citizen that she was there and with lots of help by lots of wonderful people, she came to us. A Huge thank you to Diane & Bill from Atlanta Animal Clinic in Pompanao Beach, Fl for driving 5 hours to pick her up and bring her back to their clinic , Also a huge thank you to Elizabeth, her mother & Mindy, Ivonne for facilitating her journey to us by driving 10 hours to bring her to us. She is super super sweet and I know is going to feel so much better once her eyes are taken care of."

How to help? For just $30 a month ($1 a day!) you can adopt a rescued kitty at the Blind Cat Rescue. There are SO many kitties who need some help. You can even browse photos and pick out a kitty to adopt.

Why do blind kitties need help? Did you know that many public animal shelters simply quickly get rid of any handicapped or special needs kitties (like blind cats) that fall into their hands because of the low chances for adoption. So thank goodness for the kind volunteers at Blind Cat Rescue who take in these sweet creatures. Gallie, the kitty I chose, was suffering from painful and very severe eye problems and needed surgery to remove her eyes (the source of the pain). Blind Cat Rescue stepped in. Now Gallie is a sweet and happier girl who I am told loves to chase bugs outside in the yard 🙂

More about BCR: "Blind Cat Rescue was started in 2005 to answer the need for a safe place for blind cats that were deemed unadoptable by regular shelters. They were going to be killed just because they are blind. And in 2011 we built a building to provide a safe sanctuary for FELV+ & FIV+ cats."

So for my birthday wish, I hope you guys will check out this list of my favorite animal organizations. Please feel free to leave more names of great animal organizations in the comments below. And if you have means, please consider donating. You hear it all the time, but it is TRUE: Every little bit helps. (If you do donate or adopt, please feel free to leave me a comment so I can give you a big thank you!) xo

For my bday wish, I hope all these kitties and pups have many more happy birthdays to come!

Click to help the kitties + more:

Blind Cat Project Wishlist and ADOPT a kitty program (like Gallie!)
Farm Sanctuary - One of my faves. Love the amazing Gene Baur!
Sea Shepherd - amazing group. And if you have been following the dolphin slaughter in Taiji Japan you know the amazing work that organizations like SS do, and how crucial they are!
Love & Leashes - wonderful adoption non-profit here in LA
Best Friends - another awesome non-profit
ASPCA - helping animals, fighting for animals!
Humane Society - they do amazing work, and I am a big fan of Wayne Pacelle!
Teal Cat Project - found this via Isa Chandra, who is one of the founders, love everything about TCP! I am the proud owner of three teal kitties.
Hendrickson Boards - awesome company that supports a wide number of shelters and animals, plus they sell super cute tees "every purchase saves animals around the nation"

And ok, something sprinkled to nibble on for my happy bday...

Cake Batter Truffles
makes 9 truffles

½ cup raw cashews, soaked
⅓ cup extra virgin coconut oil, melted
2 ½ tablespoon liquid sweetener (I used agave)
2 tablespoon non-dairy milk, warmed
pinch of real vanilla bean seeds (or a few drops vanilla extract)
pinch of pink salt

fold in:
1 teaspoon vegan rainbow sprinkles

Nutrition per ball: 139 calories, 11g fat, 8g carbs, 2g protein

1. Soak cashews in salted water overnight, or for quick soak method, boil them in water for a few minutes. (Raw soaking works best though)
2. Add all ingredients to a blender or food processor and blend until silky smooth. Pour mixture into a small bowl. Fold in the sprinkles, leave out a few or more for coating.
3. Place mixture in the freezer until firm enough to work with.
4. Scoop small balls once the mixture is firm enough (but not too hard) and roll into balls. Place on a greased plate and place back in the freezer to fully firm. Serve chilled or slightly warmed to room temperature.

Nutty Banana Chocolate Chip Bread

January 27, 2014 by Kathy Patalsky 10 Comments

p1-2014_01_20_jan-23-2014-hhvk_9999_36banana-bread-choco-triple.jpg


Sometimes the best recipes are discovered by happy kitchen accidents. Like this Nutty Banana Chocolate Chip Bread. I was adding the "spelt" flour when, whoopsies, I realized that my spelt was actually my buckwheat flour. So I continued anyways, a bit worried that this bread would not turn out fluffy and lovely as I had hoped, since buckwheat can be a heavy flour. But sure enough, this bread baked up into a delicious banana bread loaf! It has the perfect subtle accent of dark chocolate chips and crunchy jungle peanuts combined with three sticky sweet mashed bananas and all sorts of other yummy vegan ingredients. Try it out and taste my delicious mistake..


Enjoy it.
This bread was delicious warmed up at breakfast all last week. Super hearty yet still moist, light, nutty and sweet. Those chocolate chips give this bread a decadent feel, but the ingredients are healthy enough to enjoy a slice any time of day. Peanuts, chocolate, bananas. Banana bread bliss.

Nutty Banana Chocolate Chip Bread

By Kathy PatalskyPublished 01/26/2014Nutty Banana Chocolate Chip Bread
Nutty amazing buckwheat banana bread with mashed bananas, loads of peanuts and chocolate chips.

Ingredients

  • 1 cup buckwheat flour
  • ½ cup oat or wheat flour (I use homemade oat flour)
  • 2 teaspoon ground flax seeds
  • ½ teaspoon vanilla extract
  • ¾ teaspoon cinnamon
  • ¾ teaspoon salt
  • ⅓ cup maple syrup, grade B
  • 3 large ripe bananas, mashed
  • ½ teaspoon apple cider vinegar
  • 1 teaspoon baking powder
  • ⅓ cup extra virgin coconut oil, melted
  • fold in:
  • ¼ cup vegan chocolate chips
  • ¼ cup peanuts (I used jungle peanuts)
  • topping: 1 tablespoon coarse sugar (optional) + sprinkle of peanuts

Instructions

  1. Preheat oven to 400 degrees and line a bread loaf pan with parchment paper or grease with coconut oil.
  2. Add all bananas to a large mixing bowl and mash very well. Add in the melted coconut oil to assist in the mashing. Then add in the vinegar, vanilla extract and maple syrup too. You should have a very wet banana mash now.
  3. Fold in the flours, salt, cinnamon, baking powder, flax seeds. Fold very well until a wet and very thick banana batter forms. Pour this mixture into the loaf pan and smooth with a spoon. Sprinkle sugar and peanuts on top.
  4. Bake at 400 degrees for 35-40 minutes or until edges start to brown. Cool before slicing and serving.

Yield: 8 servingsPrep Time: 00 hrs. 10 mins. Cook time: 00 hrs. 40 mins. Total time: 50 mins.

Nutrition

  • Calories: 284
  • Fat: 13g
  • Totalcarbs: 40g
  • Dietaryfiber: 5g
  • Cholesterol: 0g
  • Calories:

Tags: dessert,snack,bread,vegan,banana bread,buckwheat,peanuts,gluten free,breakfast

Roasted Soup Obsession: Carrot or Sweet Potato. Spices Galore.

January 22, 2014 by Kathy Patalsky 18 Comments


My latest obsession: creamy roasted soups. Carrot and sweet potato flavors mostly, with a few flavor and ingredient tweaks along the way. These soups have been bringing me some serious delicious-comfort the past few weeks. Get the info on this fantastic go-to meal recipe and share a bowl with me!..

First off, thank you so much for the support and congrats for my cookbook#2 announcement! Your support and excitement means so so much to me.

Now lets warm you up!.. These warm, cozy, healthy, vitamin-A, fiber, deliciousness-infused bowls are perfect for cozying up to at the end of a long day. They warm you from the inside out and nurture you with nutrition. Pop some veggies in the oven, forget about them for a while, then hop back in the kitchen and blend up these soups. Easy!..

Creamy carrot with some soaked cashews added to make things "extra creamy"

Roasted carrots turn into amazingly flavorful carrot soup. I prefer using roasted to boiled carrots. Look at the flavor!..

super-spiced sweet potato. Loads of smoky paprika, maple, sweet curry, garlic and turmeric.

On Food Obsessions. I like to think that as a food blogger I try new things at each meal, my table being a constant vehicle for experimentation and creativity.

Well, yes sometimes. But not always.

Actually I'm just like anyone else really. I fall in love with certain dishes and crave them, so sometimes that even means having a dish three times in a row (ok, or more!) and changing it up a little each time. It is amazing how changing up the spices, garnish or adding even just one new ingredient can change the flavor, texture and tone of a recipe. Including these soups!

But back to obsessions. Obsessions is a bad word. Hm. I mean, healthy vegan food is my obsession. These recipes I speak of are more like "kicks." I usually go on a recipe kick, crave it like crazy for a few days (or weeks!) then get sick of it and crave something new. Sometimes I go back to old kicks and sometimes they are enjoyed and never heard from again.

Just for fun , let me share a few of my historic "kicks"

- There was the GoBo NYC Butternut Squash Risotto + Seitan Skewers kick of 2008.
- The giant big salad bowl dinner kick, summer of 2009
- The breakfast for dinner, tofu scramble wrap craze a few years back.
- And then of course my matcha protein shake obsession that started about a year ago and is still going strong. (Some kicks never die I think!)
- My farro porridge breakfast crush of 2011, which comes and goes, seasonally.
- My fresh-pressed juice craving when I simply HAD to start my day with juice for a few months straight, this comes and goes too.
- My kale dinner salad bowl.. again that one comes and goes.
- My baby carrots + hummus snack obsession. That totally passed. Very three years ago. (I used to be a baby carrot addict, I buy whole bunches nowadays though.)
- My vegan frozen yogurt addiction. Broke that off, thank goodness.
- My "Macro Bowl" kick of 2012. I got a little bored with that.
- My 'big pot of soup' kick a few snow seasons ago back in NYC. That was fun.
- My Matcha and turmeric warm mug lattes kick of 2013, ahem, still going strong.
- My steamy miso noodle soup bowl lunch kick, 2007. That was me getting used to my first NYC winter.
- My breakfast chia pudding kick, this one comes and goes.
- My green smoothie obsession while writing my book 365 Vegan Smoothies. Those green smoothies were my favorite to taste test because they are so. darn. good. for. you.

And on and on and on..

I think we all do this though. A lot. Yes? What are your recipe obsessions?

THIS soup. So, amidst cookbook writing and extreme recipe-testing activities, it seems all I crave at the end of a long day is a giant bowl of roasted carrot or sweet potato soup, paired with two toasted slices of sprouted grain bread, a slather of Vegenaise, and some sort of salad on the side. Kale sald, bean dish, grain salad (farro + black rice .. yum!) etc.

So here is my soup of NOW. Get it while its hot. In a few months I probably will be saying, "Soup who?" I'm such a culinary flirt.

Spice it up! My thing with these soups (carrot or sweet potato) is that I can literally drown them in spices of all sorts. Which I love. You can do the same. I can also adjust the creaminess level by changing the ratio and amount of broth to non-dairy milk. Or by adding in ingredients like beans, lentils and soaked nuts. More texture, heartier flavors. Coconut milk and canned pumpkin are also fun add-ins.

Simple Roasted Carrot Soup with spices, curry, ginger, garlic, maple
2 servings

To Roast:
1 tablespoon extra virgin olive or extra virgin coconut oil
7-9 small to medium carrots (about one bunch stemmed) OR 1 medium sweet potato - more info on roasting carrots
2 teaspoon agave or maple syrup
salt to taste

Additional:
1-3 cups vegetable broth
1-2 cups almond milk, plain
1 clove garlic, optional
1 teaspoon ginger, grated
spices: pinches of cayenne, turmeric, black pepper, sweet curry powder to taste, smoky paprika and more..
*liquid amounts will greatly differ from how creamy or thin you want your soup.

Garnish: more spices (I love smoky Spanish paprika for this), drizzle of roasting juices or maple syrup, pinch of parsley or veggie garnish

Optional add-in ideas to change things up:
1 cup canned beans or lentils, drained and rinsed
½ cup pumpkin puree - for extra creaminess
¼ cup soaked cashews
Salt & Peppered Shiitakes (make on the side then serve over top the soup .. heavenly!)

garnish: roasted carrot and carrot roasting juices

1. Preheat oven to 415 degrees. For carrots: Wash and dry carrots. Slice or chop carrots. Toss carrots with the oil, salt and sweetener. Lay flat on a rimmed baking sheet and bake until tender, about 30-40 minutes, less for smaller carrots. Reserve the “roasting juices” from the carrot pan for a soup accent to serve. For sweet potato: simply plop the sweet potato on the baking rack, slitting a few holes in the top to vent. Be sure to line your oven with foil to catch any sticky juices that drip and burn. Bake until very tender so that the skin peels right off.
2. Add the roasted carrots or roasted sweet potato flesh to a high speed blender, leave out a few small carrots or sweet potato cubes for garnish. Add all additional ingredients to blender and blend from low to high until silky smooth. Modify texture and flavor as desired. I personally love my soup very rich and creamy, so I use minimal amounts of liquid. But for a more traditional soup consistency, start with two cups of broth, a cup of non-dairy milk and go from there. (If you add too much liquid you can always simmer the soup uncovered on the stove to reduce the soup and thicken.) After blending, taste test the soup and adjust spices and salt to taste.
3. Pour soup in a small soup pot and simmer on low, covered, until ready to serve. I cover the pot otherwise the thick soup splatters everywhere! Garnish with the roasted carrot and a drizzle of the carrot juices from the roasting pan.

Nutrition Facts (per serving – 893g):
Calories: 322kcal Fat: 12g Carbs: 46g Protein: 10g Fiber: 13g
Vitamin C 36% Iron: 23% Calcium: 44% Vitamin A: 1309%

Sweet potato lover?
Here is another recipe to try: Easy Sweet Potato + Pistachio Fritters

Shiitake Farro Tortilla Salad + Cookbook News to Share!

January 21, 2014 by Kathy Patalsky 45 Comments

2014_01_20_mushroom-taco-salad-blog_9999tortilla-salad-bowl-farro.jpg


The weather here in LA these past few weeks has been gorgeousful. Yes, gorgeousful. Beautiful and gorgeous all at the same time. And while the winter sun has been working overtime here in SoCal, I have been working overtime too. Mostly because I have been so (happily) busy the past few weeks. My exciting news to share, plus a yummy recipe for Shiitake-Farro-Tortilla Salad!..

pretty winter sunset over the Santa Monica shore..

And today's recipe..

Tortilla Salad. Recipes first, always! (And my big news follows the recipe.) So, you know how everyone loves tortilla soup? Well this is tortilla salad. Made using just a few fantastic ingredients including homemade corn tortillas, sizzling shiitake mushrooms, tender rustic farro, fajita spices and zesty lime juice. Avocados on top! Try this yummy fusion recipe out, the flavors are so simple, yet so wonderful all blending together in a big festive bowl..

Shiitake Farro Tortilla Salad
4 servings

farro:
1 cup farro
2 ½ cups water
¼ teaspoon salt

shiitakes:
4 cups shiitake mushrooms, diced (about 4-5 large shiitake mushrooms)
1 cup onion, diced
½ teaspoon fajita seasoning, I used Penzey's Spices brand
salt and pepper to taste
½ teaspoon extra virgin coconut oil

also:
½ avocado, diced
2 limes, (1 squeezed, 1 for garnish)
¼ teaspoon cilantro or parsley, finely chopped

corn tortillas:
½ cup masa harina
¾ cup water
spritz of lime juice
pinch of salt

nutrition estimate (4 servings per recipe)
Directions:

1. Start off with your homemade tortillas, you will need to combine the masa harina, water, salt and lime juice in a bowl, stire until smooth, cover bowl and let sit for an hour before using. I soak my mixture in the fridge so it is chilled upon using, and easier to handle. Note: yes you can use store-bought tortillas, or substitute with corn, but try homemade at some point, you will be impressed with yourself!
2. While your tortilla mix is soaking, you can cook your farro. Add the grains, water and salt to a small pot and bring to a boil. Reduce to a simmer, cover with lid and simmer on low for about 30-35 minutes, or until farro is tender. If there is any liquid left or excess upon cooking to farro, drain and fluff farro. Pour farro into a large mixing bowl and set aside.
3. After the tortilla mix has soaked, start cooking your tortillas. Warm a skillet, cast iron is my preference, to medium. Roll a gold ball sized amount of corn mixture and flatten into a tortilla shape. If you were using these as actual tortillas, a tortilla press would really help, but since you will be slicing them up anyways, do not stress about making them perfectly shaped. Just flatten them down as much as possible using your hands or a greased flat spatula. Cook each tortilla for just about a minute on each side, they cook very quickly. Continue until all tortillas have been cooked.
4. In the same skillet, turn heat up to high and add in the coconut oil. When oil is hot, add in the onions and mushrooms, saute for 2-3 minutes or until cooked. Sprinkle fajita seasoning over top and salt and pepper to taste.
5. Squeeze the juice of one lime into the farro bowl, and add the parsley or cilantro - then fluff the farro very well. Next, pour the warm mushroom mixture into the farro bowl and toss again. Lastly, dice up 2-3 of the cooked tortillas and add to the farro bowl. Toss together very well. Add more seasoning to taste. Pour salad into serving bowl(s). Dice avocado and add to top of salad. Garnish with fresh lime. This salad can be served warm, freshly tossed, of cold after chilling in the fridge. Salsa of hot sauce over top. You can serve any leftover tortillas as sides.

-- news!

News News! Soo.. a few months ago I signed a cookbook deal with an amazing publisher, Houghton Mifflin Harcourt. You can follow all the awesome cookbook updates on twitter: hmhcooks and JustCookNYC. So for the past few months I have been working on my second cookbook! This vegan-recipe-packed book will include a wide array of recipes: breakfast, lunch, dinner, snacks, desserts and more. It will be a complete collection of my most favorite recipes. There will be a few of my most popular recipes from here on my blog, but the majority of the recipes will be brand new. I am also doing the photography for the book.

I had so much fun writing 365 Vegan Smoothies and so I am so excited to bring you guys a wider array of recipes in book #2!

I wanted to go all Beyonce on you guys and announce my book right before being released next year (2015) .. but I just couldn't hold this news in.

So far cookbook-ing has been a whirlwind of grocery shopping trips, piles of ingredients all over the kitchen, day-long sprees of photoshooting, recipe testing and on and on. In short, it has been a wonderful project to take on, especially right now when (as many of you guys know who follow my blog) there have been quite a few heavy things happening for me in the past year. With the sadness over the holiday season, I was so incredibly grateful to have this new project to tackle. I know this book will make miss Nellycat proud.

So FINALLY, I can answer all of you who have asked me again and again "when are you going to write a big cookbook??" .. I am now! 🙂

I am so excited to move forward.

And truly, I am SO excited for you guys to see this new book.

PS! Smoothie lovers, enter this awesome contest featured on Earth Balance's page!.. (link at the bottom of the post once you clickover)

Easy Peanut-Kale Black Rice Bowl

January 15, 2014 by Kathy Patalsky 17 Comments

2014_01_14_black-rice-blog_9999_45black-rice-bowl.jpg


Is black the new brown? In my house it is! Well, sort've. I still adore my beloved, simple, nutty, fluffy, go-to short-grain brown rice. But black rice also called "forbidden" rice or purple rice is my new must-try fave! Here is why: It contains all the fiber, texture and 'less processed' goodness of brown rice. But in addition to that, it also has antioxidants, the same anthocyanin antioxidants found in blueberries.

So today I bring you a super easy recipe containing a few superfood favorites: my easy Peanut-Kale Black Rice Bowl. Head to your local grocery store or health food store, find some black rice and get cooking!..

More on those antioxidants.. More than a few sources say that black rice may even contain MORE antioxidants than blueberries. Crazy, yes? OK, so if you look at that study, they compare one spoonful of black rice to a spoonful of blueberries. So calorie-wise, I'm not sure what contains more calorie-per-calorie. But still. I am super excited about this new ingredient fave! Can you tell?

Black Rice Inspiration? I have been ordering a seasonal special at Real Food Daily here in Santa Monica called "The Essence." Anyone try it as well? OMG. It is crazy delicious. It contains this creamy cauliflower puree with pomegranate seeds speckled on top. Some maple-y roasted brussel sprouts and then a giant balsamic portobello mushroom overflowing with black rice. The entire dish is spectacular, but that purple, black (I confuse myself!) "forbidden" rice is what makes the dish a real filling meal. In fact, my husband who used to hate all grains (I know) now likes rice, but LOVES this purple stuff. So I knew I had to start making this stuff myself.

How to cook black rice? Easy! You simply add 1 cup of rice and two cups of water to a large soup pot, add a pinch of salt, bring to a boil, then reduce heat to a simmer. Cover pot with lid and allow the rice to simmer for a good 45 minutes, or until tender.

The rice keeps a somewhat soupy broth around it right up until the end of cooking time I found. I actually had a bit of black rice broth left on the pan and I drained it right off and fluffed the rice. I actually drank the broth since it was dark purple and looked oddly dreamy all rich in antioxidants. And it was dreamy! This stuff would make an amazing soup grain. (I had extra broth because I added an extra splash of water since I was uncertain if the 2:1 ratio was correct my first time cooking it!)

Black rice can be used in any way that white or brown rice can be used. It has a very tender, nutty and chewy texture that I love. It is a bit heartier and heavier than fluffy white or even brown rice. Perfect for a hearty grain addition to any meal.

Peanut kale is a favorite of mine, so paired with this tender purple-colored black rice I was in heaven. I added some simple lime juice and maple syrup to accent. Do you love black rice? How do you use it?

Peanut-Kale Black Rice Bowl
2 servings

4 cups kale leaves, torn (About one half of a large bunch of kale)
1 ½ cups cooked black or purple or "forbidden" rice

dressing:
1 tablespoon peanut butter, organic
2 teaspoon maple syrup, grade B (or agave or brown rice syrup)
1 juicy lime, squeezed
pinch of salt and pepper
optional: pinch of fresh grated ginger or cayenne for spice

garnish: crushed raw jungle peanuts and lime wedges

Directions:

1. Cook your black rice. Use about one part rice for every two parts water. (See instructions above or on your rice package.)
2. Drain rice of any excess liquid and place in the fridge to set and chill over night for best texture. (I found my rice dried out a bit overnight and befame nice and chewy and fluffy like i love. But just after cooked it is delicious too!)
3. Combine dressing ingredients in a small cup. Warm the dressing tin the microwave for about fifteen seconds (this step is optional but encouraged!).
4. Place all washed, dried and torn kale leaves in a large mixing bowl and pour warmed dressing over top. Massage the dressing into the kale. The kale should wilt a bit and soften as it becomes marinated with the peanut dressing.
5. Fold in the rice. Toss well. Serve wit crushed peanuts over top and lime wedges.

calorie estimate per serving (2 servings total)

Chocolate-Peanut Butter Banana Bites + 15 Healthy Track Treats!

January 11, 2014 by Kathy Patalsky 10 Comments

p3-2014_01_09_book-fri-jan-10_9999_364pb-bites_edited-1.jpg


Goodbye pumpkin pie. Hello healthy. January feels like abruptly waking up from a long, fuzzy, jolly dream.

Suddenly things are oddly quiet. You find yourself calmly gazing at a hushed scene of freshly fallen snow, shivering bare trees in the distance. Or maybe your harshest winter weather (raises hand) is a brazen beach fog drifting your way. You have swapped out your nog and cocoa for green smoothies, warm lemon water or carrot-ginger juice. That whimsy-filled holiday time is now just a blur or colors, twinkly lights, carols and laughter. Just a clutter of faint memories of you dancing in glowing lights, surrounded by people dressed in fuzzy sweaters, fluffy scarves and sparkly somethings. A hum of holiday music and chatter. Cinnamon sugar, vanilla bean, pumpkin and peppermint aromas tickling your nose. You, smiling and spinning beside a crackling fire, a sugar cookie in one hand, a tall mug of hot cocoa in the other, towering swirls of whip gazing straight up at you.

Ah, what a nice dream. But wait, that was like just over a week ago! Just like pulling the plug on your Christmas tree lights, all good things must come to an end. But maybe the REAL fun has only just begun? Green smoothie cheerleaders, gimme a "G!"

Healthy 2014.
I love this healthy-you-lovefest season. I do not do the new year resolution thing, but I do love the whole idea of reevaluating your current state of wellness. Taking inventory on how you feel, what you are eating, how you are managing stress, what your happiness level is, how your job satisfaction is, how the meaning in your life is crystallizing, how your friendships are faring, how you look, how active your creative life is and then, after a good long ponder .. figuring out where you want to be and how far you are from that wellness vision in your head. So instead of strict rules this January, lets instead call this a month of taking inventory on our wellness. And setting broad goals for the rest of the year.

On the road. Most people start on their road to feeling better by giving their diet a makeover. And I know a large number of people want to shed a few pounds after an indulgent holiday season. And while I am in favor of being in tune with your nutrition, I am very wary of this thing called dieting. Diets can lead to a fast and furious feeling of deprivation. Not a healthy, happy place to be at all! So I like to find a happy medium. Setting goals, while staying in tune to the needs of my body. If I want a cookie, dammit I will have a cookie. Or two. I understand the temptation to deprive yourself for what may seem like a short period of time to lose weight at a fast pace. But experts say that weight that is lost at a slow rate tends to stay off more permanently. Those quickie losses often creep right back on.

Today's post.. So to keep you from the dry and dreary desert of deprivation, today's post offers fifteen healthy treat recipes. Sweet treats to keep your healthy eating plans on track.

Inspired to try vegan this year? My plant-based vegan diet has brought me so much happiness, peace and wellness in my life. So veg-curious people, feel free to browse around and get inspired to try vegan this month and beyond! Another smart move.. start a smoothie habit this year with my book 365 Vegan Smoothies, on Amazon!

15 Healthy Treats to Keep You on Track!

1. Chocolate-Peanut Butter Banana Bites (recipe at bottom of post) - grab one or a few from the freezer to stomp out a sweet tooth. Healthy banana, dark chocolate and coconut oil keeps you on track!

2. Secret Ingredient Vanilla Shake - one of my favorite super healthy shake recipes. Vanilla ice cream flavor and texture - without the guilt .. or dairy!

3. Sweet Citrus Avocado Dreamboat - yup, a green smoothie packed with sweet fruit flavors like citrus, grapes, pear, apple, banana, mango, pineapple, kiwi and more is a GREAT way to satisfy a sweet tooth while sipping on some serious superfood! Talk about a guilt-free treat!

4. Fresh Blueberry Toasted Coconut Chia Seed Pudding - omega-3 fatty acid-rich chia seeds make the most delicious pudding ever. Add some fresh fruit for a bonus healthy treat boost.

5. Chewy Peanut Butter Oat Granola Bars - grabbing a sweet and crunchy granola bar is a great way to energize your body and beat a sweet tooth craving.

6. Blackberry Acai Sorbet - creamy, frosty and packed with healthy antioxidants, this cool treat is one to try!

7. Chocolate Coconut Oil Spread for toast - chocolate craving? Toast some bread and slather on a spoonful of this luscious, healthy chocolate spread! Craving satisfied.

8. Golden Caramel Coconut Popcorn Bites - these crunchy golden popcorn bites are a fun sweet treat when you crave a sweet crunch. Popcorn keeps these flavors light and crunchy.

9. Oat-Chocolate Chip Pumpkin Cookies - when you simply need to have a cookie, grab one of these mini pumpkin cookies. Small and sweet with chocolate chips in every nibble. Just one should do the trick.

10. Grilled Banana + Chocolate Almond Butter Bagels or toast -- a healthy banana can easily transform into a dessert-approved treat simply by grilling it in a hot skillet! Layer it over top chocolate almond butter and toast for a yummy snack that satisfies.

11. Easy Peanut Butter Pudding - easy and delish. This protein-packed, five ingredient pudding is a favorite in our house!

12. Chocolate-Covered Animal Crackers - these light and fun little crackers are easy to make. Store them in the fridge or freezer and grab one or two when a craving hits.

13. Peanut Butter Cacao-Coconut Oil Superfood Fudge Bars - Just a tiny cube of this coconut oil fudge should satisfy a sweet craving. Hemp seeds add some superfood power!

14. Easy Silky Chocolate Pudding - silky chocolate pudding, guilt free! So healthy, you could eat it for breakfast.

15. Vegan Aztec Hot Cocoa - cocoa to the rescue! The go-to wintertime sweet treat savior. Go light on the soy whip to keep things lower in calories.

And today's new recipe!..

Chocolate-Peanut Butter Banana Bites
3 servings, 2-3 bites per serving

1 large ripe banana, thickly sliced
1 teaspoon rolled oats

chocolate dip:
1 teaspoon peanut butter, sweetened
1 tablespoon vegan chocolate chips
1 tablespoon extra virgin coconut oil

Directions:

1. Slice your banana and place them on a plate in the freezer while you melt your chocolate.
2. Add the peanut butter, coconut oil, chocolate chips to a small bowl and microwave for fifteen seconds. Stir briskly, then microwave for another fifteen seconds. Stir briskly again. If after a minute of stirring there are still chocolate chip clumps, microwave for ten more seconds.
3. Fold the oats into the chocolate dip.
4. Lay some parchment paper on a baking sheet.
5. Pull the bananas from the freezer and roll them one at a time in the chocolate dip, coating all sides. Then lay flat on the parchment paper. Continue until all the bites are covered.
6. Place bites in the freezer to fully chill, store in freezer, and eat within a few days for best flavor.

nutrition estimate per serving:

Bonus game. Two more from my personal collection of sweet smoothie favorites.. turmeric and matcha! Matcha green tea powder is such a Zen-ergizing ingredient, when blended into a creamy, frosty sweet shake it provides a sweet and cravable pick-me-up. And my turmeric golden wellness shake is sweet and sassy, I LOVE it.

16. Secret Ingredient Matcha Shake - I often enjoy a matcha shake for lunch or breakfast, but it is so sweet and lovely it could easily be a sweet tooth break in your afternoon.

Golden Wellness Turmeric Shake - frosty and sweet with a spiced flavor you have to taste to understand. Turmeric is a superfood spice to add to your diet in 2014.

White Velvet Soup

January 8, 2014 by Kathy Patalsky 9 Comments

p3-2013_12_19_dec-17_9999_51white-yam-soup.jpg


White sweet potatoes. I am obsessed. I love them. They are the ultimate in sticky-sweet baked yam perfection.

And this white sweet potato soup, aka White Velvet Soup, is just way too easy to make. I have already made it twice, and I am plotting when to make it again. Sweet potato lovers, this is a dreamboat of a soup..

Hello beautiful..

So deliciously simple.

Grab a spoon.

This silky white sweet potato soup is a new comfort food favorite. I like to serve it as a hearty, warming, cozy soup starter alongside something light like a grain and veggie salad. The soup includes sweet baked yams, creamy white beans, a hint of dreamy coconut oil and maple syrup and simple salt and pepper.

White Velvet Soup
vegan, 2 servings

1 large white sweet potato or two small, Japanese sweet potato (white flesh, purple skin)
1 cup canned white beans, drained and rinsed
1 teaspoon virgin coconut oil, melted (or a splash of coconut milk)
1 garlic clove, raw or roasted
¼ teaspoon pink salt
1-2 teaspoon maple syrup, grade B
¼ teaspoon black pepper
Liquid: You can use all non-dairy milk for ultra-creamy or do a mixture of non-dairy milk and broth for a thinner texture.
1 cup+ unsweetened or plain almond or soy milk OR broth/non-dairy milk mixture, add liquid to blender warmed.

Optional: Spice things up! Add in cinnamon, ginger powder, cayenne or turmeric to add some spice.

Directions:

1. Preheat oven to 415 degrees. Wash and scrub potato and poke a few holes in the top of the potato to vent steam.
2. Bake the potato right on the oven rack for at least 50-60 minutes. Longer if needed. You want to potato skin to practically fall off the potato when it is fully baked. The flesh should be sticky sweet, soft and velvet-y.
3. Warm the liquid you will be using, either in a mug in the microwave or on the stovetop. Warm liquid means the soup will be warm enough to simply pour and serve if you'd like. You can also drain and rinse your cooked white beans and warm your coconut oil.
4. Remove potato skin and discard. Add potato flesh (retain a few diced cubes as garnish if desired) and all soup ingredients to a high speed blender. Blend from low to high until silky smooth. You can now add in more liquid if you'd like a thinner soup. I like my soup very thick and creamy, but you can choose your favorite texture.
4. Season to taste and pour into bowls to serve. Garnish optional.

Nutritional info estimate - per serving (2 total)
calories: 341kcal fat: 3g carbs: 71g protein: 14g fiber: 13g

Lentil Cashew Cakes

January 6, 2014 by Kathy Patalsky 16 Comments

pp-2014_01_03_lentil-cakes_9999_39lentil-cakes.jpg


OK, so these may look like basic brown patties. But trust me, they taste amazing! Much more amazing that they appear at first glance.

These toasty little Lentil Cashew Cakes are perfect as a protein-rich appetizer or entree. You could even use them as a veggie burger patty. Rich creamy mashed lentils combine with nutty cashews and cheezy nutritional yeast, an accent of pepper, garlic and citrus zest to lighten things up.

Holiday-ing. Wow what a super two holiday-ish weeks this has been. The beaches here in LA were simply PACKED with tourists these past few days and walking along the sandy beach walkway, or attempting to ride our bikes, felt more like walking through Times Square right before 8PM when the 'show crowd' swarms in. It felt more like summer than January with the sunny temperatures and clear blue sky, and trust me, I am quite appreciative of this weather! Especially when I hear about all my friends out east being showered in cold white snowflakes. But seriously snow bunnies, I do miss those snow days. Embrace them with hot cocoa and cozy days cocooned inside.

Vacay. Even a few days away from home gave me a very nice mental break from the normal routine. It is so invigorating how a change of scenery can refresh your mind and really re-inspire your outlook on work and life. And since this holiday has been still a rough time getting over the absence of miss Nellycat, we we happy to get away a bit. We took a quickie trip to Vegas after Christmas to see the opening night of the Britney Spears concert (super fun) and staying at The Wynn is always a vegan dream since there are vegan options everywhere. A few snaps from my holiday-ing..

Hello chill time, Sleepytime tea please..

New hotel room glee..

Why I adore The Wynn.. a VEGAN tab on the in-room dining menu

Christmas dinner dress, we went to Sinatra - it was fantastic. Butternut squash soup was pure bliss. The vegan gnochi were amazing too..

Vegan Chopped Salad Poolside at The Wynn .. sunny outdoor dining in December:

Vegan aramcini (fried risotto balls!) from The Wynn's Lakeside restaurant (amazing!)

Vegan waffle at The Wynn (I crave this fluffy, flaky waffle! I order with a soy latte and giant fresh fruit platter)

The Britney..

In the pit at the Britney concert, surrounded by stranger since my husband wanted an actual seat instead of standing (dancing!) the whole show 🙂 It was a blast.

More Britney..

And of course LA's version of snow, thick beach fog! Paired with a 3.0 earthquake this day. (I'll take it!)

So of course I started off 2014 some New Year smoothies, but I am also in love with lentils this year. And forbidden rice. And golden turmeric foods of all sorts. And kale (always!)

These easy lentil cakes are delicious and filling. Perfect alongside a big salad or a big bowl of winter-y greens, like my fave miso-mustard chard salad!

Lentil Cashew Cakes
vegan, makes 5 cakes

1 ½ cups canned lentils, drained and rinsed
1 cup cashews, processed into crumbly powder
⅓ cup nutritional yeast
¼ teaspoon black pepper
½ teaspoon salt
½ cup white onion, diced
⅛ teaspoon garlic powder
a few pinches of orange zest
optional: 1 teaspoon turmeric - add to cake mixture if desired

garnish:
¼ teaspoon orange zest*
orange slices to garnish
2-4 teaspoon virgin coconut oil to sauté cakes

*I used a satsuma tangerine

Directions:

1. Drain and rinse the canned lentils and empty into a large mixing bowl. Using a large fork, mash the lentils until they are a wet, silky, thick mixture.
2. Add in the processed cashews, nutritional yeast and spices. Fold until the mixture thickens considerably.
3. Warm a skillet over medium-high heat and add 2 teaspoons of coconut oil.
4. Form the mixture into cakes, about three inches wide and a quarter to a half inch thick. Add the cakes to the hot pan and cook 1-2 minutes on each side. Add a few pinches of the orange zest over top the cakes just before flipping. Since the ingredients in the cakes are already cooked, you mostly just want to crisp the outsides and warm the cakes through. Note: Yes you could bake these cakes, at 350 degrees for about twenty minutes.
5. Remove cakes from skillet and allow to cool slightly (to help the cakes bind a bit) before serving. Serve warm with a generous sprinkle of orange zest over top. Orange slices to garnish.

2014 Golden Wellness Smoothie

January 1, 2014 by Kathy Patalsky 25 Comments

2013_12_31_golden-smoothie_9999_30golden-smoothie.jpg


Wellness trend for 2014: Gold. Calling it now.

While everyone is sipping on green smoothies today (and cheers to that) I just blended up a different sort of smoothie to start this new year. My Golden Wellness Smoothie is a mellow, spiced, sweet citrus blend. A new fave recipe I hope you try! Lets share a golden smoothie toast to start a healthy, happy 2014..

Green was very in last year. Green juice. Green smoothies and more. And yes, green will always be "in" because leafy greens are rich in nutrients and wellness-infused properties. Kale, spinach, chard, arugula, broccoli, celery and more are all superfoods last year and this year. But I have a new trend for 2014, a prediction, lets start it going right now!..

GOLD. Golden wellness flavors and colors for this new year.

Golden carrots rich in vitamin A.
Golden oranges rich in vitamin C, potassium, folate and fiber.
Golden pineapple rich in bromelain, fiber and vitamin C.
Golden sweet potatoes rich in vitamins A and C, fiber and potassium.

And my new favorite gold of mine.. the spice turmeric. Also the secret wellness ingredient in today's smoothie recipe. I have been using turmeric a lot lately in savory dishes and now my smoothies and even hot beverages. Today's sweet and delicious citrus smoothie has healthy turmeric infused in each frosty golden sip.

And if you have any hesitation about a turmeric-filled smoothie, just give it a try! The sweetness and spices balance out the savory turmeric flavor in a unique and cravable way. This is one of my favorite new smoothie recipes and I hope you love it too.

Turmeric contains manganese, iron and vitamin B6 - and more. How much? Well, one tablespoon of turmeric has 16% RDA or iron, which is pretty good but I am more interested in the off-label properties of turmeric. Much of the wellness benefit to turmeric, for me, is the healing and anti inflammatory properties - variables that do not come up on a nutrient label.

Healing turmeric via ABC News: "Turmeric has been used for centuries to treat wounds, infections and other ailments. It's long been believed that curcumin -- the main ingredient in turmeric -- is responsible for its healing power, but it hasn't been known how curcumin works inside the body, explained researcher Ayyalusamy Ramamoorthy and colleagues. They used solid-state NMR spectroscopy to examine molecules of curcumin and found that they act like a "biochemical disciplinarian." The molecules insert themselves into cell membranes and make the membranes more stable and orderly in a way that boosts cells' resistance to infection by disease-causing microbes."

And this: 25 Reasons Why Turmeric Can Heal You - MindBodyGreen.

Cheers to a year filled with dreams, goals, love and light. Stop wondering what 2014 will bring to you and start dreaming about what you want to bring to it. Write down your wishes, keep them in a place you see them everyday, and who knows, they just may come true.

Golden New Year Smoothie
1 serving

1 large orange, frozen*
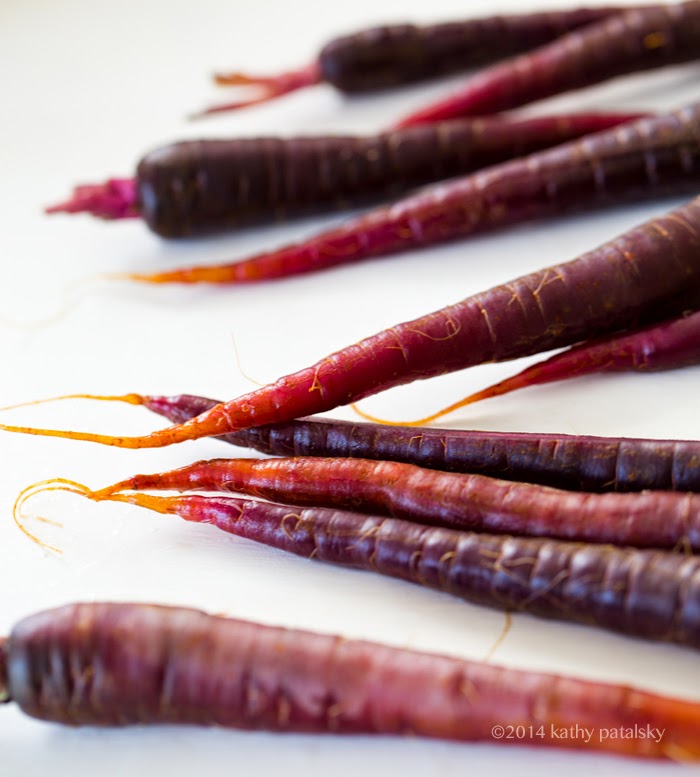
1 cup almond milk, vanilla (homemade)
1 banana, fresh or frozen**
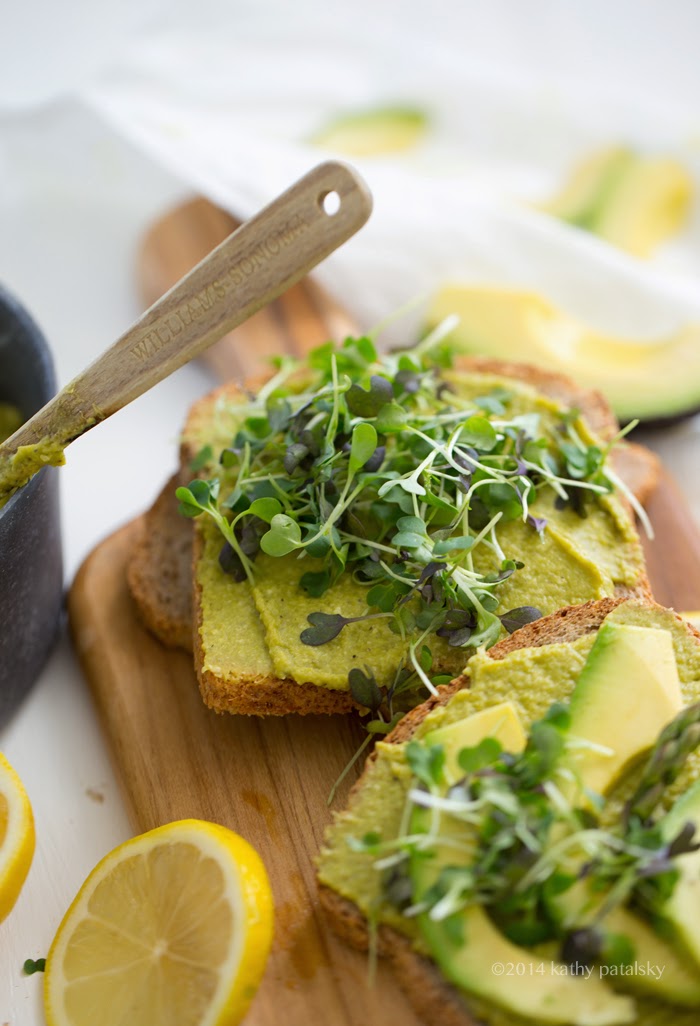
½ teaspoon maple or agave syrup (optional)
1 teaspoon turmeric powder***
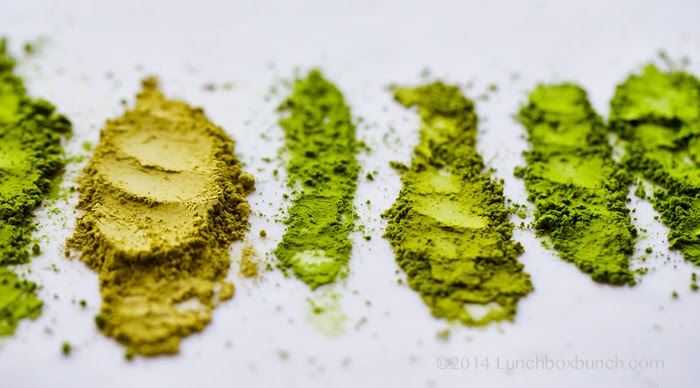
a few pinches of cinnamon
a pinch of cayenne

Directions: Blend from low to high until smooth and frosty. A high-speed blender is needed to obtain a smooth blend with the fibrous orange. Adjust flavor: Add in more turmeric for a brighter yellow blend. Add in more banana, maple or agave syrup if you want things sweeter. If you do not have a high speed blender, you can substitute the whole orange with ⅓ cup orange juice and a handful or ice - but the texture will be thinned.

Notes:

* You will need to freeze your orange ahead of time. I peel a bunch of very ripe and juicy oranges, quarter into large segments and freeze. Then I add them to citrus smoothies for some sweet frosty flavor - WITH the fiber - unlike straight up orange juice would provide.
** For a thicker, frostier shake-like blend use a frozen banana, for a thinner blend, use fresh. Just make sure it is very ripe! Smoothies need very ripe bananas, an under ripe banana can ruin a smoothie.
*** Build up to adding even more turmeric per smoothie! Start with ¾-1 teaspoon if you are new to the flavor. Then try one full teaspoon, then eventually two if you'd like!

Want 365 of vegan smoothies in 2014? Grab my book over at Amazon

Best of 2013: Top 25 Posts on HHL!

December 25, 2013 by Kathy Patalsky Leave a Comment

t1-2013-besthhl.jpg


Lets take a look at my 2013 memorable moments and HHL's Top 25 Posts of 2013..

Someone once told me that once you hit your thirties, everything in life speeds up. I will be 33 in January and I am so proud of every single year I have spent in this world. And 2013 was a year where everything DID seem to speed up for me. For me it was a memorable year for some very happy reasons and some sad ones as well. But in between all the craziness of life, for better or worse, I was always in the kitchen. Always ready and eager to whip up healthy, happy vegan dishes to share with you guys. I am so thankful and happy for all the comfort food meals, homemade dinners, wellness smoothies and lunches and bright and sunny brunches that 2013 brought me.

Food is intertwined in life, so why not make it amazing, uplifting, healing, energizing and happy.

So as I look at my year in review, I always love to look at the food I created and enjoyed too!

Memorable Moments of 2013:

* My Book. My First Book was Published! July 2nd 2013 365 Vegan Smoothies - order your copy now for a healthy smoothie-filled New Year and 2014! And thank you to everyone who has purchased my book, my publisher Avery, my agent Holly and every blog reader who has been so supportive of my book release. I am SO very proud of it and so glad you guys love it!

* FV. My other site FindingVegan.com had a serious boom in popularity. It has reached over 92,000 likes on facebook and has become a go-to spot for vegan recipe sharing online. I am so proud and happy to have started this amazing community of vegan bloggers and vegan curious recipe seekers.

* Nelly. As you all know, I am still getting over the very sad loss of my best friend and best kitty, Nelly. I am still healing. The wounds are still quite tender, as I realized last night in church when I couldn't help but start crying when all my favorite Christmas songs were sang. O Holy Night, Silent Night and Hallelujah, and suddenly I was tasting tears. It struck me by surprise and also reminded me that my heart has been forever changed. And now it is just up to me to choose a path of joy, as a tribute to sweet Nelly. But tears are a part of that. I chatted about that in this post. My husband and I have been avoiding a "normal" Christmas this year in exchange for a low key holiday. We even made a truce that we wouldn't buy any wrapped presents this year. Instead we have donated to a few of my favorite animal charities, in Nelly's name.

I was very hesitant at first to share this journey and experience online, but sure enough, sharing this experience has been a blessing in disguise. The conversation we have started about pet cancer awareness and pet loss is one I will hold with my forever. It has truly forever changed the way I live each day in this world, I want to thank you all for being there for me and sharing your stories with me.

* 2014! Onto the joy! Seriously guys. I am so excited about 2014. So many exciting things await me in 2014, I am SO looking forward to sharing them all with you as they come. Just you wait and see! Thank you for reading my blog, and I hope you visit me here on HHL in 2014 as we continue to share and celebrate healthy, happy vegan recipes together. xo

So with a grand drum roll, the 2013 most visited posts via google analytics are...

Top 25 Post from 2013

1. Five Step Raw Kale Salad - Yup, kale takes the lead spot. Is anyone surprised? Not me! Kale for the win..

2. BBQ Peanut Sweet Potato Burgers - This feisty sweet potato burger is a go-to comfort meal.

3. My Big Guide of Vegan Protein Powders - For all those smoothies you will be blending in 2014... add some vegan protein!

4. Cookie Tips + My Best Cookie Recipe - Oh goodness these chocolate chip cookies make me swoon!

5. 33 Potluck Perfect Dishes - I guess you guys like to party... and share food when you do! Good for you. Good food was meant to be shared.

6. Warm & Chewy Peanut Butter Cookies - Peanut butter cookies, a favorite of all, gone vegan.

7. Rustic Kale , Rice & Tomato Comfort Stew - This comfort soup was one of my favorites of the year. Tomato rice soup... yum.

8. Fall Oatmeal Pumpkin Bread Loaf - Pumpkin lovers, dive into this cozy loaf.

9. Creamy Baked Potato Soup - My husband's favorite. Creamy soup with loaded baked potato flavor. Gone vegan!

10. Vegan Carrot Cake with Cream Cheese Frosting, Gluten-Free - Healthy carrot cake. Breakfast approved in my book!

11. Chocolate Avocado Mousse - Creamy chocolate meets silky avocado.

12. Veggie-Loaded Avocado White Bean Salad - I adore this lunch-perfect open-faced sandwich recipe! A must try..
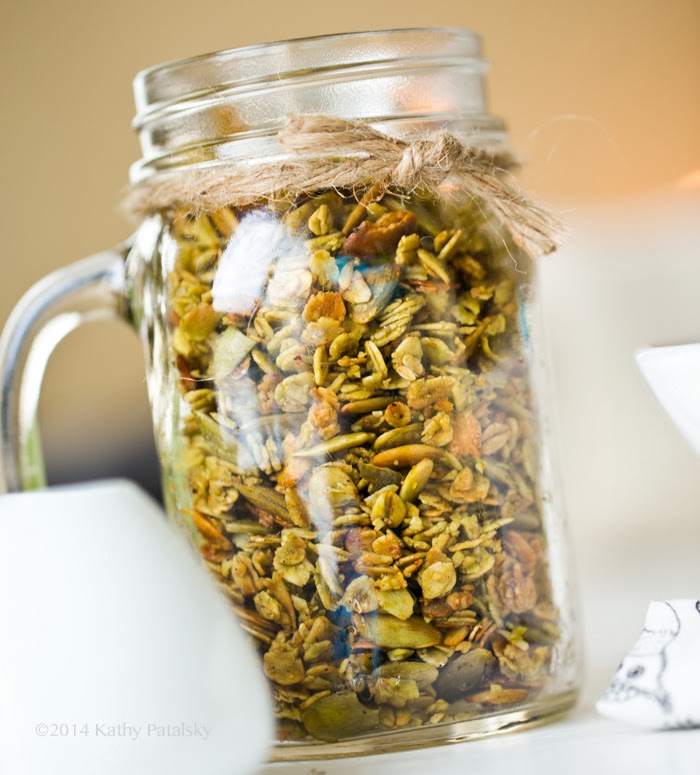
13. Lemon Tea: What I Drink Every Morning - Yup, every morning..
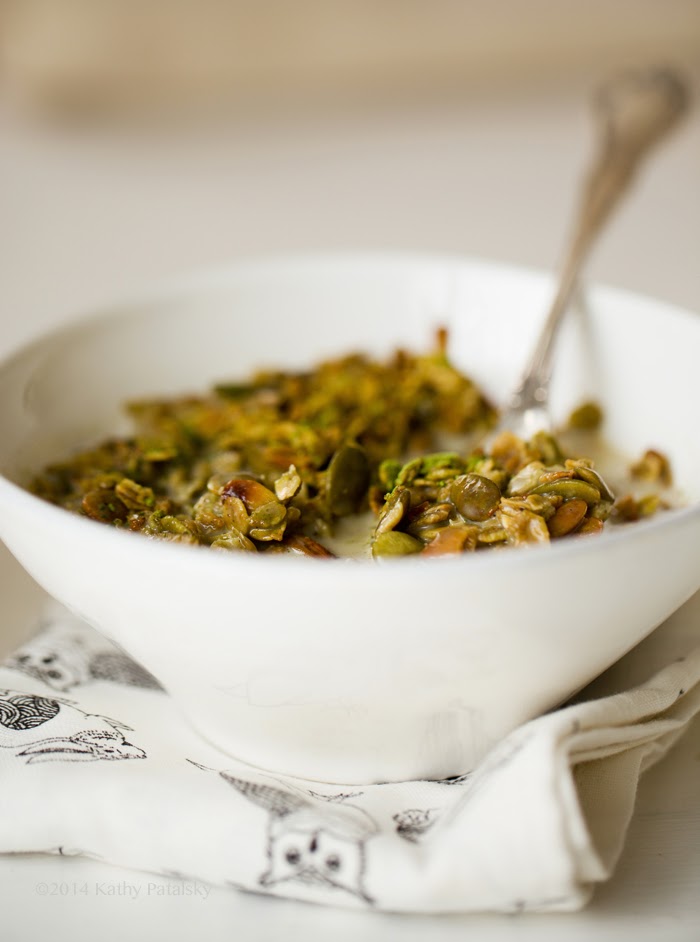
14. Green Tower Power Salad - This salad will win you over I am sure of it! I meal on a plate, or bowl!

15. Spaghetti & No-Meatballs - The classic gone vegan.

16. Hot Pumpkin Mug - Oh I adore this cozy golden mug! Try it!

17. 15 Go-To Vegan Salad Dressing Recipes - Your greens need some fantastic dressing on top.. here are plenty of go-to recipes!

18. Creamy Cashew Pot Pie - LOVE this one.. comfort food.

19. Sweet Citrus Avocado Dreamboat Green Smoothie - Green smoothie time. Sweet citrus and greens.

20. Avocado Pesto Pasta - Pesto with avocado and plenty of veggies built in.

21. Secret-Ingredient Healthy Vanilla Shake This secret ingredient will make all your shakes frostier!

22. Homemade Almond Milk: 3 Recipes - If you do one thing in 2014, make your own almond milk! A must-try for every person, like, ever.

23. Peanut Butter Chocolate Cupcakes - Dessert perfection to me. Chocolate meets peanut butter via a cupcake.

24. 6 Summer Slaws to Try - Some sassy, slaws to try. Crunchy salad, zesty flavors.

25. Double Coconut Blueberry Muffins - And these. Muffins. Blueberry muffins. With gobs of coconut. Bliss.

Iced Gingerbread Muffins

December 15, 2013 by Kathy Patalsky 22 Comments

p-1-2013_12_14_gingerbread_9999_7gingerbread-muffins.jpg


Spicy, dark brown, fluffy, cinnamon and molasses-infused vegan gingerbread has been my baking obsession the past week. And December is pretty much the one month you can fully obsess about gingerbread and not blink an eye. So grab some blackstrap molasses and lets start some seriously holiday-yummy aromas brewing in your kitchen!..

This gingerbread bakes up fluffy and spiced. A light crinkle of icing on top.

The secret ingredients to gingerbread: molasses and of course ginger. I like fresh ginger, but you can use ginger powder if need be.

Jazz them up:
* Add fresh or dried cranberries
* Add a thicker vanilla bean frosting
* Add chopped pecans or walnuts
* Add chocolate chips!

Iced Gingerbread Muffins
vegan, makes about 12

dry:
1 ½ cups flour (any variety)
¼ teaspoon cinnamon
2 teaspoon ground flax seeds
a few pinches cayenne
2 teaspoon baking powder
¼ teaspoon salt

liquid:
½ cup silken tofu, blended
⅓ cup non-dairy milk
¼ cup blackstrap molasses
¼ cup maple syrup
¼ cup sugar (or more maple)
¼ cup extra virgin coconut oil, melted
¼ cup Earth Balance vegan buttery spread
½ teaspoon vanilla extract
1 tablespoon fresh orange juice
¼ teaspoon fresh orange zest
¾ teaspoon freshly grated ginger (or ginger powder)

Vanilla Glaze:
½ cup powdered sugar, organic
1-2 tablespoon warm water
a few drops vanilla extract

Directions:

1. Preheat oven to 400 degrees.
2. Combine all dry ingredients in alarge mixing bowl.
3. Blend the silken tofu in a blender until smooth. Blend in the remaining liquid ingredients.
4. Fold the liquid into the dry mixture until smooth.
5. Line or grease muffin tins and fill with batter.
6. Fill muffin tins and bake at 400 for five minutes. Then reduce heat to 350 and bake for another 12-15 minutes or until the tops are fluffy but set and starting to shine from baking.
7. Whisk the glaze together until a thickened mixture forms, pour a small spoonful over each muffin. Serve warm.

Seasonal Sips: Mulled Wine & Kathy's Hot Toddy. Cheers!

December 12, 2013 by Kathy Patalsky 9 Comments

P1-2013_12_11_dec-11_9999_5holiday-sips.jpg


My two favorite seasonal sips of the alcohol-infused variety? Mulled Wine and my Spicy Lemon Hot Toddy! Get both recipes, and warm up tonight!..

A few basic mulling ingredients and you are good to go. Whole cloves, cinnamon sticks and star of anise..

I had heard of "Mulled Wine" before. But it wasn't until I really started thinking about the actual concept of this seasonal sip last week that I felt the immediate need to research and try this out for myself. Warm sangria? Sign me up!

I read a few blogs on mulled wine, like this one by DomesticateME, and I fell in love with all the tales of sipping mulled wine in a cozy Parisian cafe during the holidays as snow fell on the champs de elysees outside. Yes please. So I tried it and loved it. My first try at Mulled Wine, I just winged the recipe and had success. The concept is pretty easy, and there is no need for perfection in your recipe, if you have whole cloves, cinnamon, star of anise and some sort of fruity accents you are good to go.

This Mulled Wine recipe compliments my other seasonal favorite: a Hot Toddy! A warmed sip infused with lemon, brandy, spices and maple.

And ps, if you do not like the "alcohol" part you can simply substitute the wine or brandy with apple cider or more citrus juice. And adjust the sweetener.

After the recipes, cozy up by the fire for a little holiday story...

So. These are my two most favorite warm beverages for the holiday season.

Mulled wine is a spiced delight that reminds me of warm sangria. Apples, citrus, cinnamon, cloves and star of anise.

My Hot Toddy is bright and tangy with brandy, maple, lemon, orange, cinnamon, cloves, star of anise and some ginger or black tea to finish things off.

Warm up to one tonight!

Kathy's Mulled Wine
2 servings

16 ounces leftover red wine (you do not need too anything fancy, a $10-$15 bottle is perfect)
½ apple, diced
1 orange, juiced
1 orange, sliced
½ teaspoon orange zest
3-4 whole cloves
1 star of anise
1 cinnamon stick
2 tablespoon maple syrup, grade B
1-2 shots of brandy or cognac
for a lighter/sweeter sip, add ½ cup apple cider or pomegranate juice

Directions: Simmer all ingredients in a sauce pot on the stove for about 15 minutes. Serve warm.

Kathy's Spicy Lemon Mulled Hot Toddy
2 servings

1 tea bag, I like black tea when i do not mind the caffeine or ginger or chamomile tea when this is an evening sip
16 ounces water
2 shots brandy or cognac
2 tablespoon maple syrup, grade B
2 small lemons or 1 large, juiced + pinch of lemon zest
½ teaspoon fresh ginger, grated
pinch of cayenne
3-4 cloves
1 star of anise
1 cinnamon stick
optional: for a sweeter citrus sip, substitute half the water with fresh orange juice or apple cider (you may want to lessen the maple syrup if you do this, depending on how sweet you'd like it).

Directions: Simmer in a sauce pot on the stove for 10-5 minutes. Serve by pouring through a mesh strainer.

Now that you have a cozy sip in hand, a little story by the virtual roaring fireplace..

I have a funny story. A cinnamon stick story. Feel free to use it at holiday parties if you'd like. It is a quickie, kinda really silly and simple, but I love it.

A few years ago I spent all afternoon in the kitchen baking up a luscious batch of holiday season vegan cinnamon rolls. It was a frosty December weekend day so my husband was in the other room eagerly awaiting his taste test. So once the rolls were frosted and fluffy, I loaded one of the warm steamy rolls onto a plate. I was trying to be all crafty and elegant, so I grated some fresh cinnamon over top and left the cinnamon stick on the side of the plate as a garnish.

I glided into the living room holding the roll high in the air as if it were a .. well, as if it were a freshly baked cinnamon roll! I think all freshly baked cinnamon rolls deserve a proud entrance to a room. I presented the roll to my husband and he smiled wide as he dove in fork first. I glided (yes I always glide when I bake cinnamon rolls), glided back into the kitchen and grabbed myself a roll, plopped it on a plate, grabbed a shiny fork and floated back to devour my roll as well. But just as I entered the living room, this was in like slow motion now, I spotted my husband picking up the cinnamon stick and sticking it right in the side of his mouth and in one big chomp, he bit down on the cinnamon stick. The rock hard tree bark swirl must have confused him because he, again, bit down on the stick. My eyes were just about to pop out of my head as I froze in amazement watching him try to eat the cinnamon stick garnish. Finally I unlocked my gaze and shouted, "Hunny! Don't eat that!"

He paused, looked at me with a blank stare and then back at the mangled, cinnamon stick

"You didn't swallow that did you?!" I asked.

"Um, no." He said spitting out a few shards of bark.

"That darling is a cinnamon stick. Garnish. You don't eat that." I spoke in my 'talking to kids' voice. He finally came out of his blank stare and realized what he did. After much interrogation on my part as to why he would bite into a cinnamon stick, he eloquently reasoned that he thought the cinnamon stick was one of those chocolate twirl garnishes that you find on top of desserts at fancy restaurants. Ok, ok, I can buy that.

The scene ended with me in a ball on the floor, rolling around in laughter.

I remembered this story yesterday when I served him a glass of mulled wine with a cinnamon stick garnish. He laughed to me, "I do not eat this, right?"

🙂

Craving cinna buns now? Here is my recipe! Vegan Cinnamon Buns with Ginger Cream Cheese Frosting

Also watch out for a cinnamon stick to garnish Mrs Claus's Sip:

DIY Holiday Gifts: Vegan Hot Chocolate. Aztec Style.

December 10, 2013 by Kathy Patalsky 10 Comments

p2-2013_12_05_gifts-holiday-cocoa_9999_8cocoa-gift.jpg


I am loving this easy DIY holiday gift idea: Hot Cocoa with Marshmallows. Vegan style...

Such a simple idea and seriously, who doesn't love hot cocoa and marshmallows? I used Sweet & Sara mini mallows. You can buy them online. Or you can skip the marshmallow part too. Hot cocoa is a very worthy holiday gift, so whip up a long line of cocoa jars and your holiday gifting is done! And super delicious.

Vegan Marshmallows! (These should be kept in fridge FYI) *The marshmallows should be good for a half a day or so, but tell your giftees to store the cocoa jar in the fridge if you use Sweet & Sara mallows. Dandies seem to be fine stored at room temp, but they can also keep longer in the fridge.

Love these minimalist cards I found at Whole Foods..

Glass jars. You could use basic mason jars or the easy seal variety in my photos. I found these jars at my local craft store for a few bucks each.

Boost it: If you want to boost this gift a bit, place the jar in a pretty gift basket or box with the following:

* extra vegan marshmallows (Dandies or Sweet and Sara)
* vegan chocolate bar(s)
* vegan graham crackers (smores + cocoa!)
* super soft socks
OR
* A pretty jar or popping corn + jar or coconut oil with a recipe for chili-cinnamon popcorn .. also yummy with cocoa

..instant cozy night. You could even toss in your favorite DVD for your movie lover giftees. Or an itunes gift card.

DIY Vegan Aztec Hot Cocoa
8-10 servings - if filling multiple jars you should make a larger batch, depending on your jar size

¾ - 1 cup organic vegan sugar
1 cup cacao powder
½ - 1 teaspoon cinnamon
⅛ teaspoon pink salt
⅛ teaspoon cayenne
½ vanilla bean, sliced into two pieces
optional: 1 teaspoon mesquite powder or maca powder (or both!)
optional: vegan mini marshmallows - buy them at Whole Foods (or another store) or online.

Directions:

1. Add all the ingredients, except the marshmallows and vanilla bean to a large mixing bowl. Toss well. Use a sifter to remove any clumpy cocoa bits. Fold in one of the vanilla bean pieces.

2. Pour cocoa mix in serving or gift jars. Top with optional marshmallows and another vanilla bean slice.

To serve: Use 2-3 tablespoon of cocoa mix for every cup of non-dairy milk.

Also check out my DIY Winter Wonderland Spa Day + gift ideas..

Sugar Plum Citrus-Cranberry Sparkle Muffins (GF, vegan)

December 8, 2013 by Kathy Patalsky 11 Comments

2013_12_02_salads-veggie_9999_230cranberry_edited-1.jpg


Add some healthy sparkle to your holiday season with these Sugar Plum Citrus-Cranberry Sparkle Muffins. They are vegan, gluten free and tofu-infused! Made using oat flour, these tender, sassy-sweet muffins are filled with tart cranberry, orange-spice flavor in every sweet bite. Grab a bag of fresh cranberries and make these festive little gems..

Leftover. Berries. I bought too many fresh cranberry bags for Thanksgiving. So instead of tossing them in my crowded freezer, I made these! I love this easy, healthy way to use up fresh cranberries.

These muffins have a very unique texture since they have so much silken tofu in the batter. They fluffy on the edges and top and kind of like a sponge cake inside. I loved them warmed up the next day with a steamy mug of tea.

Add Nuts. You could toss in some chopped walnuts or pecans to add a nutty crunch to these muffins too!

Each muffin is around 170 calories. (nutrition estimate below)

Sugar Plum Cranberry Sparkle Muffins
vegan, makes 12 muffins

¾ cup agave syrup or vegan sugar
1 ¾ cups oat flour (about 2 cups rolled oats, processed in food processor or Vitamix)
12 ounces silken tofu (room temperature)
½ teaspoon salt
½ teaspoon vanilla extract
12 ounces fresh cranberries (one standard bag)
1 tablespoon baking powder
1 teaspoon cinnamon
1 teaspoon orange juice + 1 teaspoon orange zest
2 tablespoon freshly ground flax seeds
3 tablespoon melted coconut oil
optional: a few dashes cayenne

crumbly sparkle topping: pinch of orange zest, vegan white sugar, rolled oats and ground flax on top of each muffin

Directions:

Preheat oven to 400 degrees

1. In a large soup pot, add the twelve ounces of cranberries and agave syrup (or sugar). Boil until the cranberries just start to burst, then remove from heat. Using a fork, lightly mash about half the berries, leaving the other half whole and soft. Set aside.

2. In a blender.. Blend tofu with vanilla extract, orange juice, flax seeds, coconut oil and 1 cup of the warmed/smashed cranberries.

3. In a large mixing bowl, blend the oat flour, cinnamon, salt, orange zest, baking powder and optional cayenne.

4. Pour the tofu mixture into the dry bowl and fold until combined. Fold in the remaining cranberries.

5. Grease or line a muffin tin. Fill muffin cups. Top each muffin with a sprinkle of sugar, orange zest, oats and ground flax.

6. Bake muffins for ten minutes at 400 degrees, then another ten minutes at 350.

Cool before serving, the tofu will make the insides quite soft and tender fresh from the oven.

Store in the fridge or freezer and reheat to serve.

Delicious with "cinnamon sugar"-vegan butter, aka maple syrup whipped with cinnamon and vegan buttery spread or coconut oil.

DIY Winter Wonderland Spa at Home. Wellness + Beauty.

December 6, 2013 by Kathy Patalsky 6 Comments

700-4-2013_12_03_beauty-break_9999_50beauty-break-spa.jpg


I think we can all agree that the holiday season is a time filled with stress, packed schedules, long to-do lists, hectic travel, prepping for company, primping for parties and loads of kitchen time for all the holiday baking and feasting. Twinkly lights and tired eyes. So this month, take a nice long hour or two for YOU. No one else. Just you. I promise after this yummy, aromatic, soothing, ahh-inducing spa sesh at home you will feel cleaner, smoother and less stressed than when you woke up. And your face and body skin will have a sparkly snowflake glow too. So dive into this snow bank and freshen up with a few of my favorite DIY beauty recipes for winter.

Get in the kitchen and prep a few non-food recipes for my DIY Winter Wonderland Spa at Home.

Three recipes in all! They smell so amazing you will truly want to lick you face. And it is OK if you do since the ingredients are all healthy kitchen ingredients you probably already have on hand! The sugar cookie scrub will leave you swooning... Let your beauty break start now!

Print this - you can also add this to homemade gift sets:

And to complete your natural hour of pampering, grab some fresh beet slices for "beet lipstick & blush" :)..

Three recipe blends below: peppermint, pumpkin and sugar cookie.

Sparkle Scrub before blending:

Totally gift-able too! Package all the ingredients in little jars and containers you can find at craft stores. The coconut oil and sugar scrubs can be placed in jars, but the pumpkin should be given in a can. Strip off the label and place you own crafty version. Or just do the coconut-sugar scrubs as your gift.

Lets begin! (follow below or on the printable card image above)

Bonus Tip - Coconut Oil:
Did you know that coconut oil makes a wonderful natural makeup remover? Yes! I now keep two jars of virgin coconut oil in the house. One for cooking and one for beauty. To remove makeup, just spread a small amount on the makeup and wipe away with a gentle/soft tissue or cloth.

So wipe off any makeup and have a au natural day - grab the coconut oil and lets begin.

Kathy's DIY Winter Wonderland Spa at Home

Grab these:
* virgin coconut oil - at room temp, soft and buttery
* organic brown sugar - coarse or fine crystals (if using coarse, allow the sugar to melt into pumpkin to soften a bit when mixing)
* organic white sugar - fine crystals
* cinnamon
* pure vanilla extract or real vanilla bean seeds
* unsweetened pumpkin puree (canned or boxed or homemade)
* agave or maple syrup
* peppermint essential oil (or eucalyptus essential oil)
* coarse sea salt
* towels & wash cloths
* 2 chamomile tea bags
* face oil - try argan oil

recipe 1: face/body

Vanilla Bean Sugar Cookie Sparkle Scrub

2 tablespoon coconut oil
2 tablespoon white sugar
3 drops real vanilla extract

recipe 2: face/body

Pumpkin Spice Brown Sugar Scrub/Mask

3 tablespoon pumpkin
2 tablespoon brown sugar
dash of cinnamon
1 ½ tablespoon agave
optional: 1 tablespoon coconut oil for a silkier scrub

recipe 3: feet

Salty & Nice Peppermint Foot Scrub

1 tablespoon salt
1 tablespoon white sugar
1 tablespoon coconut oil
3 drops peppermint extract

Prep:

* Fill three tiny bowls with the recipe ingredients above. No need to "stir" them just yet. Just toss ingredients in a bowl (1 pumpkin, 1 peppermint, 1 sugar cookie) and set aside until needed.
* Wet one washcloth, roll and place in the freezer.
* Boil a mug of water, soak chamomile tea for five minutes. Squeeze tea bag and remove. Cover mug and set aside. Place wet used tea bags on a plate and place in fridge.

Let the spahh-ing begin:

1. Fill bathtub with hot water, add 3-4 drops peppermint or eucalyptus oil and a handful of salt. You can use kitchen salt or even better, a giant scoop of epsom salts. Add any bubble bath if desired. Grab the peppermint scrub bowl and start polishing those toes and heels. Carefully climb into your hot peppermint bath and soak for ten minutes. Warning: coconut oil makes feet slippery! Use caution.

2. Step out of tub (carefully) and pat yourself dry with a towel. Grab the "pumpkin" bowl and start mixing the ingredients with a spoon to combine. Apply pumpkin. In a circular motion, scrub pumpkin spice sugar mask all over body and face. Yes this is a bit messy but thank goodness pumpkin easily dissolves in water so no drain clogging. Tip: Apply pumpkin in a closed shower so you do not get it all over your bathroom. Scrub scrub scrub into your skin for a few minutes. Apply an extra layer of the pumpkin as a mask to your face. Rinse pumpkin from body (not face) in the shower. Dry off. Allow the face mask to sit for another five minutes or longer. Go grab those chilled chamomile tea bags and place over your eyes. Wrap yourself in a robe or towel and chill somewhere cozy while you wait.

3. Step into another hot shower and wash the pumpkin off your face. For an extra energizing step: take a cold shower for one minute, a hot shower for one minute then repeat for five minutes. This gets the blood flowing!

4. The last scrub is vanilla-tastic! Apply the sugar cookie scrub all over your body from head to toes. You can even use this scrub on your face, just be very delicate when scrubbing. And make sure you are using fine crystal sugar for this one. Let the scrub sit on your skin for oa few minutes then lightly rinse off in a warm shower. You do not want to wash off the oils, just a light rinse.

5. Dry off with a towel, your skin should be silky smooth and smell like cookies, vanilla, pumpkin & spice. 🙂

6. Grab the chilled towel from the fridge and wipe down your face for a cooling burst of winter freezer frost. Pat eyes with cool cloth for de-puffing power.

7. Finish off by applying a few drops of face oil to your face for that snowflake winter glow. Argan oil is my new favorite face oil! You can now add any other beauty products you use at home. Apple cider vinegar is a cheap and easy toner!

8. Re-heat that chamomile tea you brewed, add lemon and optional sweetener, wrap yourself in something cozy and chill for as long as you'd like. No thinking (or cell phones) allowed. Or sip some matcha tea. Or minty hot cocoa. Your choice. This is your hour.

Oh and remember to breathe. Deeply and with intention. Feel the stress melt away and winter wonderland thoughts fill your calmed mind.

For extra sensory calming, take a deep breathe inhaling that peppermint or eucalyptus essential oil.

And again, be careful! That coconut oil makes thing slippery 🙂 But your skin will thank you.

Disclaimer: If you have sensitive skin proceed with caution and ask your dermatologist if these products are OK for your skin. Do a patch test of the scrubs on your arm before using all over or on your face. And obviously, all brands will vary. For best results use high quality extra virgin raw coconut oil and always use all natural spices, pumpkin and vanilla. Be aware of any food or skin allergies you may have, as with all beauty products.

DIY Holiday Gifts Round-Up.

December 5, 2013 by Kathy Patalsky 3 Comments

p1-GIFTS-DIY-xmas.jpg

All I want to do in these next few holiday days is crank up the holiday music, turn on all the twinkly lights, load some gingerbread in the oven, put on something super cozy (or super glittery!) and embrace some holiday time, hot cocoa in hand.

Sure it can be fun to do a little last minute holiday shopping, but it is also super fun to stay in, where it is warm, toasty and cozy, and get your crafty-self in gear whipping up homemade gifts made with love. Cocoa, granola, cookies and more. If you want to whip up some last minute DIY holiday gifts, here are six recipes and ideas to try!..

DIY Holiday Gifts Round-Up

1. Cookies
Everyone loves cookies and it is easy to whip up a big batch and wrap them up all pretty and nice for a few of your favorite people. I like to make my cookies extra special during the holidays by using a real vanilla bean in place of vanilla extract. Get that holiday cookie recipe here. And cookie baking tips here.

2. Cocoa
Everyone loves cocoa. And this recipe for my Spicy Aztec Vegan Hot Cocoa is super yummy! We finished out jar and I had to make another batch! You can customize your hot cocoa by adding vegan marshmallows, special spices and crafty cute cocoa labels made with tools from any craft store.

3. Spa Day at Home.
I love these beauty and wellness recipes for a Winter Wonderland Spa Day at home! Even if you do not give this gift to someone else, give yourself the gift of a few hours of spa wellness at home! And smell like a sugar cookie when you are all done 🙂

4. Granola
Holiday granola is easy to make in one big batch and you can hand out single servings to everyone on your holiday list, or fill a large glass jar as a granola-tastic holiday gift. Granola is easy to modify as well based on the nuts, seasoning and flavors you like or have on hand. If you have rolled oats, a sweetener, oil (coconut oil is my new granola favorite!) and a few spices and nuts - you can craft some granola at home!

5. Popcorn
Pop up a big batch of coconut oil popcorn, toss in some cozy spices and fill a few large glass jars or holiday baggies. You could even add an itunes gift card to your popcorn gift for a few movie rentals for your giftee.

6. Cookies-in-a-Jar (recipe below)
Take your favorite cookie recipe and turn it into a jar gift! Try the recipe below or your own..

Coconut-Spice Cookies in a Jar

layer these ingredients bottom to top:

1 ¼ cups oat flour (or other flour)
1 teaspoon ground flax seed
2 teaspoon baking powder
1 teaspoon cinnamon
½ teaspoon salt
2 tablespoon whole rolled oats
⅓ cup coconut, unsweetened
3 tablespoon walnuts, chopped - optional
½ cup dry sugar, organic
¼ cup brown sugar, organic
⅓ cup virgin coconut oil - add in a soft yet spoonable room temperature state
handful of vegan chocolate chips - optional

Add: card that says: cookie tittle and "keep at room temperature. Add ⅓ cup non-dairy milk + a spritz of lemon juice. Stir dough and bake at 350 for 12 minutes."

Bonus Holiday Gift #7:
Buy your giftee my book 365 Vegan Smoothies and get them started on the right foot for a healthy, happy 2014! Just think, a different smoothie for every day of 2014 awaits them, or you! Buy on Amazon

And if you want a vintage look down my blog-memory-lane. Check out my 12 Days of Vegan Treats from 2009!

Three Weeks.

December 5, 2013 by Kathy Patalsky 53 Comments

kathy-montage-nelly.jpg

Healthy. Happy. Life. Update. Taking a pause from yummy vegan recipes today. It has been three weeks since I wrote this post. Since Nelly lost her battle with cancer. And a few of you have asked how I am doing. So to continue this heart-filled conversation we have started about pet love and loss (thank you for sharing your own honest and emotional stories in the comments - I continue to read each and every one), I want to share my update..

First. Thank you. Thank you to everyone who continues to leave sweet and caring notes here on my blog about Nelly. I love that she will live forever through the pawprint she made here on HHL.

I have cherished the time I have taken to pause from work as well as my time now as I continue the work I love. Cooking, writing, photographing, laughing, creating, inspiring, being inspired. All things that make me happy. Work is so healing for me. So thank you for being on the other end of the work I love to do!

Dawn in Santa Monica. A new day. Pink sun-kissed clouds slowly clear for the rising sun:

My Three Weeks.

Nelly leaving. Nelly was a very special kitty to me. More special than any other pet I have ever had. So losing her was a moment in life I had been dreading ever since I first fell deeply in love with her sweet fuzzy paws and velveteen soft soul. I had no clue how I would react to losing her. Would I really be able to cope? The thought seemed unimaginable. I used to cry just thinking about losing her. Just the thought of it crushed me.

Ready or not. It was suddenly time to jump.

During Nelly's cancer battle, the sky was spinning on a daily basis. And when it all abruptly and tragically ended, everything fell silent. The sky. The room. Every familiar scene became so calm and quiet. It all jerked still so suddenly.

I felt so dizzy in the sudden stillness of it all.

Our house felt bitterly quiet without Nelly frolicking around, scratching on her post, scampering across the hardwood floor, scraping around in her kitty litter, crunching on her greenies.

It is funny how loud silence can be sometimes.

I now faced the challenge of sorting out this whole mess in my head, while the swift world kept rushing by.

Thank goodness for friends, family & an uber supportive online community of animal lovers, aka YOU.

So three weeks is big for me. I am proud to feel my soul strengthen as I discover that I DO have the ability to cope with such a profound loss in my life. The loss of my soul kitty.

--

Baby cat. circa 2001..

Lessons Learned: Loss. Tears of Joy. And the Appreciation of Sadness.

It is so easy to be sad. To cry. To sit in that place of loss.

And for a while all you do is 'be sad.' Then eventually, through red eyes and endless tears, your brain whispers to your heart, "When will this sadness go away? When will this pain end?"

The sadness. It takes up so much space in those first few days and weeks that there is little room left to focus on anything else.

But then, for me, I realized two things:

1. That sadness? That sadness will never go away. I will always think about Nelly being gone and be sad. It is sad to lose a soul that brought me SO many years of happiness.

2. But the second thing I realized was that I do not mind that the sadness will never go away. It validates the bond I had with her. I cherish it actually. And the root of that sadness is simple, it is what I keep saying over and over and over, "I just miss her."

So having accepted the fact that the sadness will always be somewhere inside me, I decided, like clicking on a light switch, that I had to force my brain to smile and let joy triumph.

To smile, laugh, look up and feel a warm glow of happy when Nelly crosses my mind. Which is quite often! I just have to remember the million billion things Nelly did to make me feel loved, to make me roar in laughter and to make me feel whole. And all those feelings I had when she was still here come swelling back in my heart, even if just for a moment. Those gifts from our bond will never fade.

I hinted this in my last Nelly post, but it is worth repeating: I will get through this by having gratitude towards the love Nelly gave me in my life, how lucky I was to have found her. And also by acknowledging the happiness, pride and thanks I feel from being able to have given her such an amazing, joy-filled kitty life.

So many kitties out there never feel the love and happiness that Nelly did. She was a blessed girl!

Feeling that gratitude brings tears to my eyes. Yet I am still smiling. Tears of joy. They come at such special times in life. At weddings, graduations, babies being born, long lost friends and family reuniting. Tears of joy, I think, are the secret to this whole mess of pain and loss. Tears of joy make everything make sense to me.

I am still crying. I am still sad. But I am smiling.

And my happy warm face is all I can feel.

And so like a switch, I turn on my memories-of-Nelly induced smile every chance I get.

Even if those bittersweet tears sometimes come too.

--

Animal Lover. So where now? Healing continues, forever I guess. But the other question is, when does another pet enter our lives? I am eager to save another animal and welcome it into our home. But we are not ready just yet. Everyone is different on that path I suppose. And I'm not sure if we will choose a dog, cat, bunny! Who knows. Just like with Nelly, I am sure the animal will choose us. But I have never had a dog, so I am actually anxious for some advice on that.. My friend Jaya actually had a beautiful sentiment about adopting a new animal. To not think of it as a "replacement" but more as a tribute. One life ends, another is saved. Beautiful. I think Nelly would love that. When we are ready.

--

If you are going through the loss of a pet: 1) Seek help if you need it. Via pet loss books, professional counselors or maybe even just an awesome friend, in person or online. And 2) Remember that beyond the initial horribleness of loss, there is much to be gained from the process of mourning and coming out on the other side, alive. Feeling yourself very slowly but surely, healing. Keep your eyes and heart open, I promise there is gold to be found on the other side.

xo ~Kathy

Marinated Golden Fennel Salad.

December 3, 2013 by Kathy Patalsky 7 Comments

1t-2013_12_02_salads-veggie_9999_155fennel_edited-2.jpg


This raw Golden Fennel Salad is an easy veggie side dish that will perk up your taste buds, and you mood! One glance at this sunny neon yellow salad and you will feel like a sunbeam just poured into this bowl...

Crisp yellow, sunshine-filled golden fennel salad..

Paired with some very pretty sunset colors. The sun melted into the clouds and sea tonight..

To Serve. Toss in a few organic purple or golden raisins - or some chopped candied walnuts to accent the fennel. You can easily turn this salad into a meal by topping it with some miso-dipped tempeh or serve alongside a smoky tempeh pita pocket. This turmeric salad would pair amazingly with anything avocado-infused: Curry Deviled Avocado or this citrus avocado toast pinwheel platter.

The vibrant flavor of raw shaved fennel pairs deliciously with creamy tahini, sweet maple, lemon, a hint of garlic and plenty of anti-inflammatory turmeric powder. Fennel is a veggie that is excellent for digestive health and contains plenty of fiber, vitamin C and an anti-cancer nutrient anethole. Dive into this lovely golden bowl and enjoy the vibrant flavors while pumping up your daily wellness too!

I am a huge fan of fennel bulb. Fennel is that onion-looking bulb with celery-like stalks sticking out of it and feathery fennel fronds on the ends. Fennel has a licorice-like flavor with a bright, crisp bite, slightly sweet aftertaste. I love raw fennel shaved thinly. It pairs so well with a variety of flavors like lemon-olive oil dressings, sweet flavors like maple and citrus as well as nutty accents like walnut, hazelnut and chopped almond. This cool, crisp veggie can act as a slaw for a side dish - or even a sandwich topping when marinated in the fridge to soften.

Today I prepare my fennel with some turmeric. I really loved this recipe. And so did my husband! I was polishing off the bowl, while standing in the kitchen - it was that good. And he shouted from the other room, "Y-um! Is there any left?!" I stared into my empty bowl, just a bright yellow pool of turmeric dressing left, all the fennel gone .. whoops! Sorry hunny. But I them made the leftover sauce into a spicy dipping sauce paired with a few slices of walnut toast. He approved. Happy husband happy life. 🙂

Marinated Golden Fennel Salad
vegan, serves 2-3

1 large fennel bulb
¼ cup sliced sweet onion
dressing:
1 heaping tablespoon tahini (for ultra-creamy salad add another teaspoon or two)
3 teaspoon grade B maple syrup
1 small lemon, squeezed
1 teaspoon turmeric powder
⅛ teaspoon garlic powder
⅛ - ¼ teaspoon salt - to taste
a few pinches of fine black pepper

optional:
⅛ teaspoon grated fresh ginger
drizzle of your favorite healthy oil (extra virgin olive oil, walnut oil..)

marinating advice: Allow the fennel to marinate in the fridge a few hours before serving for a softer, more pickled crunchy salad texture. (But if in a hurry or if you prefer crisp and crunchy textures, served right away after tossing was delicious too.)

Directions:

1. Clean your fennel bulb well, remove and dirt or grit. Slice off the thick root stub and part of the inner thick rough stalk. Anything that feels super firm and hard on the end should be cut out. You want to use the soft bulb of the fennel root for your salad.

3. Thinly slice the fennel bulb and place in a large bowl. Slice and add onion and optional grated ginger.

4. You can simply add all the ingredients to the bowl and start tossing well. (Alternately, you could whisk together the dressing in a small cup and add mixed.)

5. Toss very well until all the fennel is evenly coated. A drizzle of oil is a nice touch, but optional. The tahini already contains healthy fats from sesame seeds.

6. Place fennel salad in the fridge, covered, for at least an hour before serving.

  • « Previous Page
  • 1
  • …
  • 21
  • 22
  • 23
  • 24
  • 25
  • …
  • 64
  • Next Page »

Hi, I'm Kathy! I'm so glad you are here! I've been sharing my vegan life and recipes here on the blog since 2007...

More about me →

my cookbooks
my books

Latest Posts

  • Cozy Stovetop Apples - in 10 Minutes
  • I Would See Practical Magic 2 Again, for the Color Palette Alone
  • 10 Low-Stimulation Movies for Kids + Movies That Spark Imagination
  • The Best Fruit Salad

Trending

  • All Posts
  • appetizer
  • Mom Life
  • recipes
  • personal
  • dessert
  • holiday
  • Smoothies
  • snacks
  • kid recipes
  • kid crafts
  • salad
  • Sandwiches
  • entree
  • 101 Things I Love. Happiness Reflection.
  • 5-Minute Skillet Chickpeas
  • Vegan Dining at Disneyland - 2023 - Complete List!
  • 7 Tips for Fluffy Cinnamon Rolls
  • avocado toast with mushrooms
    Mushroom Avocado Toast
  • peanut butter chickpeas
    Easy Peanut Butter Curry Chickpeas

Footer

↑ back to top

About

  • about kathy
  • press
  • © 2024 polished dc, llc
  • Privacy Policy | Terms & Conditions

Newsletter

  • sign up..
  • subscriber gift: vegan cheat sheets!

Contact

  • work with me

Goodies

  • shop
  • cookbooks
  • finding vegan
  • videos

Rate This Recipe

Your vote:


Let us know what you thought of this recipe:

This worked exactly as written, thanks!
My family loved this!
Thank you for sharing this recipe

Or write in your own words:

A rating is required
A name is required
An email is required