• Skip to primary navigation
  • Skip to main content
  • Skip to primary sidebar
  • Skip to footer

HealthyHappyLife.com logo

  • about
  • RECIPES
  • LIFESTYLE
  • BLOGGING
  • VIDEO
  • SHOP
  • Cookbooks
menu icon
go to homepage
search icon
Homepage link
  • Recipes
  • Lifestyle
  • My Books
  • Videos
  • About
  • holiday
    • Bloglovin
    • Facebook
    • Instagram
    • Pinterest
    • RSS
    • Twitter
    • YouTube
  • ×

    Home » Blog

    Blog

    Garage to ADU Conversion: Making of a Studio!

    May 19, 2023

    garage to ADU conversion
    Photo credits: BOW LA

    Today I am sharing a creative project we recently completed: our garage to ADU conversion, aka the making of what is a home studio office of sorts.

    Just to mention this upfront, our project was completed by the LA-based ADU firm, OTTO. We did a lot of research on companies and they really impressed us with their design know-how and seamless startup process. This is not a sponsored post at all, but I did want to share a referral discount available to you! If you sign up with Otto for your ADU project, you can receive a $1550 credit just by mentioning my name.

    Ok, back to our project details….

    Construction Metamorphosis: Dark Dingy Garage Into Bright Beautiful ADU!

    What was once a dark and musty 1950’s detached garage – that we only used for storage – is now a space where we can gather, feel outdoor-yet-indoors, host overnight guests and be creative.

    Creative Workspace

    Our dark old garage is now a light-filled space where I can “detach” from our main house, the one filled with toddler toys and dirty dishes to be dealt with, and brew and bubble away with my creative projects, from photography to writing and more.

    Now, don’t get me wrong, I have worked from home for about fifteen years now, to some effect, and have loved having my desk a few feet from my kitchen, or sometimes stumbling from bed to computer in mere seconds – no shoes required, but there is also something nice about being able to separate from your main living space, if desired.

    Read: My 11 Tips for Working From Home

    So garage to ADU conversion it was.

    Timeline: A Bit Over a Year

    The project took a bit over a year and is now finished.

    Fill The Space!

    When construction was complete, we were given a beautiful blank slate to fill. And by fill, I mean, place furniture, organize work items and make the space functional yet inviting.

    It is actually quite a challenge to fill a detached studio with inspiring warmth and energy that matches that of your main house. Just think about how much fills your home on a daily basis!

    Giggling voices, cozy rugs, pets, comfy furniture, softly humming appliances, photos on the walls, aromas, sounds, textures, energy from the front door.

    And a new building truly does clear all that from memory. The goal: to create an uplifting creative cove. I’m still working on making this space functional and inspiring.

    Why Did We Convert Our Garage to an ADU?

    Coming out of 2020, “working” had shifted to a lot of remote work, and now we also had a baby. So essentially, my work had drastically changed for this period of time. As in, I wasn’t doing my traditional job of creative professional.

    The spare room that was designated as “Kathy’s office” was now being used for my husband. I was totally fine with this, but wondered where I would go once I was ready to dive into work again.

    Our solution: and ADU!

    So, did it work???

    Well, flash forward to today: I am slowly working again and, I find that I separate my workspace between the kitchen island in our main home and my new ADU studio.

    I still love working out of the main house, mostly because it has a very warm energy that is impossible to replicate – with access to all the comforts, sights and sounds of home – and the best part – our kitty cats. Huge bonus.

    The cats will not go into the ADU, since they are indoor kitties and I do not want to risk confusing them, especially after what we just went through with MrWhite.

    Unused Garage Space

    We weren’t really in need of the detached garage that our home came with. We charge our Tesla in the back driveway. And in LA, you don’t get snow or severe weather changes, so parking a car outside, under the sun and sky and stars is basically not a problem.

    detached garage interior

    A Place for Overnight Guests

    We get more house guests now that we have a child. I mean, everyone wants to hang with our little cutie pie, I don’t blame them, she’s the best. So we wanted a space to house overnight guests for a few days, a week or longer! I like the extra spacing between us and our guests. And since the ADU contains a kitchen, they can even prep meals like coffee and breakfast and snacks etc.

    But the main purpose of our ADU is for a flexible work space.

    I wanted a flexible space that would serve as both a photography studio, kitchen space, and podcasting studio (shhh, more on that project later!)

    Will You Rent Out Your ADU? OR do AirBNB?

    Short answer, no. Technically, we could rent out our ADU, especially since an ADU has its own address. Or use it for AirBNB. Many people do that! But that’s not our passion or comfort level on our property, so no. And being a landlord or AirBnB host also comes with a long list of things to manage, so it’s not something to undertake lightly.

    gold and pink accents bathroom design

    Five Things I Love About Our ADU

    1. The Natural Light. The tall windows and French doors that create a super bright corner. The two skylights also bring in loads of natural light.
    2. SMEG. I needed that fridge and I really think it brings so much character to the space. Plus it works great too!
    3. Privacy. One goal for the ADU was that I really wanted the space to feel bright, but still private. By keeping one section of the kitchen wall free of windows, windows that would otherwise face our home, I think we accomplished that goal. And the windows that do look towards our home can easily be covered with semi-private curtains.
    4. The bathroom colors. Though the main space is mostly white, with some fun wood cabinets in the kitchen, the only base color comes from the bathroom – which I love. The pinkish and mossy green hues in there, paired with the gold finishes is so lovely and modern — without being too feminine.
    5. Having all the appliances! This place is stocked. Fridge, convection oven/microwave, four burner induction stove, washer and dryer and a dishwasher. Yes, you could live here.

    What I Wish it Had…

    Somewhat wish we had these…

    1. A Murphy bed. They are quite expensive and take up some space on the wall. I like to have a cleared studio when I need it for photography. Always possible to add later though.
    2. A hidden AC/Heat unit. The mini-split is great, but I wish it was hidden or in a less visible spot on the wall. This would have added a significant cost though, so we didn’t move it.
    3. More Storage. I mean, this is a tiny space so it’s not really possible but still would be nice.
    4. Room Addition or Bedroom Nook. Again, the bed issue. We didn’t go with adding another room onto our garage space, but I kinda wish I had that extra room to better dictate the space function. I could have kept a small added room for a cozy bed nook for guests. But oh well.

      Adding onto the garage would have added a higher price to the construction cost and more time to the project so we decided to just convert the garage as is – no added square footage. Plus, we didn’t want to sacrifice backyard space. So I wish I had an extra room, but also very happy with it as is.
    kitchen table adu

    Why Convert a Garage to an ADU?

    Here are some reasons why you may want to look into a garage to ADU conversion for yourself!

    To get technical, an ADU (Accessory Dwelling Unit) is a separate living unit on the same lot as a primary residence. There are many reasons why homeowners may choose to build an ADU.

    Here are some of the most common reasons to have an ADU:

    1. Rental income: Many homeowners choose to build an ADU as a way to generate rental income. Renting out the ADU can be a great way to offset mortgage payments or supplement retirement income.
    2. Multi-generational living: ADUs can provide a separate living space for aging parents, adult children, or other family members who want to live nearby but still maintain their independence.
    3. Increased property value: Adding an ADU can increase the value of your property, especially if it is in a desirable location or if rental income is a possibility.
    4. Home office or workspace: An ADU can provide a separate space for a home office, studio, or workspace, allowing you to work from home without disturbing the rest of the household.
    5. Flexibility: An ADU can provide flexibility for changing needs over time. For example, it can be used as a guest house, vacation rental, or home gym.
    6. Environmental benefits: An ADU can be designed to be energy-efficient and environmentally friendly, with features like solar panels, green roofs, and rainwater collection systems.
    7. Affordable housing: In some areas, ADUs are being promoted as a way to provide more affordable housing options.
    8. Aging in place: An ADU can provide a comfortable and accessible living space for seniors who want to age in place and maintain their independence.

    In regards to number eight, I have even heard of some older people who live in their large homes decide to put an ADU on their property, then essentially let their adult children move into the main large house while they stay on property and move into the smaller ADU. In cities where the prices of new homes are soaring, this would benefit young families and seniors.

    Overall, building an ADU can provide many benefits, including increased income, flexibility, and added value to your property.

    Converting a garage into living space can be a great way to add extra square footage to your home.

    College Students Could Stay at Home

    We often joke that if we live here when Rosalie graduates high school, she can just move into the “tiny house” and never leave us. Ha.

    Hosting Guests

    I think I was a hotel owner in another life, because one of the first things I did when our ADU was completed, was create a few little “guest baskets.” One in the bathroom, with items like travel toothbrushes, soaps, razors, etc. And in the kitchen, some with drinks, snacks and coffee and tea center on hand.

    If you are about to dive into a project like this, here are some helpful tips and just some things to think about…

    Here are some tips to help you with the ADU process:

    1. Determine the purpose of the space: Before you begin the conversion process, you need to decide what the purpose of the space will be. Will it be a bedroom, a home office, a playroom, or a guest suite? Knowing the purpose will help you plan for the layout and design of the space.
    2. Check local zoning laws: Make sure to check your local zoning laws to see if converting your garage into living space is allowed. Some areas may require a permit or have specific regulations that you need to follow.
    3. Choose an amazing company to assist in the process! We went with OTTO. We did a lot of research on companies and they really impressed us with their design know-how and seamless startup process. If you sign up with Otto, you can receive a $1550 credit to your project, just by mentioning this post and my name – woo hoo! I also receive a referral credit.
    4. Insulate and weatherproof: Garages are often not insulated and weatherproofed like other living spaces in your home. Make sure to add insulation to the walls, ceiling, and floor to help regulate the temperature in the space. Additionally, check for any air leaks around doors and windows and seal them up.
    5. Add flooring: Garage floors are usually concrete, which can be cold and uninviting. Consider adding new flooring, such as laminate, hardwood, or carpet, to make the space more comfortable and livable.
    6. Add lighting: Garages are often dark and poorly lit, so make sure to add plenty of lighting to the space. You can add overhead lighting, task lighting, and even natural lighting with windows or skylights.
    7. Plan for storage: Garages are often used for storage, so make sure to plan for adequate storage in your new living space. Consider built-in shelving or cabinets to keep the space organized and clutter-free.
    8. Consider HVAC: Depending on your climate, you may need to add heating and cooling to your new living space. Consider installing a mini-split system or extending your existing HVAC system to the garage.
    9. Add finishing touches: Once the major renovations are complete, add finishing touches to make the space feel like a livable area. Add decorations, furniture, and window treatments to make the space comfortable and inviting. Factor this into your budget! You don’t want to be left with an unfurnished and accented space.

    Remember, converting a garage into living space can be a big project, so make sure to plan carefully and hire professionals as needed.

    add wide view

    Some of the Brands I used to Decorate the Space…

    1. Target – Hearth and Hand by Magnolia. I bought so many goodies from Target for this space. I wanted to save money on the decor, yet still keep a trendy and modern vibe and this brand helped me do that. Of note, the dining table and chairs, bench, many decor items.
    2. SMEG – I had to go with the SMEG fridge in white. I ordered mine from Crate & Barrel. It was a custom item so expect to wait a bit for shipping! I also went with a matching SMEG coffee pot in white, which I really adore.
    3. Schoolhouse – Oh man, I would buy everything at Schoolhouse if I could. I love their brand so much. But just a few of the goodies I bought are their stools (I have one in white and one in the burnt orange), artwork “Work Hard and BE Nice to People,” by Anthony Burrell — a black chair and one of their clocks. some of my stuff of theirs is in the main house.
    4. West Elm – I bought the gold-rimmed mirror from West Elm.
    5. Magnolia Rug – the jute rug under our dining table is from Magnolia and I adore it.
    kathy teal background photo studio
    I painted this backdrop and plan to experiment with more custom-painted backdrops for my studio

    Photo Studio Gear

    Some of the photo goodies I plan to use in this space..

    1. Food Photography Backgrounds – My usual stock of them finally have a space that’s not in the living room or laundry room.
    2. Tripods – One or two is a good mix.
    3. Laptop – Since I didn’t want to keep a computer in the studio, a laptop allows me to move my work from main house to studio.
    4. Backdrops – I am actually experimenting with making my own backdrops! This has been so fun. I painted the teal one in the photos here. It’s a fun skill to learn!
    5. Studio Lighting
    6. Grip Equipment for hanging backdrops – C stand, clamps, sandbags, etc
    7. Desk or Rolling Media Center
    8. Tether Cords, Remote Control for Camera
    9. Camera, Lenses – In My Camera Bag
    10. iPhone tripod or holder like a Canvas light.
    meg white refrigerator

    Photos of our ADU

    Photo credits: BOW LA

    These photos were all taken by the very talented team at BOW Los Angeles Photography. Thank you for allowing me to use them for this post!

    pink and green and gold bathroom modern
    pink and gold shower

    How I Found My Lost Cat – Tips to Help

    March 21, 2023

    mr white cat hug - How I Found My Lost Cat

    This is the story of how I found my lost cat. And some tips to help.

    A complete lucky miracle of a story, but one that might help someone else dealing with the trauma of losing a pet.

    Dealing with a lost pet is a very traumatic experience. The worry. The unknown. The possible lack of closure. The guilt. The sadness. The unresolved grief. The fatigue of the search. The reminders in your daily routine that your bff is gone. Scared. Possibly hurt. Maybe needing your help to get home.

    The feeling of helplessness is overwhelming.

    These emotions are still very fresh in my brain and body.

    How I Found My Lost Cat — Losing Mr. White

    A few weeks ago I experienced the trauma of losing a beloved pet. Mr. White, an indoor only kitty cat, got out of the house.

    You guys already know Mr. White as part of my kitty cat duo, Mr. White and Sochi, whom I adopted about nine years ago after losing my cat Nelly to cancer. Well, these two brother cats are very indoor cats. They have never been outside, aside from their time ‘on the streets’ as rescued kittens. They don’t wear collars and I never really feared them getting out. Well that has all changed!

    I am sharing this story today because while I was fatigued with grief, the stories of hope and happy endings from my friends and followers on Instagram, truly kept me going. So I hope this story can help you and maybe give you a few good tips if you are hoping o find a lost pet – especially a cat.

    I hope this post can help someone find their cat.

    black cat closeup

    How I found my lost cat – my indoor only, very timid and shy, black kitty cat…

    Story time.

    On Thursday March 9th, Rosalie and I decided to sleep in and skip school. A fun little mommy and me day off. We ate pancakes and planned on an adventure to pick up grandma and head to a favorite park about ten minutes away. I closed the side door of our home on my way out, locking the bottom lock with a click. I was rushing, as I usually am, chasing an eager two year-old out the door, trying to beat her to the car door.

    But when I closed the door it didn’t latch. It’s one of the those doors that you really have to pull shut. I almost always lock the top lock on my way out, but since my husband was home and I was in a hurry, I didn’t.

    It was a sparkly sunshine day. The kind with clear blue sky for miles and fresh puffy clouds from al the recent rain. Warm and crisp and perfect.

    I hopped in the car and off we went. I picked up my mom and we headed to the park. Rosalie was so excited. I even had to make a pit stop at CVS and she very patiently waited in the car with grandma.

    Happy Day Takes a Turn

    We zoomed down the 405 and just as we were exiting, my husband called. Not a text. A phone call. That is never good. I picked up on the car speaker. “Hi.” He was flustered. He mumbled something about the door being open. And looking for Mr. White. He got out. “Like out, OUT?”

    “YES.”

    “Ok, I’m coming home.” I hung up the phone.

    Then I changed the destination on our car’s navigation system. I tried calmly explaining to Rosalie that we wouldn’t be making the park. But she turned hysterical with disappointment, screaming in the backseat as my mind reeled. I’m sure she could tell something was wrong and that feeling mixed with no park set off a fireball of toddler emotions.

    I took deep breaths while concentrating on getting home safely.

    At this time, I truly thought that I would find Mr.White tucked into a corner of our yard. Maybe behind a palm tree, watching the birds. Or maybe he squirreled his way under the deck, between that one shallow spot in the ground. I had a plan. I really couldn’t imagine him actually GONE.

    11 AM Thursday – Arriving Home

    When I pulled up to my driveway, my mind was mush. I climbed out of the car and saw my husband on his crutches limping around the yard, down the sidewalk. My husband had broken his ankle a few weeks before.

    I raced to the backyard and searched ever crevice. Nothing.

    I was suddenly in a surreal nightmare. My incredibly sensitive, shy, timid, sweet, scared black cat was gone.

    I melted in a pool of tears. Sobbing from my chest in deep gasps. The feeling of helplessness overtaking my body as I realized he was not in our yard or anywhere in sight. The vast, dangerous city of Los Angeles tucked just behind the facade of our quiet neighborhood street. Coyotes. Loud dogs. Screeching cars, zooming down every street. Fences. Trees. Thickly packed neighborhood streets with foreign yards and strange smells. My mind reeled.

    Noon – Grief Kicks In

    I immediately knocked on a neighbors door asking to check their backyards. They were so kind. When the words “our cat got out” escaped my lips I started sobbing again. I checked every crevice of the unfamiliar backyard. Nothing. I rushed out and popped over to the next house. Another kind neighbor. But still, nothing in the backyard.

    I stayed on our side of the street. He wouldn’t possibly cross the street in the midddle of the day! No way. Not our scaredy cat.

    I went home and started shaking treats, tapping cans of food. Calling out. I scooped up my toddler, who was now following along in the search, shouting out at the top of her little lungs, “Mr. White, come home!”

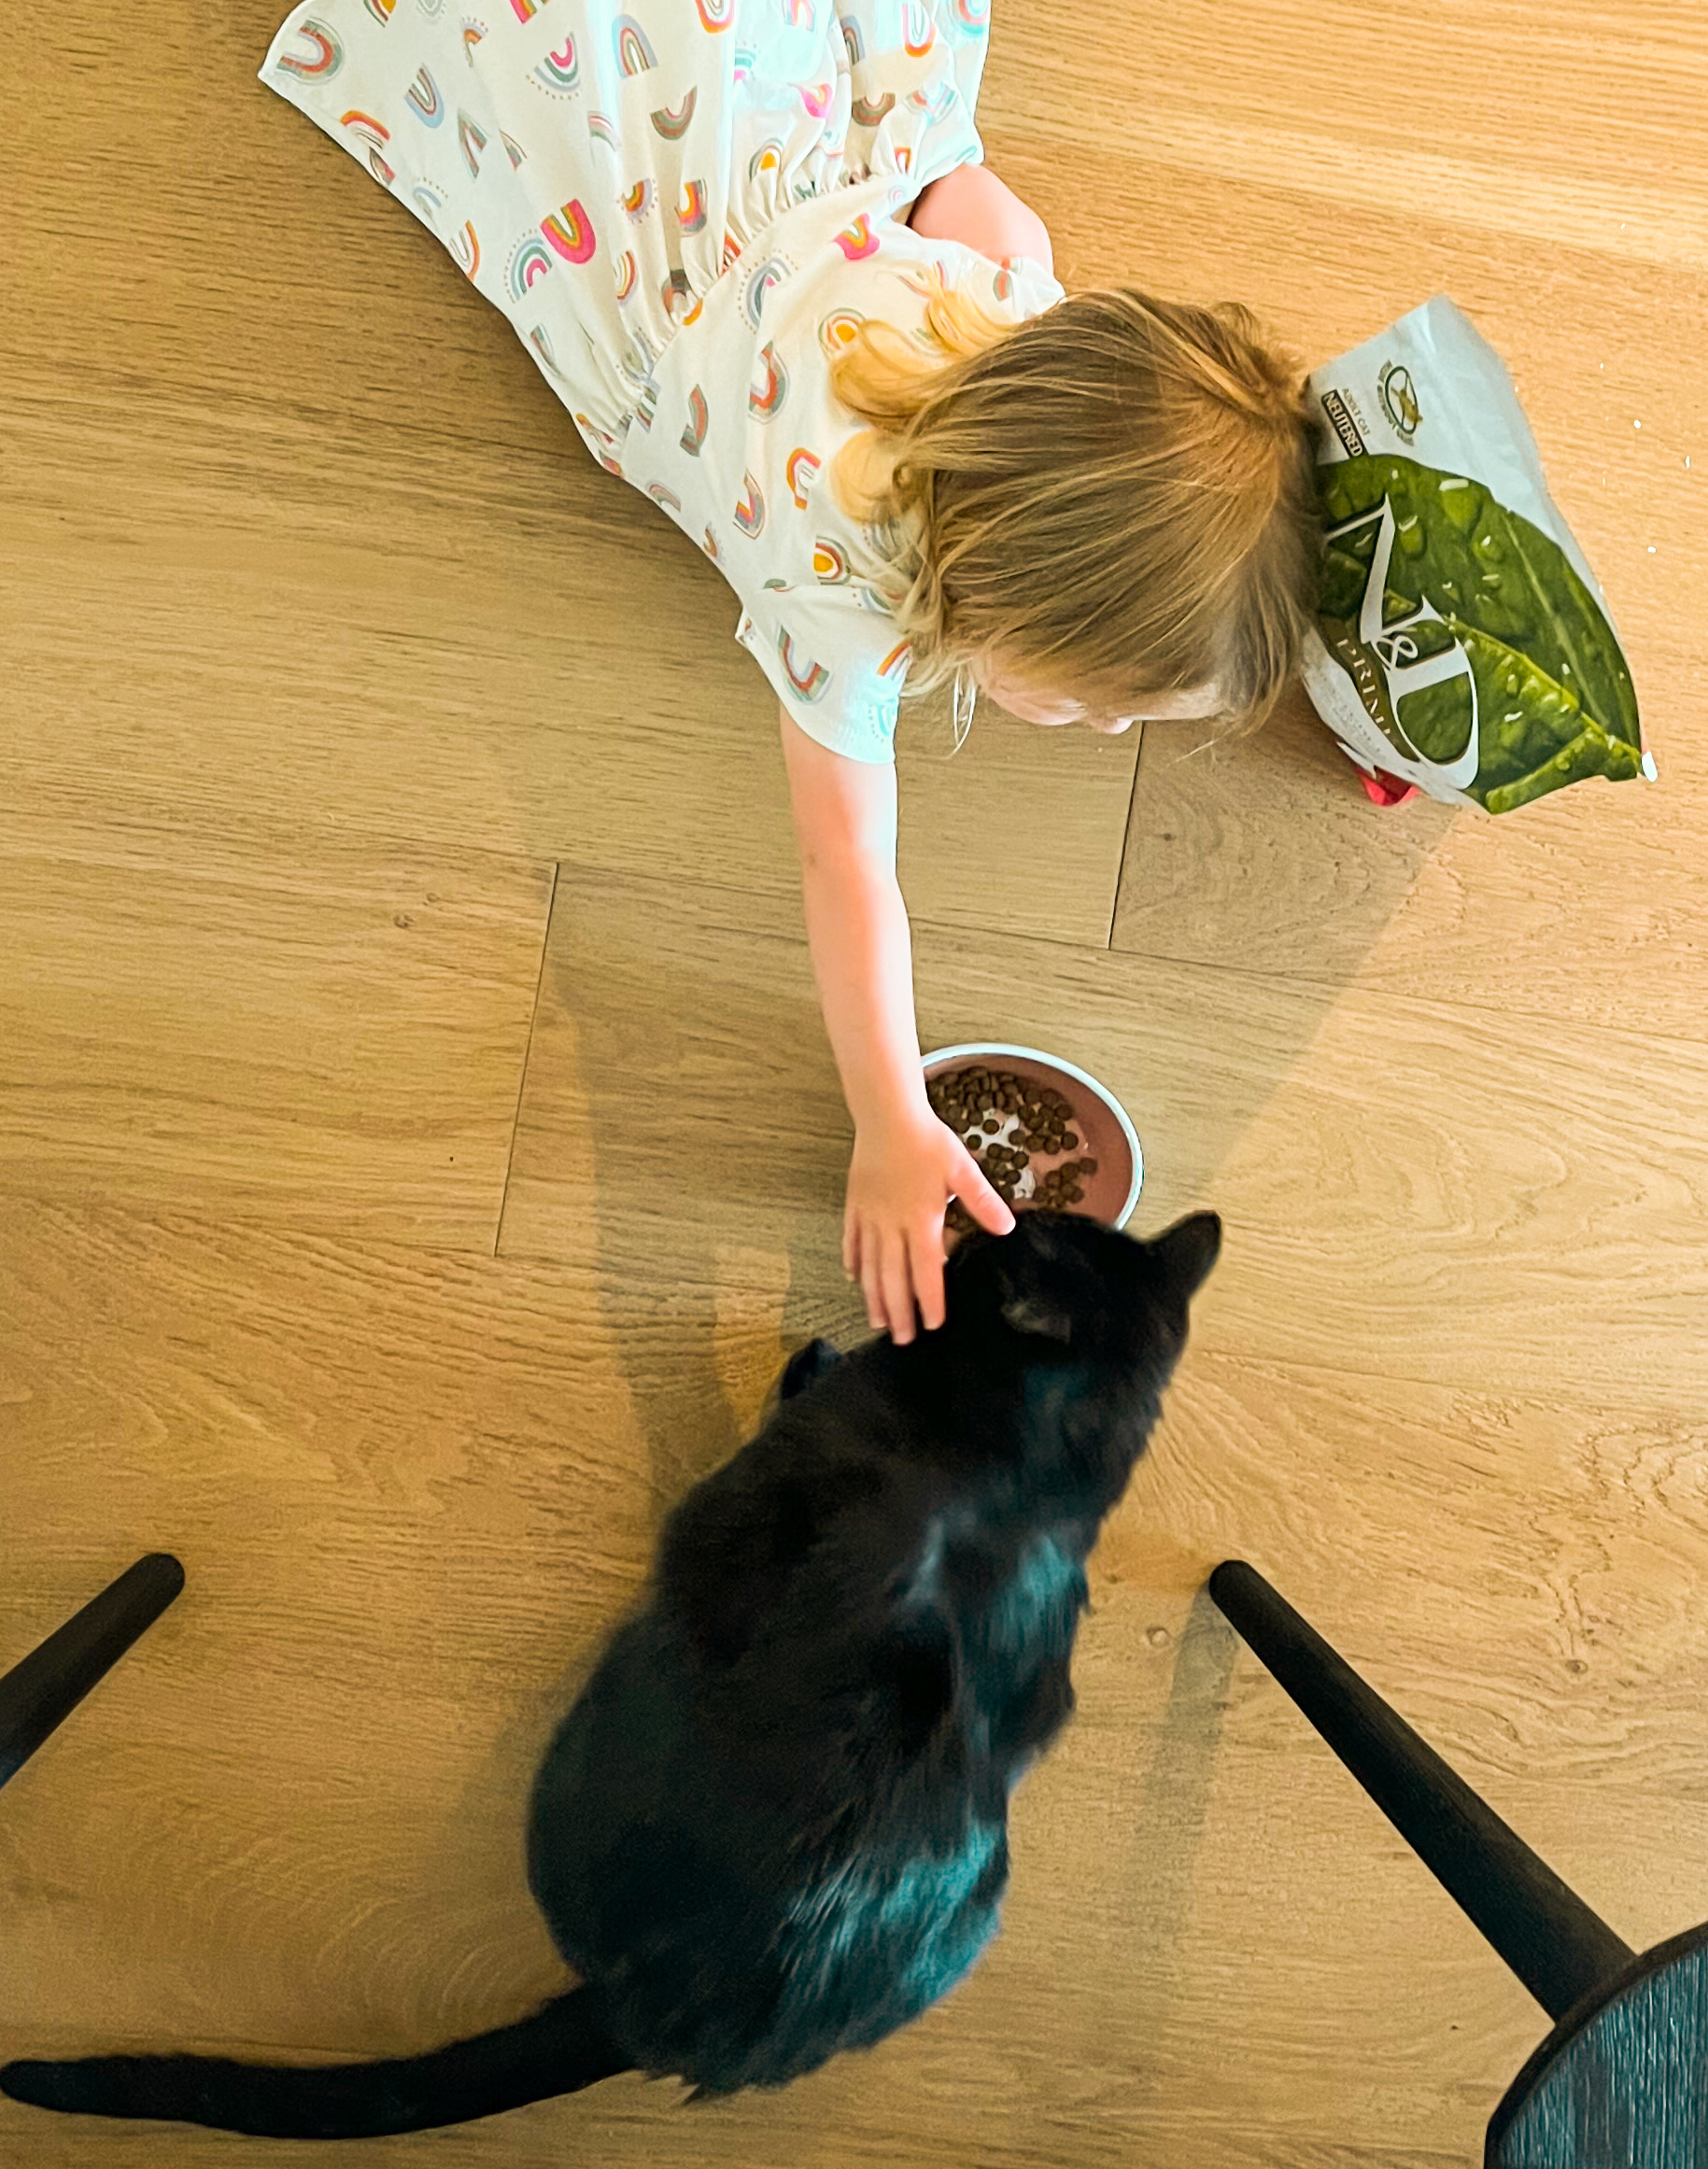
    She saw me pouring dry cat food into a paper bowl on the stoop of our side door. She lifted the entire bag and poured in out. The entire full bag pouring into kibble-shaped mountains on our steps. Normally I was jump to stop her and clean things up. But I was spent. I didn’t care. And I knew she was trying to help. I think I said, “Thanks Rosalie, that’s so sweet of you.”

    We both sat in exhaustion. Me more than her. She was still quite perky. I think maybe she thought this was a weird game. Mr.White would be home soon and it would end. Like find and seek. She loves that game.

    Sochi, Mr.White’s brother, was starting to get worried. Looking for his brother and meowing for him. They always snuggle sleep together…

    two cats sleeping hugging

    4 PM – Street Walks

    Together, we marched up and down the street hoping for a miracle. I knew he wouldn’t just pop out of thin air, into the scary broad, noisy daylight, but still I had to shout out to him, just to somehow let him know that we were looking for him. That he was still close to home.

    I hoped he had found a safe spot and would stay put until after sunset, when the street was quiet. And he could come prancing home.

    Rosalie saw me crying. Sobbing. I tried calmly telling her that Mr.White was gone and I hoped he would come home soon. She would see Sochi inside our house and say, “Where Mr. White go?” “Go find him.”

    She also randomly mumbled over and over “He be back. Two days.”

    Initial Search

    For the rest of the afternoon, I was in search mode. I couldn’t eat. Sleep was not happening that night. And I did everything I could think of to find him.

    Up and down the street I walked. Knocking on more neighbors doors begging to be let in. 

    I made super quick paper posters and taped them to light poles. Knowing fully well that rain was on the way.

    I posted on NextDoor and a few Facebook pages. Instagram.

    Rosalie finally went to bed. She was so tired. Probably emotionally drained.

    mr white and kathy big green eyes

    8 PM – Dusk

    I barely remember what I did after Rosalie went to sleep, I just know I stayed up all night. When the moon was out and all was quiet, I paced the street within 500 feet or so of our front yard. I constantly checked our yard. Over and over I did this. Just hoping that one check would be different than the last.

    I finally climbed into bed around midnight, clothes still on. Eyes wide open. Listening for the security camera chimes to ring, signaling that an animal was in our yard. We sometimes get skunks, opossums and a few stray or neighborhood cats. If the chimes went off, I’d leap out of bed and race to the doors and windows.

    1 AM – Quiet Cold Moonlight

    It was a cold night. 50’s. Which is cold for Los Angeles. Rain was coming.

    I sat of the stoop of our front door for about an hour. Shaking treats and quietly calling out his name. Clinking a can of food. Scraping the lid between the open can, to make the sound of a freshly popped open can of food.

    I had ordered sardines that afternoon – thanks DoorDash – so I was heating those up, mushing them around and putting them outside. Cats have incredible smell receptors so I hoped he would get hungry and come home.

    I was constantly googling. Tips. Tricks. How to Find a Lost Pet. I tried all the things….

    How I Found My Lost Cat – Tips to Help:

    By the first evening I had done all the following things to help find my cat / lure him home…

    1. Searching within a 500 foot radius of home. Indoor cats usually stay put in a spot close to home. Hard to believe at the time though!
    2. Kitty Litter outside.
    3. Putting familiar blankets, toys, beds outside.
    4. Signs up. (Quick ones the day of losing him.)
    5. Asking neighbors to check their yards – or even better, checking yourself.
    6. Shaking treats, food bags.
    7. Clinking a can of cat food.
    8. Warming up smelly cat food, tuna or sardines and mushing it up, putting it outside.
    9. Post on Next Door, Facebook, and neighborhood groups or message boards.
    10. Focus your search on dawn and dusk – when cats are most active and hungry.
    11. Security cameras around the yard – putting up several more for 365 viewing of yard.
    12. Calmly calling his name – or even calling out in a happy voice – not a scared one.
    13. Researching tips from experts. I hooked up with Landa Coldiron and had a consult with her. Incredibly helpful tips and advice.

    5 AM – And Then it Rained

    It started to rain. Slowly at first. Then buckets of downpours. Drenching the streets, bushes, trees, my flimsy paper signs and all the cat food filled paper plates in my yard become soggy. All my work seemed to disappear into the misty sheets of rain. 

    around four AM, I passed out in bed for a few hours. A bit of sleep. But once dawn came, I leaped out of bed – adrenalin filled – knowing that dawn would be a time when cats would move around. Look for food. Maybe even in the rain.

    But nothing.

    toddler petting kitty cat

    8 AM Friday – More Rain

    The reality of losing Mr. White was really starting to kick in. He didn’t come home that first night. That felt like a really bad sign. the rain was soul-crushing. I pictured him wet and scared. Rushing from hiding spot to hiding spot, darting away from yellow car headlights. He hated being wet. Even a few drops of water and he would sprint across the house.

    When Rosalie woke up, the first words out of her mouth were, “Where White go?”

    I tried to explain through tears that he decided to go on an adventure outside. And we missed him. And hoped he would come home. But that maybe he wouldn’t. She didn’t seem to understand that part. She kept saying. “Go find him.”

    Dropped Off the Kiddo

    I decided to take Rosalie to school. I wanted her to have a “normal day.” And not see mommy crying all day.

    That was a good idea. I’m glad she got out of the house.

    On the drive to school there were more questions about “White.” I said through a crackling voice, “Mr. White went outside. And we miss him. And that makes me sad. I hope he comes home. But if not, we know he’s having a fun adventure – and he knows how much we love him – and he loves us. And sometimes kitties don’t come home.”

    How I Found My Lost Cat – Tips to Help: Tools

    1. Large flashlight
    2. Humane animal trap with smelly cat food or sardines
    3. Microwave to warm cat food or sardines — no salt added tuna or sardines “people food”
    4. Neon pasteboard for signs
    5. Large sharpie pen
    6. Map of neighborhood for checking off the homes you have searched
    7. list of neighbors with contact info – keep track of progress and stay in touch with key neighbors
    8. Laminator for waterproof photos for signs
    9. Packing tape to “laminate” large signs – cover completely
    10. printer – homemade flyers (see example below – private info has been omitted)
    lost cat sign

    10 AM – Home to Search, Day Two

    I drove home through pouring rain. My chest ached thinking of him out there. I was wearing a giant puffy coat to stay warm

    The thick drops of rain pooled up on the highway. My car splashed through puddles. I cringed.

    On the way home, I bought a large humane animal trap, by the advice of a lost pet expert I had desperately called. 

    2 PM – Knocking on Doors in the Rain

    I went over to another street and begged to be let in. Kind neighbors let me look. With sad faces they watched me pull back wet bushes in their yard. Shine my flashlight under decks and behind fences. Red eyes and a desperate look on my face.

    More flyers. More sobbing. The rain got more violent and the air ice cold.

    How I Found My Lost Cat – Tips to Help: Internet Resources

    1. Landa Coldiron – phone consult and lost cat recovery guide
    2. Next Door App
    3. Facebook groups
    4. 24 Pet Connect
    5. Ring – share to “neighbors” on the Ring App and place as many cameras as possible around your yard

    8 PM – Night Two

    More tears, searching, neighborhood walks. Flashlight walks, shining under cars, looking for green twinkly eyes in the night.

    Searching. Waiting. Trying not to overthink all the dangers out there.

    I slept a few hours. I awoke around one AM and did my night whisper shouts and shaking of the treats and clanking of the food. Nothing. I sat on the front porch alone for an hour. Just whispering his name and playing a voice memo of his brother meowing. I held my iPhone high up into the air, hoping the echo through the quiet streets would bounce over fences and into backyards – into Mr.White’s ears – letting him know where we were.

    8 AM – Saturday Morning

    Saturday morning came. The rain paused a bit. So it was a good day to make waterproof signs – expertly designed. Neon pink poster board, large printed photos, just the essential info — a giant black sharpie.

    We made the perfect sign and stuck it in our front yard. Then I showered, changed and printed out fifty or so flyers of the same sign. More doors to knock on. I hated this part. But I was desperate.

    black cat cute

    4 PM – More Pounding the Pavement

    I walked down the street in my jeans and beige sweater. A sweet side bread. Glasses on. I wanted to look friendly. So people would answer their doors. Some neighbors answered. Some did not.

    Up and down the block. I had flashbacks of being a Girl Scout, selling cookies to neighbors.

    I made it to the other side of the street and was tired. Rain was coming. I had not gotten ahold of our neighbors across the street and a few doors down, so I knocked – again. Again, knocking on doors took every ounce of my passion to find my kitty cat. I hated this part.

    But in the end — knocking on doors is what helped me find my cat!! 

    One more door. I knocked. A smirking mad opened the door “Still haven’t found him yet, huh?” I smiled and played along with the good vibes. “Nope, me again!” I laughed and held up the new and improved flyer. He said he had the original version, 1.0. Ha.

    I sheepishly asked if I could check his yard.

    He said “Of course!” Thank goodness. Another yard to prowl with my flashlight. I expected another failure.

    How I Found My Lost Cat – Tips to Help: Backyard Searching Checklist:

    1. Thick bushes.
    2. Under tarps.
    3. Behind the back fence or wall.
    4. Under barbecues.
    5. Under decks.
    6. Check for any open crawl spaces to the underside of the house.
    7. Behind large pots or AC units.
    8. Low roofs. Roof overhangs.
    9. Along fences, under vines.
    10. Any open garages?
    11. Tarps over cars or under car engines.
    12. Behind garbage cans.
    13. Trees.
    14. Hiding spaces in junk piles or storage piles.

    Searching the Final Yard

    This yard felt clean. Nothing much. I was just about to leave when he told me to check behind the garage. Behind the garage was a pit, a very large pit. I think my brain thought it looked too open to even consider a hiding space. Just a clean clear spot of first behind the garage. But it was a pit – between a high retaining wall and the garage – a roof extended over it. A dry spot from the rain.

    The cement wall lining his yard was so high that I had to stand on my tippy toes to look in. I looked, just a dirt floor. Then I bent my head down and over, looking into the far left corner of the pit.,

    I could not believe my eyes when I saw my silky black cat sitting there. Stuffed into the corner. Curled up in a tight bread loaf shape. Pupils wide with fear. Calm and barely moving. Looking straight up at me.

    “Mr. White!” I gasped. My body shook.

    Adrenalin kicked in. I had to hop the wall. Grab him and hop back over the wall. I feared he would bolt at any moment out of alarm. But he stayed put.

    kathy and cat hugging

    Mr. White knew it was ME. And he knew I was there to save him.

    I told the owner of the house to grab a chair. He was in shock that the cat was there. He went back and grabbed a ladder. I calmly talked to Mr.White. Trying to sound happy and normal. “Hi. I’m going to come get you, ok? Stay there.”

    The main was taking too long with he ladder – so I decided to hop the wall myself. Somehow I pulled up a stubby flower pot and hopped the wall via a burst of adrenalin. I landed on the soggy dirt in the pit. Reached down slowly and scooped up Mr.White.

    Once Mr. White was in my arms I felt a warm sense of relief. I had never felt anything like that moment before. It was like I was waking from a bad nightmare, realizing everything was now OK.

    Now, how to get back over the wall with a cat in my arms? I don’t even know how we did it, but we did. I climbed down his ladder, giddy with happiness.

    Then I walked him back across the street to our home. I remember shouting out as I crossed the road, “We found Mr. White for anyone who cares!!” Ha. Omg, I’m such a nerd.

    The nightmare was over.

    I still can’t believe it. 

    5 PM – Mr. White is Found

    I appeared at the back door, holding Mr.White. My husband was in shock and I was ecstatic. Hyper with glee. Rosalie’s little face lit up, knowing that we had done something amazing. She gave Mr.White a hug. I still can’t believe this is how this story turned out. I was fully prepared for years of therapy. Continued searching. Grief. Guilt. Sadness.

    I am so grateful for how things turned out.

    And I am so proud of myself.

    I did it. Me. I was the driving force in this. I had to be. My husband couldn’t walk or drive and I was the one who had to go out there.

    I knew I had to find him. I knew I had to scoop him up and bring him home.

    And I did.

    To Everyone Who Has Lost a Pet

    Many of you reading this may be going through the horror and trauma right now. I don’t want to tell you that your pet will come home. Because, that is just not always how it works. As Landa said to me, you have to put effort into it. You have to at least try. Your pet is out there.

    So while I know 100% that finding Mr.White was lucky, I set myself up to win. I got out there. Used my voice. I searched myself, with my own eyes. Don’t rely on neighbors to search their yards. The man who had Mr.White said he looked in his backyard several times. It’s not his fault at all, it just takes an owner to really search and have an eye for their pet.

    And the other tip I want to say loud and clear is that an indoor only cat is probably close by! They have probably found a save spot in a home nearby and are just hunkered down. So searching those yards is so key.

    Search the Yards Yourself. Your Own Eyes.

    The other thing is that cats will go where other cats are. We often think that cats avoid each other’s territory, but eventually a cat will get hungry and look for where outdoor cats are being fed. So if a neighbor feeds outdoor cats, or if cats come through yards – those are prime spots. The house behind the yard where Mr.White was hiding, had outdoor cats! And cats came through that neighbor’s yard via a tiny hole in his from fence. Thank goodness for that hole, or maybe Mr.White would have had to wander further down the street!

    I am sending you so much hope and love if you are going through this. It is awful. I was absolutely crushed for those first few days. And I know I would have continued to be severely depressed if things had not turned out so well. Please take care of yourself – amidst your grief.

    Eat. Sleep. Try to get outside. Let yourself cry, but also keep moving. Show up. Don’t give up quickly. Even if you are tired. But also know that you may need closure at some point. Help yourself find that.

    “Grief is love with no place to go.” – unknown

    Pets are our babies. And when the get lost, we are devastated. I hope every person who loses a pet finds them. But also know that your pet knows how much you love them. They know you are looking for them. They know you gave them the best life ever. That love will always exist. and nothing can ever take that away.

    Your pet knows how much you love them. And you gave them an amazing life.

    Thank you again for everyone who sent kind messages my way during this fiasco. I love you guys.

    hugging mr white cat

    Vegan Linzer Cookies

    December 21, 2022

    Vegan Linzer Cookies

    Today’s vegan holiday cookie recipe is that of the lovely Vegan Linzer Cookie. I did a butterfly shape to resemble an imprint of a snow angel.

    Linzer Cookies are known for their buttery almond cookie base and beautiful snowy sugar tops – with a peek oof jam. Today I am sharing my spin on Vegan Linzer Cookies with a raspberry jam filling. These cookies are surprisingly easy, even though they pack some serious curb appeal when it comes to your holiday cookie table.

    Grab some almond flour and let’s get to it!…

    [feast_advanced_jump_to]

    History of the Linzer Cookie

    If the Linzer Cookie reminds you of a pie or tart, well you are correct! It absolutely has it’s origins based from a tart. History goes,

    “Way back in 1653, this recipe (originally a tart) was discovered in the cookery manuscript of Countess Anna Margarita Sagramosa In Austria. The tart was baked like a pie with a delicious buttery almond crust, filled with black currant preserves and topped with a latticework crust.

    The recipe was developed using a crust made of nuts since they were easier to come by at times than wheat for flour.

    While a yummy black currant tart is a perfect way to end a meal, bakers came up with a cookie version they could stock in their shops, and it became a holiday tradition to see these lovely treats in the frosty windows.”

    – eat to explore

    The sandwich cookies are traditional to Austria, though they can now be found in many bakeries in the US. The dough is called “Linzertorte dough.” The dough is rich with almonds and almond flavor.

    I have updated a more traditional recipe, to make my Vegan Linzer Cookies.

    The Spy Cookie!

    I love this bit of information from Biance Zapatka. She says they are also called spitzbuben cookies because that was the term for spies. And in essence, you can spy the jam in between the cookies. I can hear the Mission Impossible theme music playing now…

    How Long Does the Dough Chill in the Fridge?

    One important step to this dough is to chill it in the fridge before rolling out. Since the dough is rich in butter, rolling out the dough right after blending it together would be impossible. Chilling the dough greatly firms it up into a more malleable texture.

    I have tested dough that has been in the fridge for an hour and while it usually works ok, I still find it a bit too sticky. I think 2-3 hours is minimum, nut overnight really works best for these Vegan Linzer Cookies.

    Vegan Linzer Cookies powdered sugar
    Vegan Linzer Cookies on tray

    Make-Ahead Tip:

    Whip up the dough the day before you want to bake and serve the cookies! The cookies swiftly come together once baked, just add some jam and a dusting of sugar.

    Shapes and Cookie Cutters

    Cookie cutting is a key step for these Vegan Linzer Cookies. Upon rolling out the dough you will cut shapes for each cookie. But remember, each cookie needs two parts. The bottom cookie which remains whole. And the top cookie, that has an extra shape cut out so that the jam can peek through. This is sometimes called a Linzer eye.

    For my Vegan Linzer Cookies, I used a simple butterfly cookie cutter. I liked it for the holidays because it almost looks like a snow angel. I would have loved to do a heart shape for my Linzer eye, but I couldn’t find my mini heart cutter, so I did a simple round shape instead. This round shape worked well, though you want to be careful about making your eye too large. If it cuts into the cookies edges too much, your cookie could break apart.

    For the cookie shapes, you could try a traditional crimped edge rough cutter, or something sweet like a heart. For the eye, a simple circle or heart works very well. I also love a star for the eye.

    If you want to get really fancy, you could buy this Wilton Linzer Cookie Cutter sweet on Amazon.

    Or try for a few of these shapes. Just remember that the ‘eye’ cutter needs to be significantly smaller than the main cookie cutter shape.

    1. Round
    2. Star
    3. Angel
    4. Butterfly
    5. Crimped Round
    6. Heart
    7. Star
    8. Bell
    grab a cookie

    Other Vegan Holiday Cookies to Try!

    I have quite a few holiday cookie recipes here on the blog. Give a few of these a try….

    1. Gingerbread Men
    2. Pfeffernusse Cookies (my holiday fave!)
    3. Double Chocolate Chip
    4. Snickerdoodles
    5. Vegan Biscotti
    6. Peanut Butter Candy Cookies
    7. White Chocolate Macadamia Nut
    8. Chocolate Chip Walnut
    9. Molasses Ginger Cookies

    Ingredients

    Here are the main ingredients for my Vegan Linzer Cookies…

    • almond flour
    • wheat flour
    • vegan egg
    • sugar
    • almond and vanilla extract
    • salt
    • zest
    • baking powder
    • vegan butter
    • powdered sugar

    See the recipe card below for quantities.

    powdered sugar leftover

    Instructions

    Making these Vegan Linzer Cookies require three simple steps.

    First, you prepare the dough. Wrap it in plastic wrap and chill in the fridge.

    Then once chilled, you roll out the dough, cut into shapes and bake.

    Then you simply cool and assemble the cookies with the jam and powdered sugar. Easy!

    Vegan Linzer Cookies

    Substitutions

    Here are a few substitution notes for you.

    Vegan Linzer Cookies subs:

    • Vegan Egg – You could sub with silken tofu or applesauce. If using applesauce, please reduce the amount to ¼ cup.
    • Wheat Flour – You can sub with a gluten free flour blend if needed.
    • Vegan Butter – This is a prime ingredient for these cookies, but if you really want to attempt a version without it, try coconut oil and a pinch more salt.
    • Almond Flour – This is one ingredient you definitely shouldn’t sub if you want the traditional almond flavor. If you are just looking for the design and want a more sugar cookie flavor, you could sub with regular wheat flour.

    Recipes – Blogger Friends:

    I always encourage you to look at a few different recipes when settling on one to follow! This helps to educate you on the various ways to make something and what those slight variations may produce. Browsing food blogs is such a great educational activity for any budding baker or cook.

    Check these out!..

    • Vegan on Board has a lovely Vegan Linzer Cookie recipe.
    • And how pretty are these star-shaped Vegan Linzer Cookies from Garlic Head.
    • These fun Vegan Linzer Cookies from simple green recipes use letter cutouts for the eye!
    • These Linzer hearts from Vegetarian Times are also super cute.
    Vegan Linzer Cookies

    Vegan Linzer Cookies – Variations

    Change it up!

    • Jam Flavors – Raspberry, blackcurrant, redcurrant, apricot, blackberry and strawberry are my faves.
    • Shapes – As mentioned above, you can try a wide variety of designs for your cookies.
    • Thickness – The thickness will change the texture of these cookies. Roll them out extra thin for a more crispy buttery texture. Or keep them a bit thicker for a more pie crust, buttery texture.
    Print Recipe
    5 from 4 votes

    Vegan Linzer Cookies

    Buttery almond flavored cookies with a peekaboo of festive jam and powdered sugar on top.
    Prep Time10 mins
    Cook Time12 mins
    Chill Time4 hrs
    Total Time4 hrs 22 mins
    Course: baking, cookies, Dessert
    Cuisine: American, austrian
    Keyword: almond flour, christmas cookies, cookies, holiday
    Servings: 12 cookies
    Calories: 199kcal
    Author: Kathy Patalsky

    Equipment

    • 2 cookie cutters
    • 1 Rolling Pin
    • 2 parchment papers
    • 2 baking sheets
    • plastic wrap

    Ingredients

    Wet Ingredients

    • ½ cup vegan butter softened
    • ½ cup vegan egg
    • 1 teaspoon vanilla extract
    • ½ cup cane sugar
    • ½ teaspoon almond extract
    • ½ -1 teaspoon citrus zest

    Dry Ingredients

    • ¼ teaspoon salt
    • 1 teaspoon baking powder
    • 1 ¼ cups almond flour
    • 1 cup flour (AP)

    Toppings

    • ⅓ cup raspberry jam
    • ⅓ cup powdered sugar

    Instructions

    • Beat together all wet ingredients in a mixer. Gently beat in the dry ingredients until a thick, yet wet dough forms.
    • Transfer the dough to a sheet of plastic wrap and wrap into a ball. Seal tightly.
    • Chill dough in the fridge for at least two hours, overnight is best.
    • Day of baking, warm oven to 350 degrees and place parchment on your baking sheets.
    • Roll out dough on a heavily floured surface. Flour rolling pin as well. Roll to a bit let than desired cookie thickness since cookies will rise a bit upon baking.
    • Cut out both the main cookies and then half of the cookies get the Linzer eye cutout as well.
    • Bake cookies for twelve minutes. Cool on a cooling rack.
    • Dust the cookie tops in powdered sugar.
    • Fill the cookie bottoms with jam and add the tops. Repeat with all cookies.
    • Serve!

    Nutrition

    Calories: 199kcal | Carbohydrates: 21g | Protein: 3g | Fat: 12g | Saturated Fat: 2g | Polyunsaturated Fat: 2g | Monounsaturated Fat: 3g | Trans Fat: 0.04g | Sodium: 113mg | Potassium: 62mg | Fiber: 1g | Sugar: 17g | Vitamin A: 360IU | Vitamin C: 1mg | Calcium: 44mg | Iron: 1mg

    Top tip

    Make sure to flour your rolling surface and rolling pin. If you get stuck, literally, you can use a very thin spatula to scoop the cookies off your rolling surface.

    Equipment

    • Rolling pin

    Storage

    Store on the counter and eat within a few days or store in the fridge and consume within a week.

    FAQ

    How Long to Bake?

    I like around 12 minutes. Or when the very early markings of browning hit the edges of the cookies. You can do a little longer for crispier texture, and a bit less for truly buttery, tender cookies. I prefer my cookies a bit softer in texture. but baked enough to hold up for the jam.

    5 Ingredient Vegan Chocolate Pie

    December 8, 2022

    5 Ingredient Vegan Chocolate Pie

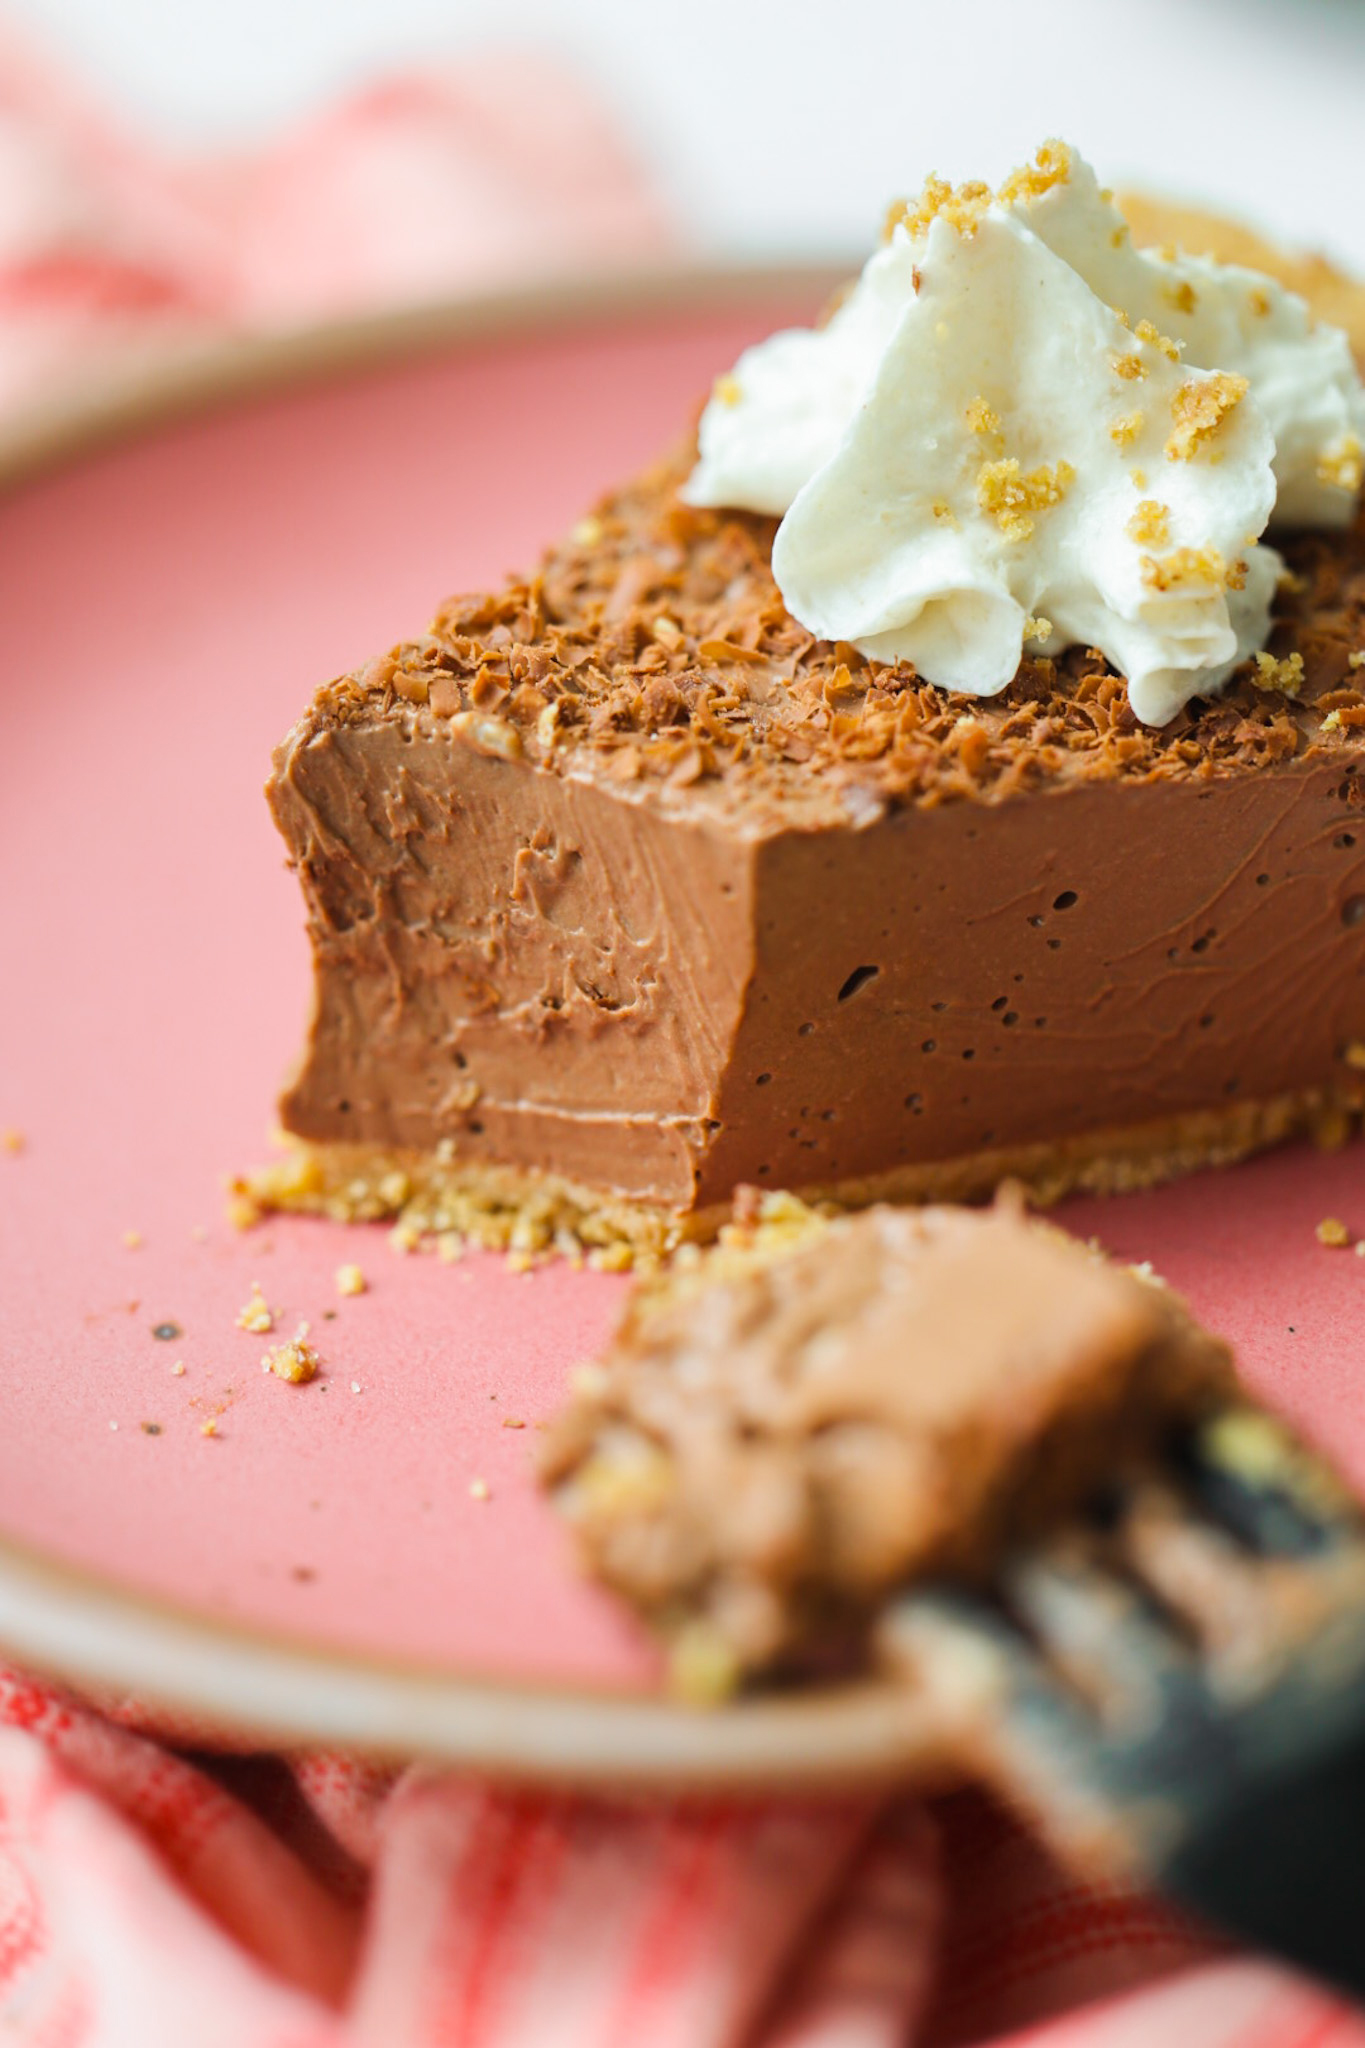
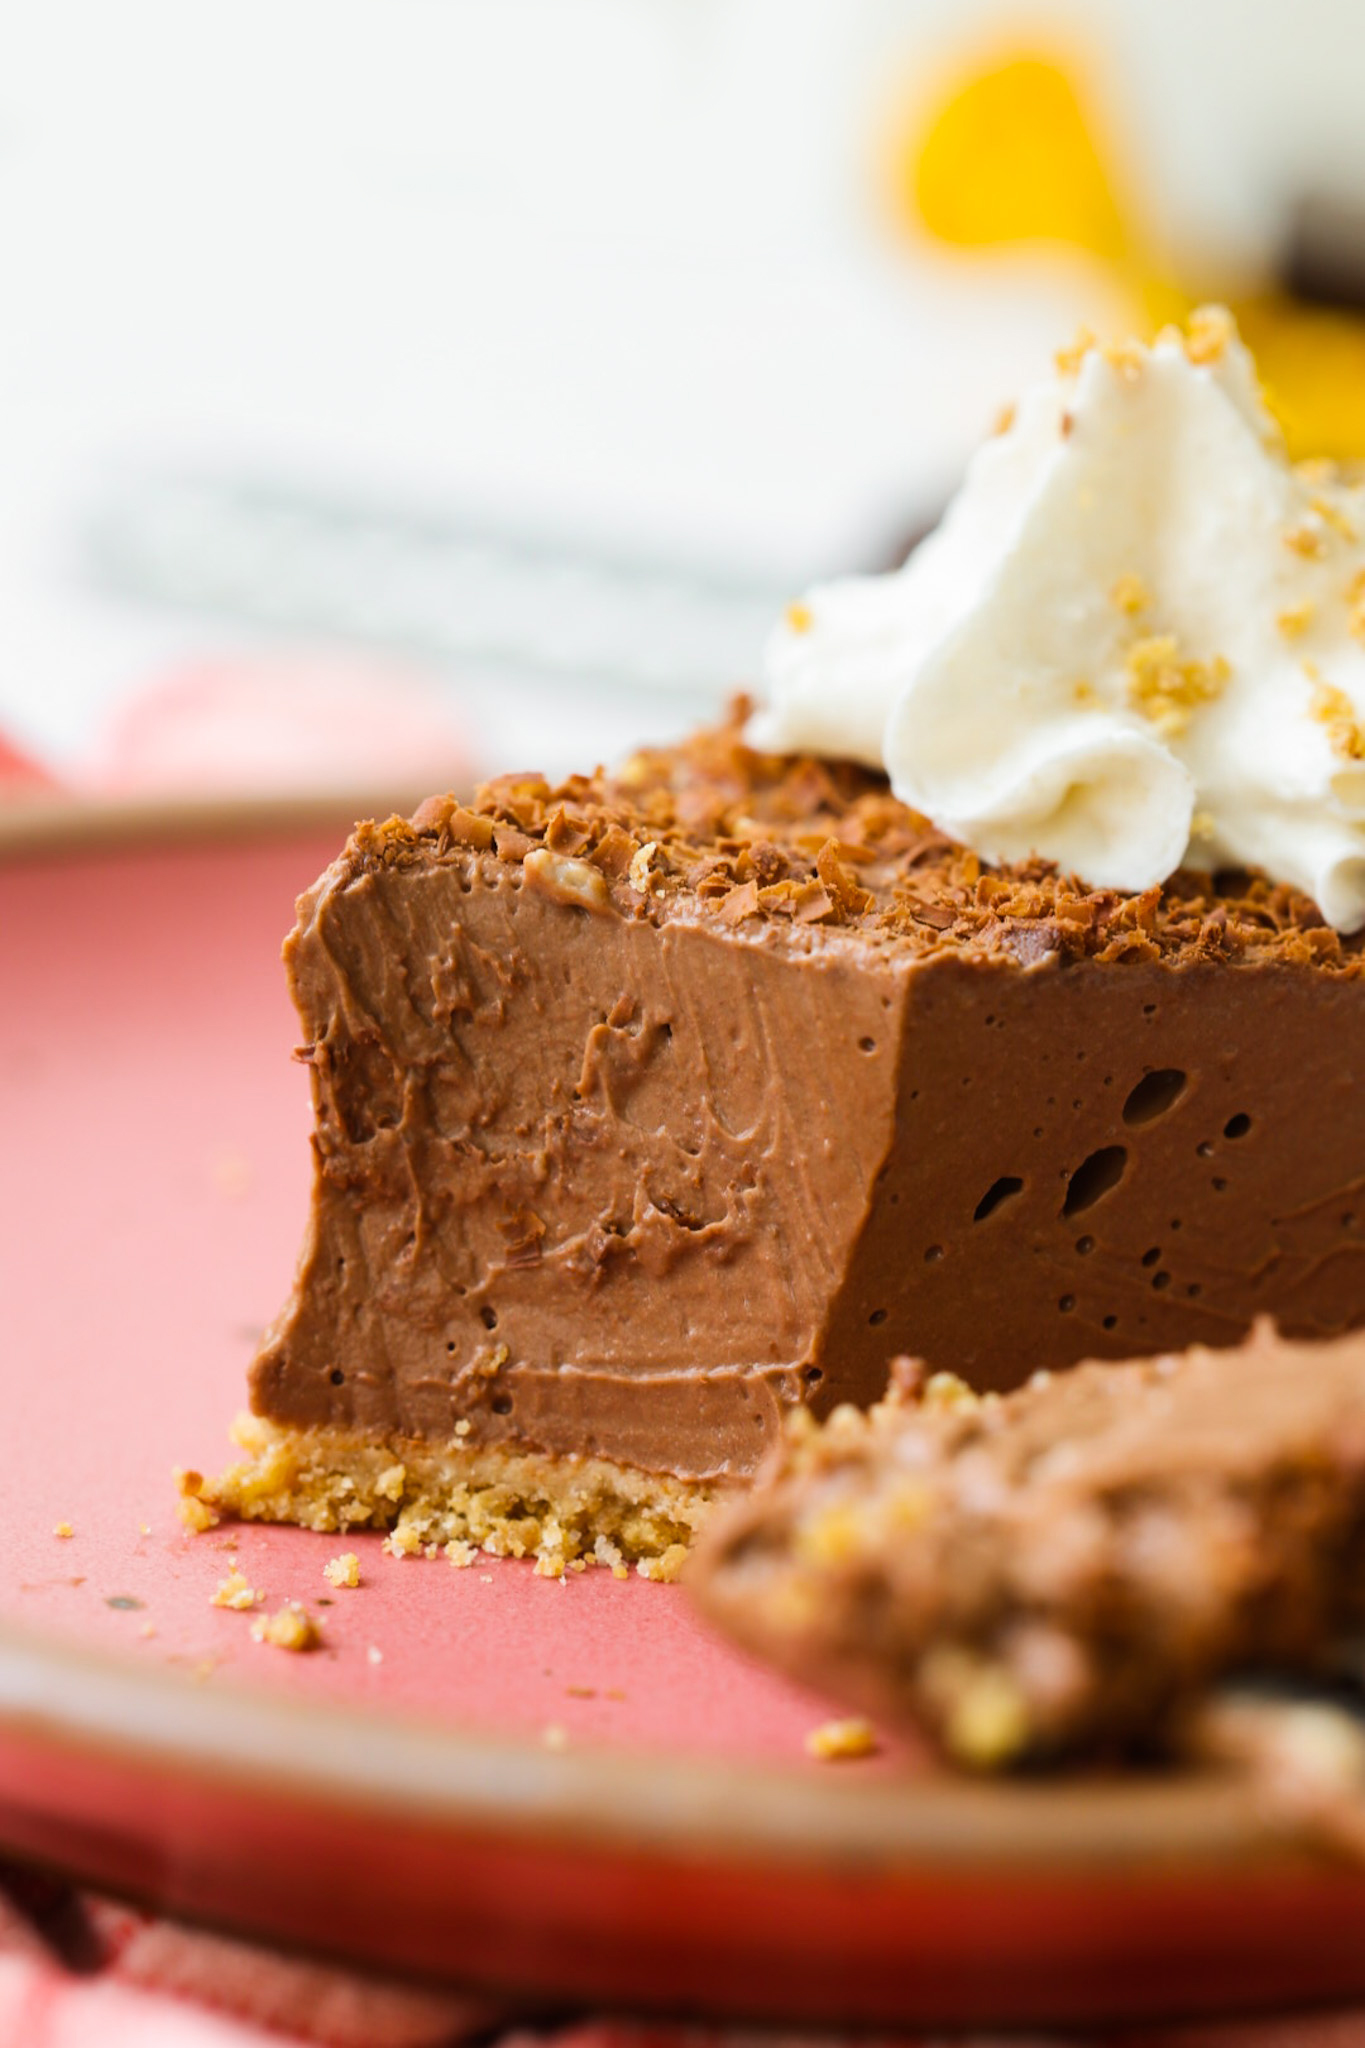
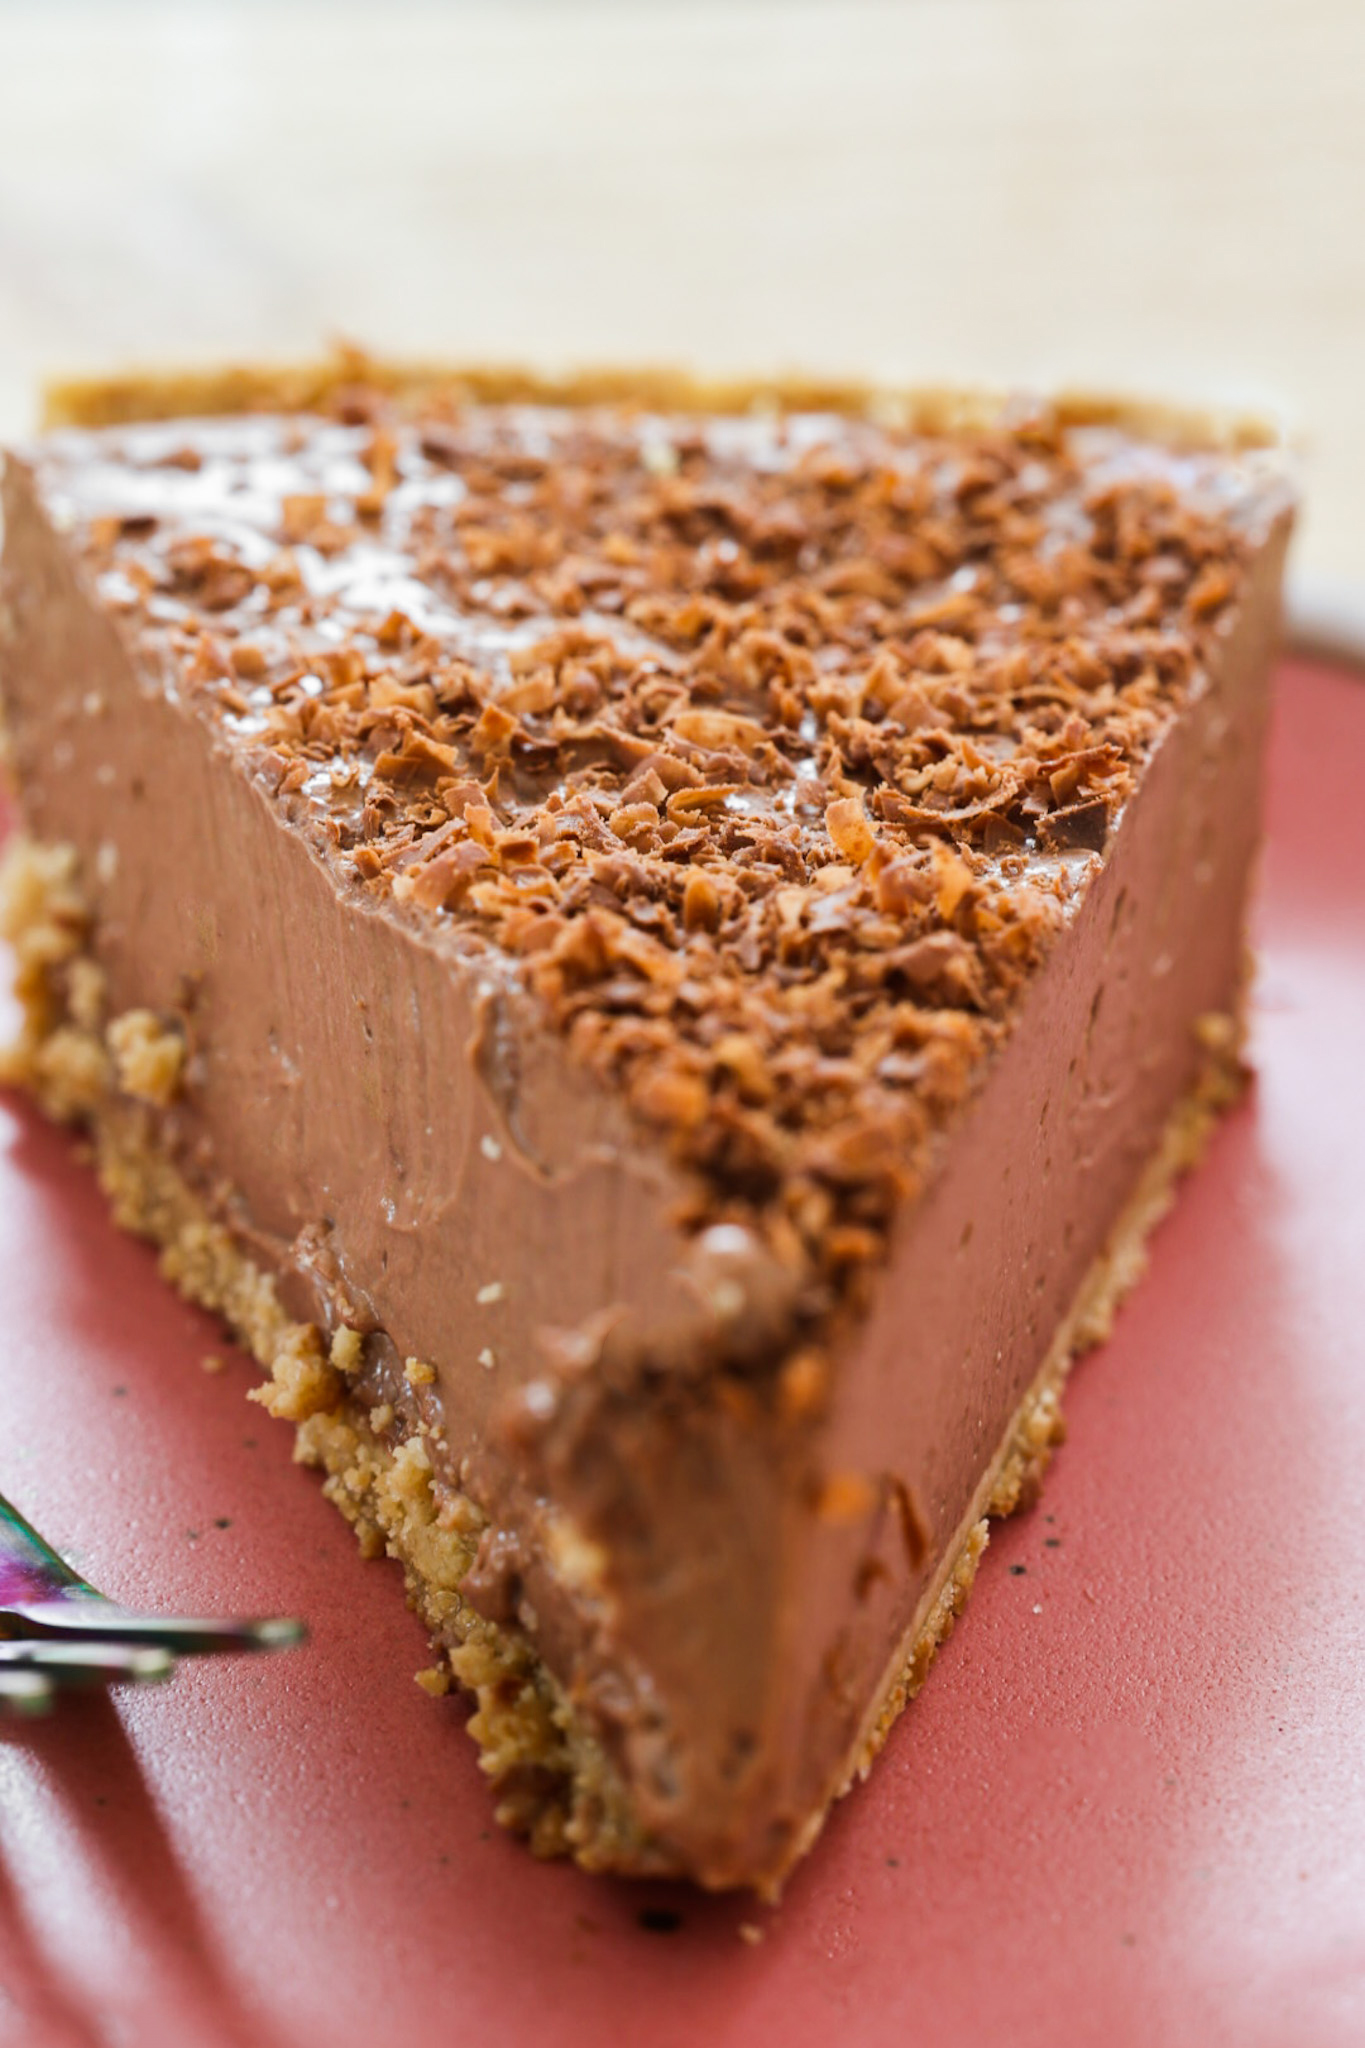
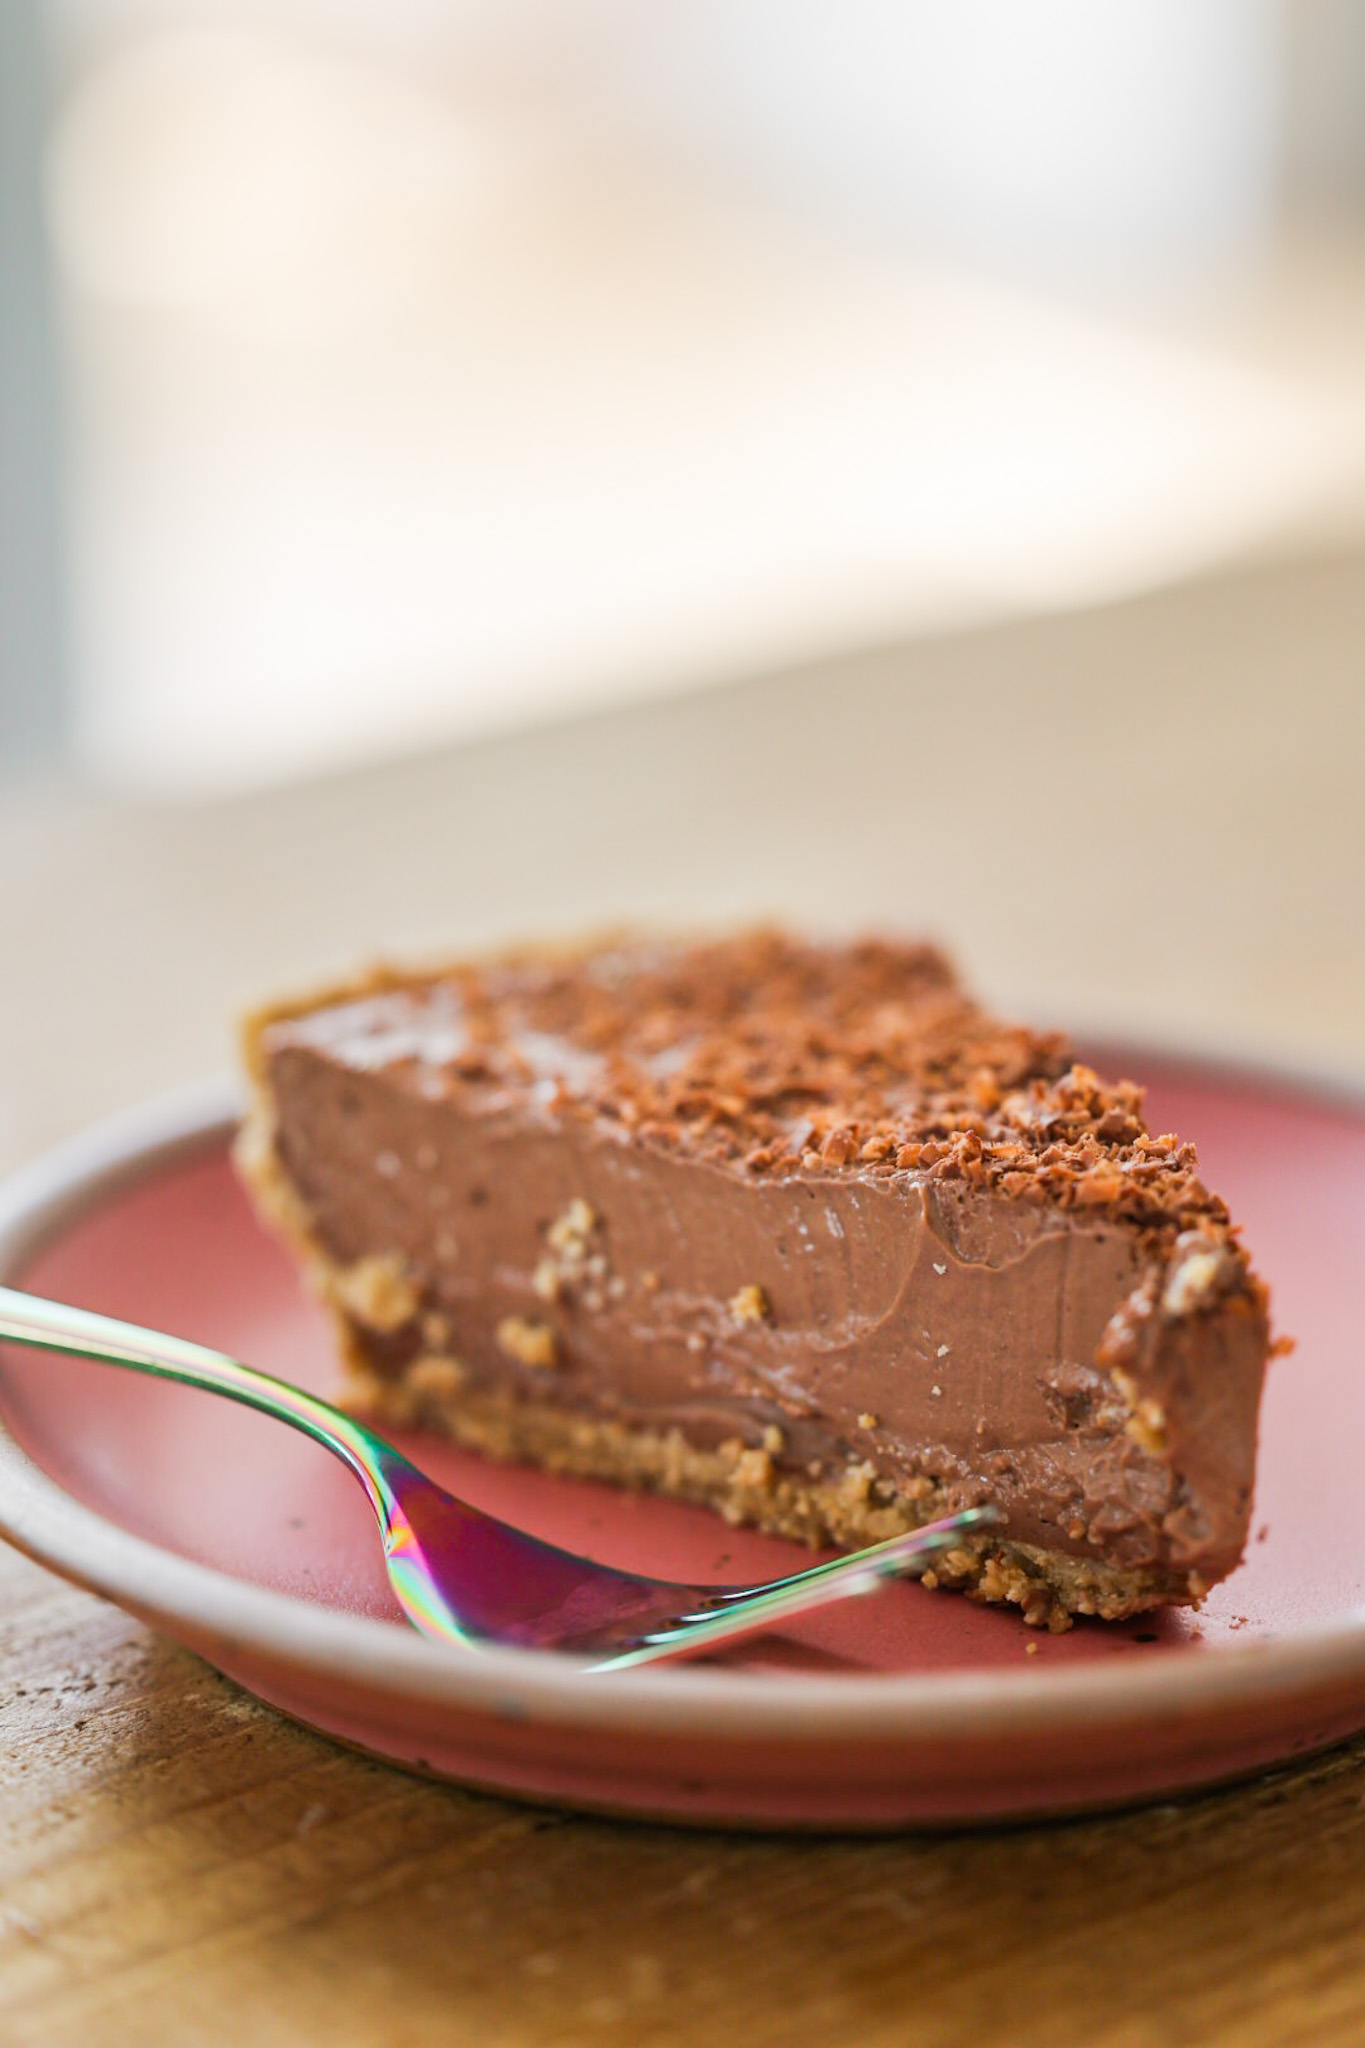
    This 5 Ingredient Vegan Chocolate Pie is the absolute yummiest thing you can do with tofu. Seriously. This recipe is a spin on my famous vegan chocolate pudding. But instead of cacao powder, I use melted chocolate chips.

    The chocolate chips do two things. One, they make the pie firmer upon chilling. Since chocolate firms up in the fridge – more so that powdered cacao. And two, the chocolate chips add a deep richness in place of the more light and friendly chocolate flavor from cocoa or cacao powder.

    Wait, what in the world is the difference between cacao and cocoa powder anyways??? This is a good question to be answered in my All About Chocolate blogpost.

    Let’s get to it!…

    [feast_advanced_jump_to]

    Kid-Approved

    I also love this recipe because it is kid-approved and you can even whip it up with your kids. All it takes is some pulling out of ingredients and getting your blender ready. For this recipe the chocolate chips are melted so there is some heat involved. You can try to wing it by using a microwave, but I prefer a double-broiler method. Older kids will love to watch how the chocolate melts over the steam from the boiling water. But younger kids can let mom or dad do this part. And again, if you want a truly no-bake chocolate pudding pie recipe, my recipe here will work great. For a firmed up pie, all you have to do is increase the coconut oil by 3-4 Tbsp.

    The Crust for Chocolate Pie

    This dessert reminds me of graham cracker crumble chocolate pudding parfaits I used to have as a kid. So I definitely love a graham cracker crust for this recipe. And even better, you can easily buy a graham cracker crust that is all ready to go! That’s just six total ingredients you need if you buy a ready to go crust. And I swear, you could make this in under ten minutes.

    How Long in the Fridge?

    It takes about an hour to firm up in the fridge. Overnight is preferred.If you are in a hurry, try placing this 5 Ingredient Vegan Chocolate Pie in the freezer.

    5 Ingredient Vegan Chocolate Pie
    chocolate pie with whipped cream

    Make-Ahead Tip:

    You can make this 5 Ingredient Vegan Chocolate Pie up to two days in advance. Just cover well with a pie lid and place in the back of your fridge. Pull it out, Swirl on some non-dairy whipped cream and it’s ready to go.

    Dress it Up for a Party

    This 5 Ingredient Vegan Chocolate Pie is a dream to make for parties. Mostly because it is so darn easy to make that you do not have to stress out about prep or process or cooking. You just whip it up and chill.

    But if you want to make this 5 Ingredient Vegan Chocolate Pie party-approved there are a few more aesthetically pleasing things you can do.

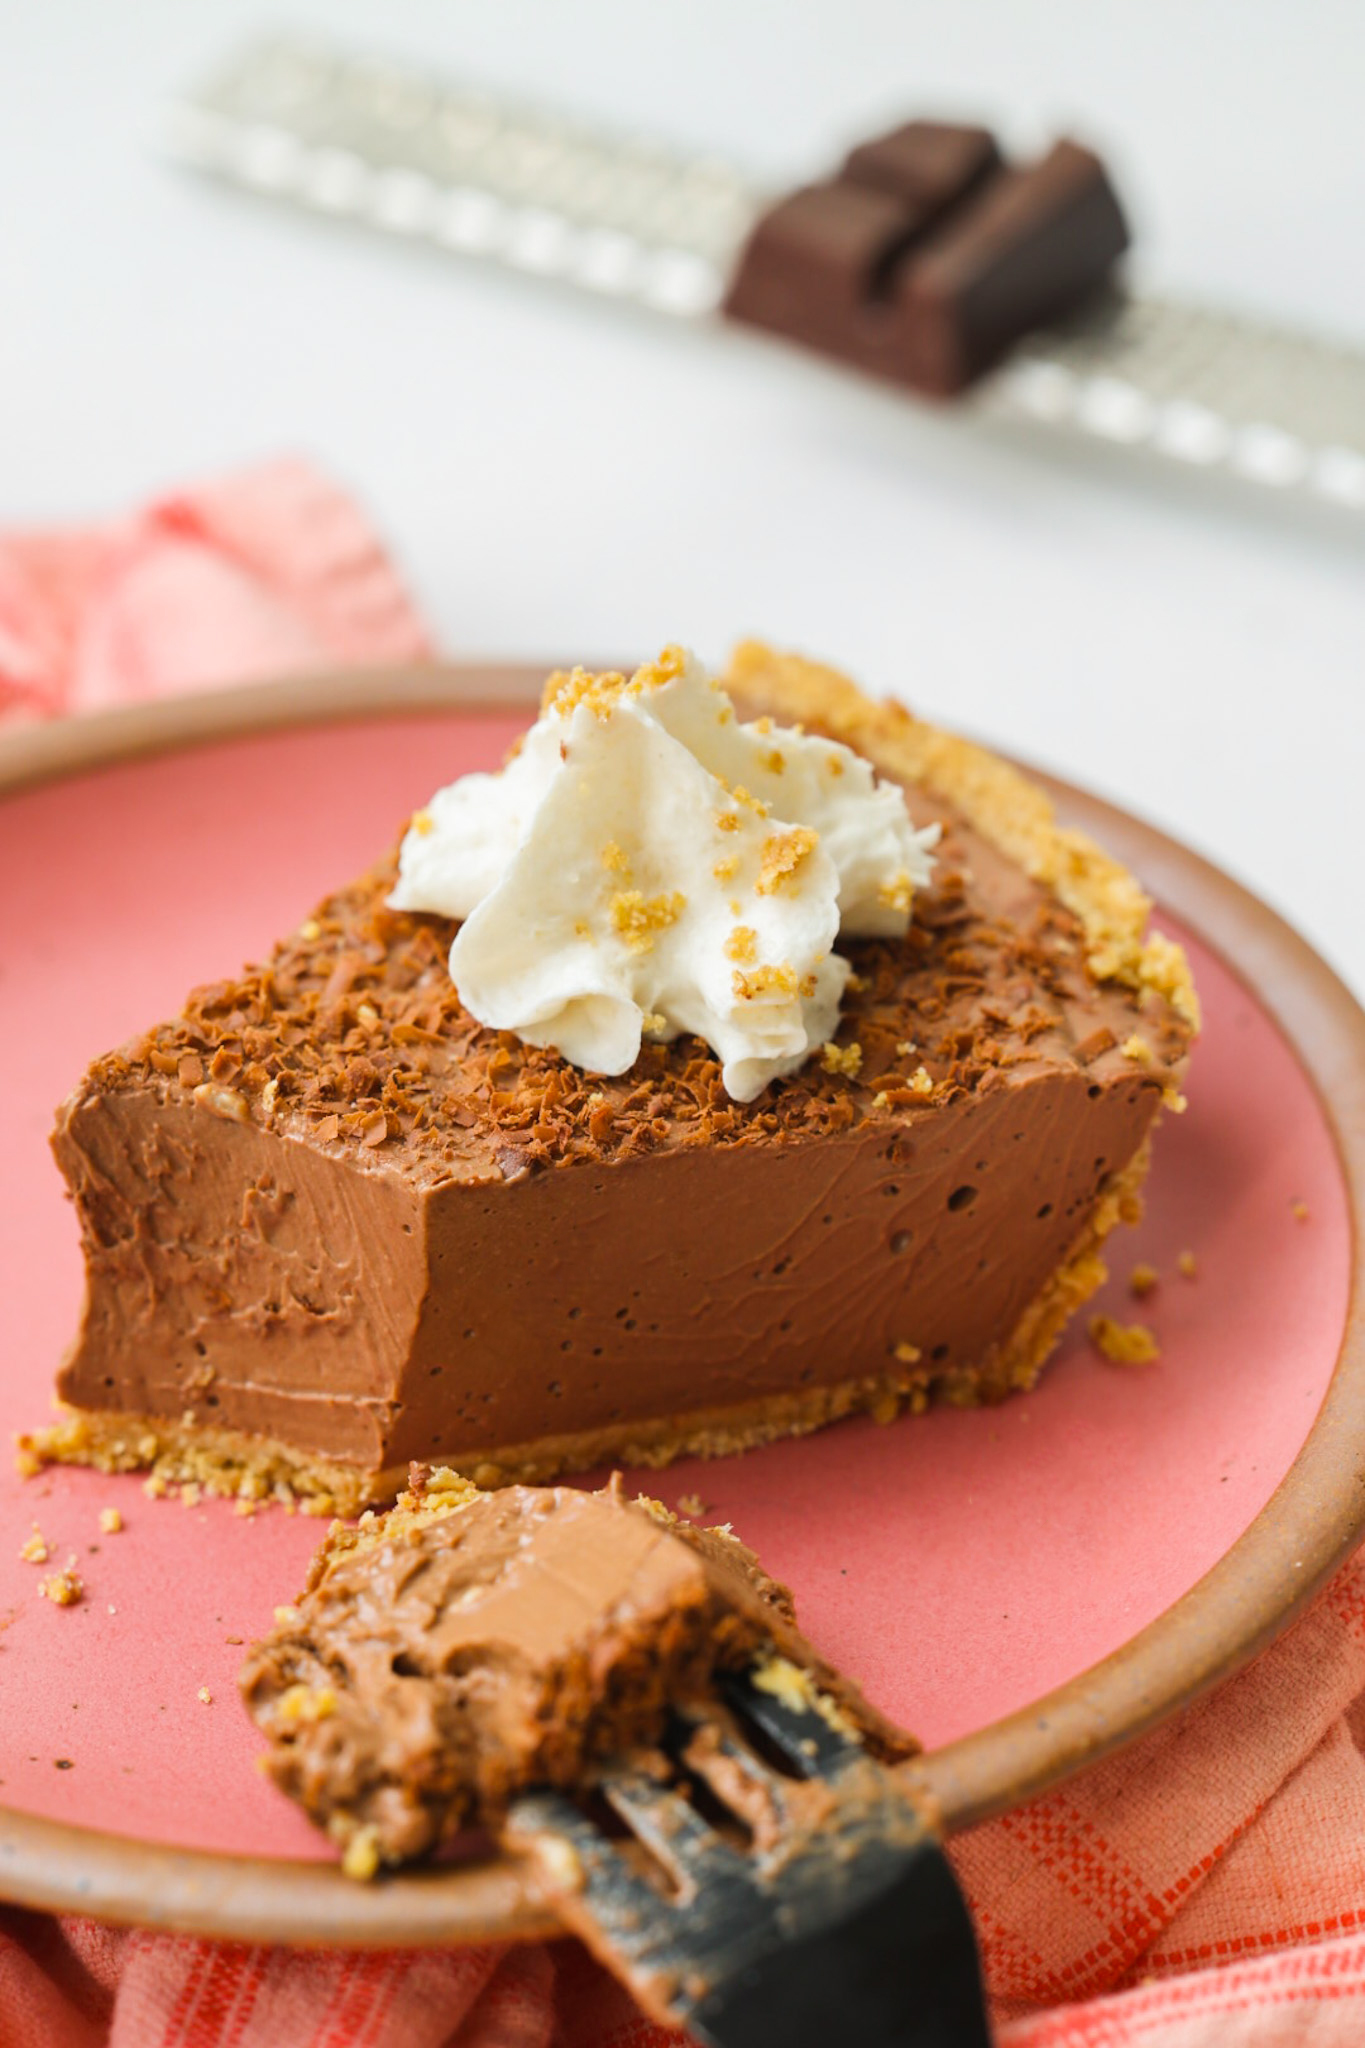
    1. Zest Chocolate – First, you can use a zester and grate dark chocolate over top. This creates a lovely texture and extra rich chocolate flavor in each bite. Plus it will cover up any imperfections like air bubbles that may have surfaced in your pie.
    2. Pie Dish – As for using a premed crust… You probably don’t want to serve it in a foil tin – the kind that the pre-made graham crust came in. But you can still use a premed graham crust! All you do is pop out the crust and re-smash it into your own presentation-approved glass pie dish. Your guests will never know. And of course, if you want to make your own graham crust, you are welcome to do that too in your own party-approved pie dish.
    3. Whip! This 5 Ingredient Vegan Chocolate Pie looks so pretty with vegan whipped cream swirled on top. You can do a self-serve station by chilling the whip in a champagne holder with some ice, next to wherever your pie will be served.
    4. Crumble Overtop – And lastly, you can even crumble some leftover or newly crushed graham pieces — or something like chopped nuts over top the whipped cream. This adds even more texture and builds upon the height of the pie.

    So to recap, served all alone, this pie is delicious, but does look a bit boring with it’s shiny chocolate top. Add some garnished on top and accent this pie a bit to bring out its beauty.

    chocolate pies plates for holidays

    Other Vegan Pies to Try!

    I have quite a few recipes here on the blog. Give a few of these a try….

    • Pecan Pie (Love!)
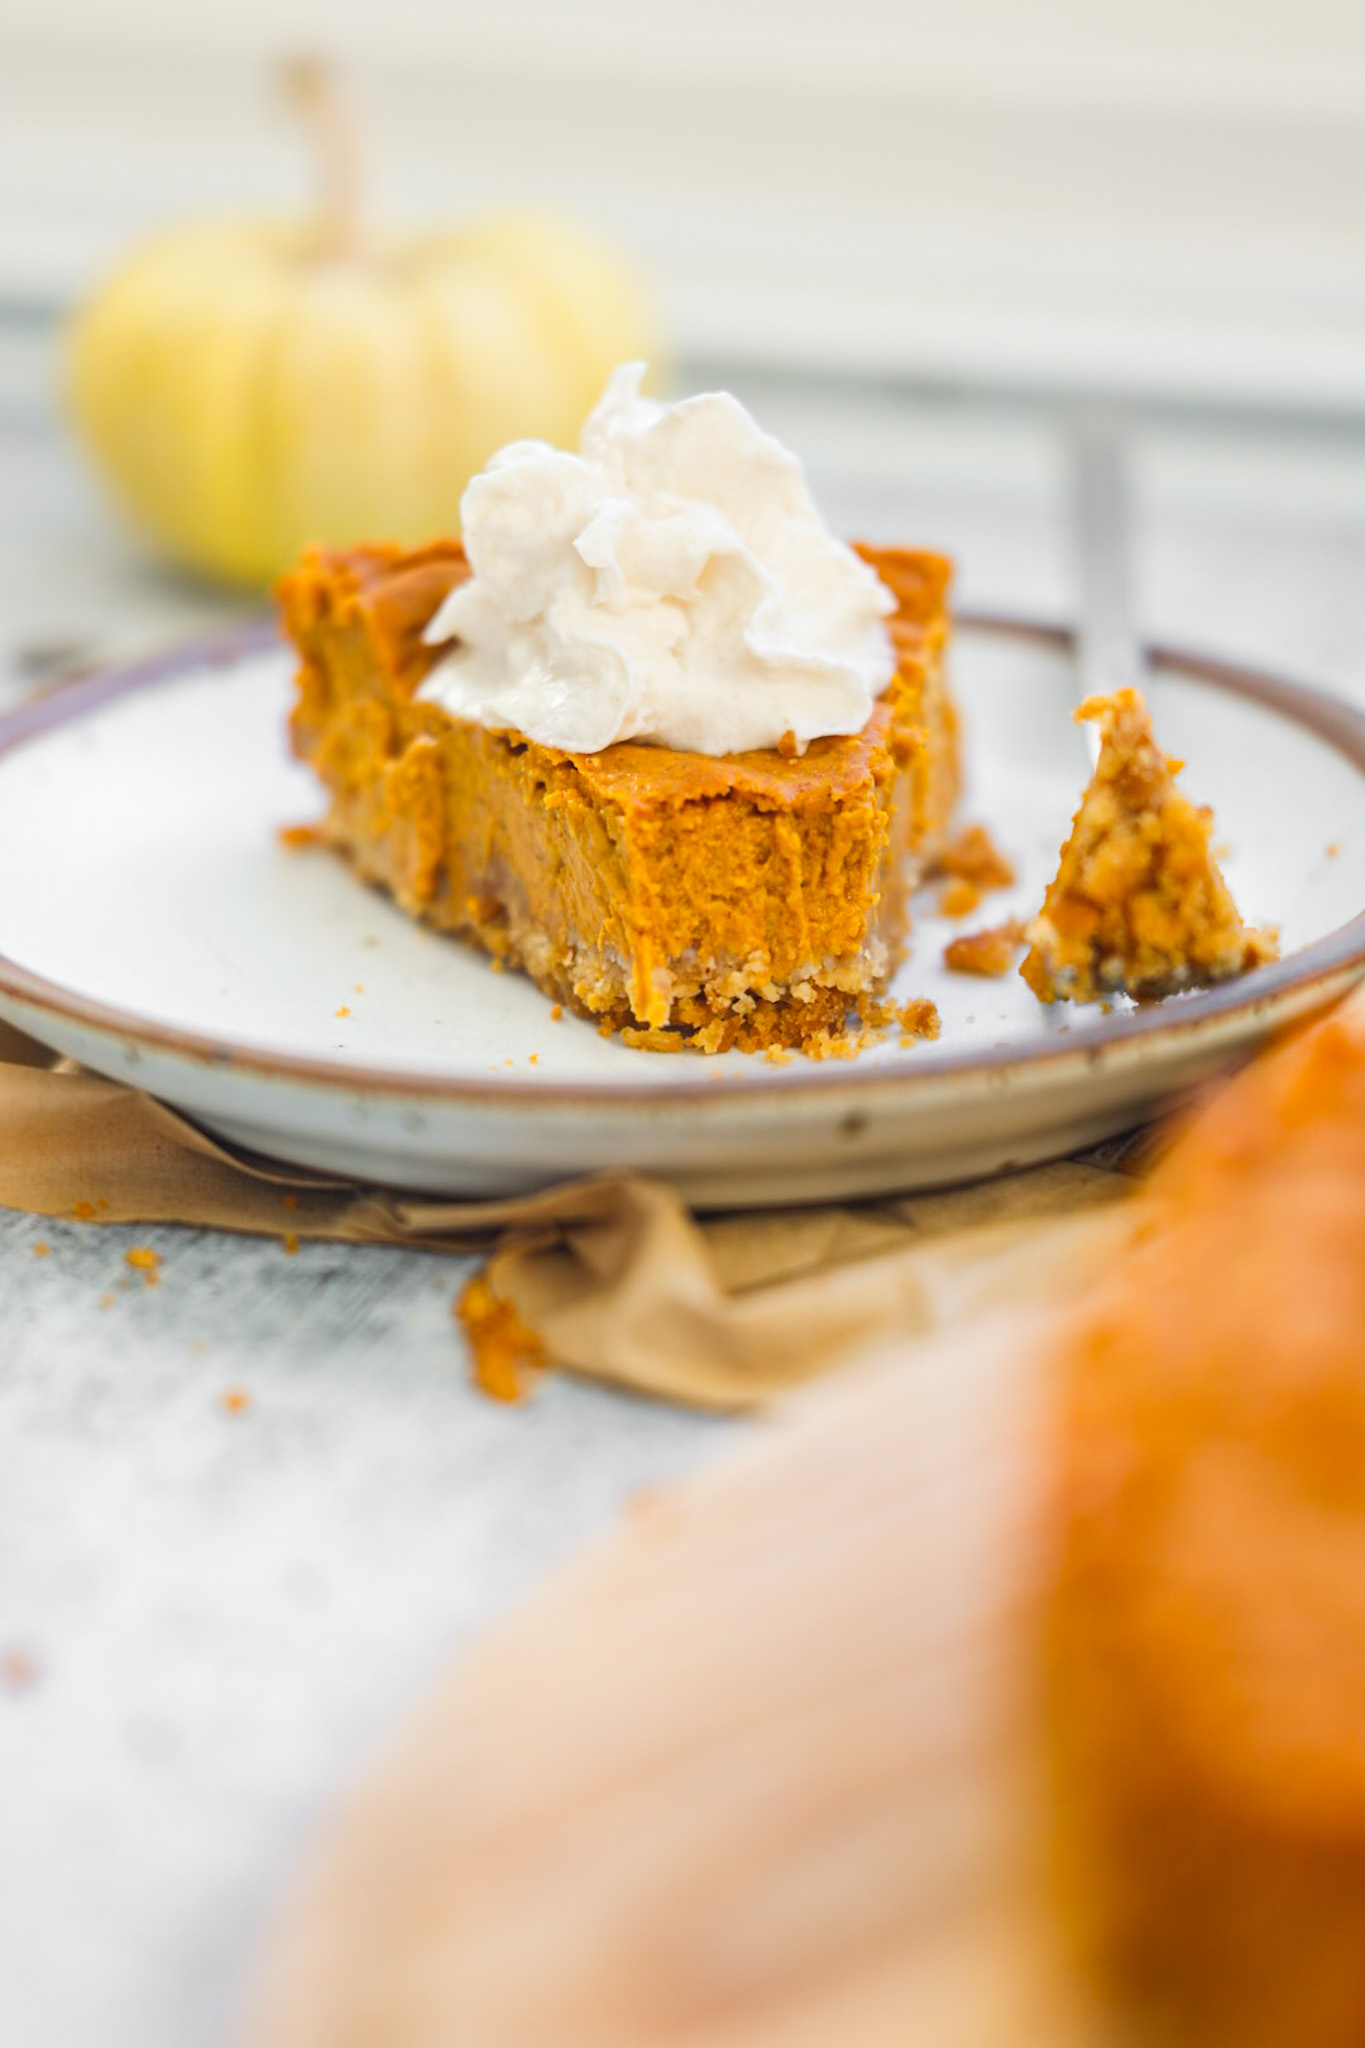
    • My classic Vegan Pumpkin Pie
    • Original recipe Chocolate Cream Pie (no-bake version with powder)
    • Cherry Pie
    • Caramel Apple Pie

    Ingredients

    Here are the main ingredients for this 5 Ingredient Vegan Chocolate Pie recipe…

    • silken tofu
    • dark or semi-sweet vegan chocolate chips
    • maple syrup (or agave)
    • coconut oil
    • salt
    • vanilla extract
    • graham crust

    See the recipe card below for quantities.

    inside of a chocolate pie

    Instructions

    Making this 5 Ingredient Vegan Chocolate Pie is super simple. If you know how to use a blender and melt chocolate, you are in! The first step is to add all ingredients tot he blender. Then you need to melt that chocolate. You can use a double broiler method, or melt the chips in the microwave.

    Tip: If you are melting the chips in the microwave, add the coconut oil and chocolate chips to a micro-safe bowl. then heat in thirty second intervals, stirring as much as possible after each interval. Eventually, you will get a melty chocolate. Just do not overcook the chocolate! It will dry out and may even burn. you definitely do not want the smell of burnt chocolate in anything you make.

    chocolate topped chocolate pie
    rich and creamy chocolate pie
    dairy free chocolate pie

    Substitutions

    Here are a few substitution notes for you.

    5 Ingredient Vegan Chocolate Pie subs:

    • Maple Syrup – You can sub with agave syrup. If you want a less sweet pie, you can also halve this sweetener amount.
    • Tofu – While there is not a sub for tofu in this recipe, you could actually use ANY tofu variety. Yup. While silken tofu will easily provide the silkiest texture with very little work, you could use firm tofu if that is all you have on hand. All you need to do is blend the firm tofu with 2-4 tablespoon water. This will silken up the firm and crumbly tofu texture. The pie will be slightly thicker in texture, but still delicious.
    • n m– The coconut oil really helps to firm up the pie in the fridge. But if you don’t want to add it or don’t have any on hand, no worries! Simply sub with another ⅓ cup of melted chocolate chips. Nut butter is another possible coconut oil sub. Try peanut or almond.

    Recipes – Blogger Friends:

    I always encourage you to look at a few different recipes when settling on one to follow! This helps to educate you on the various ways to make something and what those slight variations may produce. Browsing food blogs is such a great educational activity for any budding baker or cook.

    My blogger buddies shared these awesome vegan chocolate pie recipes. Check them out!

    • Pinch of Yum has a beautiful vegan chocolate pie using nut butter.
    • My friend Katie over at CCK has one variation using firm tofu and adding an optional bit of coffee – yum!
    • My girl Britt over at The Banana Diaries has a variation that is tofu-free
    • And I love the classic buttery crust used in this pie by Cook Nourish Bliss
    vegan chocolate pie

    5 Ingredient Vegan Chocolate Pie – Variations

    Change it up!

    • Nut Butter – Add in a few dollops of nut butter to the pudding blend. Or swirl nut butter into the finished pie.
    • Buttery Crust – Instead of a graham crust, use a traditional flaky vegan butter crust. My recipe here.
    • Serve it as a Pudding – Pour the blended pie filling into dessert cups and serve as a rich chocolate pudding/mousse.
    • Change the Chocolate – One way to give this recipe endless variations is the change the melted chocolate ingredient source. You can try semi0sweet chips, or dark chocolate chips. Or even your fave vegan chocolate bar. Since chocolate sources can have varying flavors, so will your pie!
    • Fold in Goodies – From chopped nuts to chopped peanut butter cups or even dried cranberries or pretzels, folding in goodies is a fun way to give this pie it’s own character each time you make it!
    chocolate pie on a plate
    Print Recipe
    5 from 3 votes

    5 Ingredient Vegan Chocolate Pie

    Silky smooth with rich chocolate flavor in every protein-rich bite!
    Prep Time10 mins
    Chill Time1 hr
    Total Time1 hr 10 mins
    Course: Dessert
    Cuisine: American
    Keyword: chocolate, pie, tofu
    Servings: 8 slices
    Calories: 359kcal
    Author: Kathy Patalsky

    Equipment

    • 1 blender
    • 1 stainless steel bowl
    • 1 large pot

    Ingredients

    • 14 oz tofu silken
    • 1 cup chocolate chips
    • ½ cup maple syrup
    • 3 tablespoon extra virgin coconut oil
    • ½ teaspoon salt
    • ¼ teaspoon vanilla extract optional
    • 1 graham cracker crust

    Instructions

    • Melt your chocolate using a double broiler method.
    • Add all ingredients to a blender. Blend from low to high until smooth.
    • Pour the chocolate mixture into a premed graham cracker crust.
    • Chill for at least one hour – overnight is preferred.
    • Serve! Add dairy-free whipped cream over top if desired.

    Notes

    see recipe post for subs

    Nutrition

    Calories: 359kcal | Carbohydrates: 43g | Protein: 5g | Fat: 19g | Saturated Fat: 10g | Polyunsaturated Fat: 2g | Monounsaturated Fat: 5g | Sodium: 249mg | Potassium: 134mg | Fiber: 1g | Sugar: 29g | Vitamin A: 0.2IU | Calcium: 106mg | Iron: 1mg

    Top tip

    Make sure your chocolate is silky smooth when adding to the blender. The last thing you want is a lumpy silky chocolate pie.

    Equipment

    • High Speed Blender
    • Stainless Steel Bowl for double broiler

    Storage

    Store in the fridge. Consume within a week. A few days for best flavor and texture.

    FAQ

    Can I Use Firm Tofu?

    Yes. I answered this question higher up with some prep details. But yes, you can use any variety of tofu! Just be sure to blend until silky smooth and possibly add in a bit of extra liquid. But a high-speed blender will really help you with this silky texture step.

    I don’t have coconut oil, now what?

    That’s ok! you can melt in an extra ⅓ cup of chocolate chips and blend everything else as normal. Another sub would be nut butter. Just be aware that the coconut oil helps firm up the pie, so you want an ingredient that similarly gets firm when chilled. Chocolate is the same way with cold temps. I just like the coconut oil ingredient because I think it does some extra firming and adds a lightness to the rich fatty content of the pie.

    Wait, is this Healthy?

    I mean, I have definitely eaten this pie for breakfast. The first ingredient is tofu, right? “Healthy” is all a matter of personal perspective when it comes to foods like pie and cookies and ice cream. But some positive things about this pie are that it contains very little refined sugar – just that in the chocolate chips. And yeah, all that protein-rich tofu. Which is a bean. It’s basically chocolate covered beans here. So you be the judge. Wink.

    Vegan Pumpkin Bread with Streusel Topping

    September 28, 2022

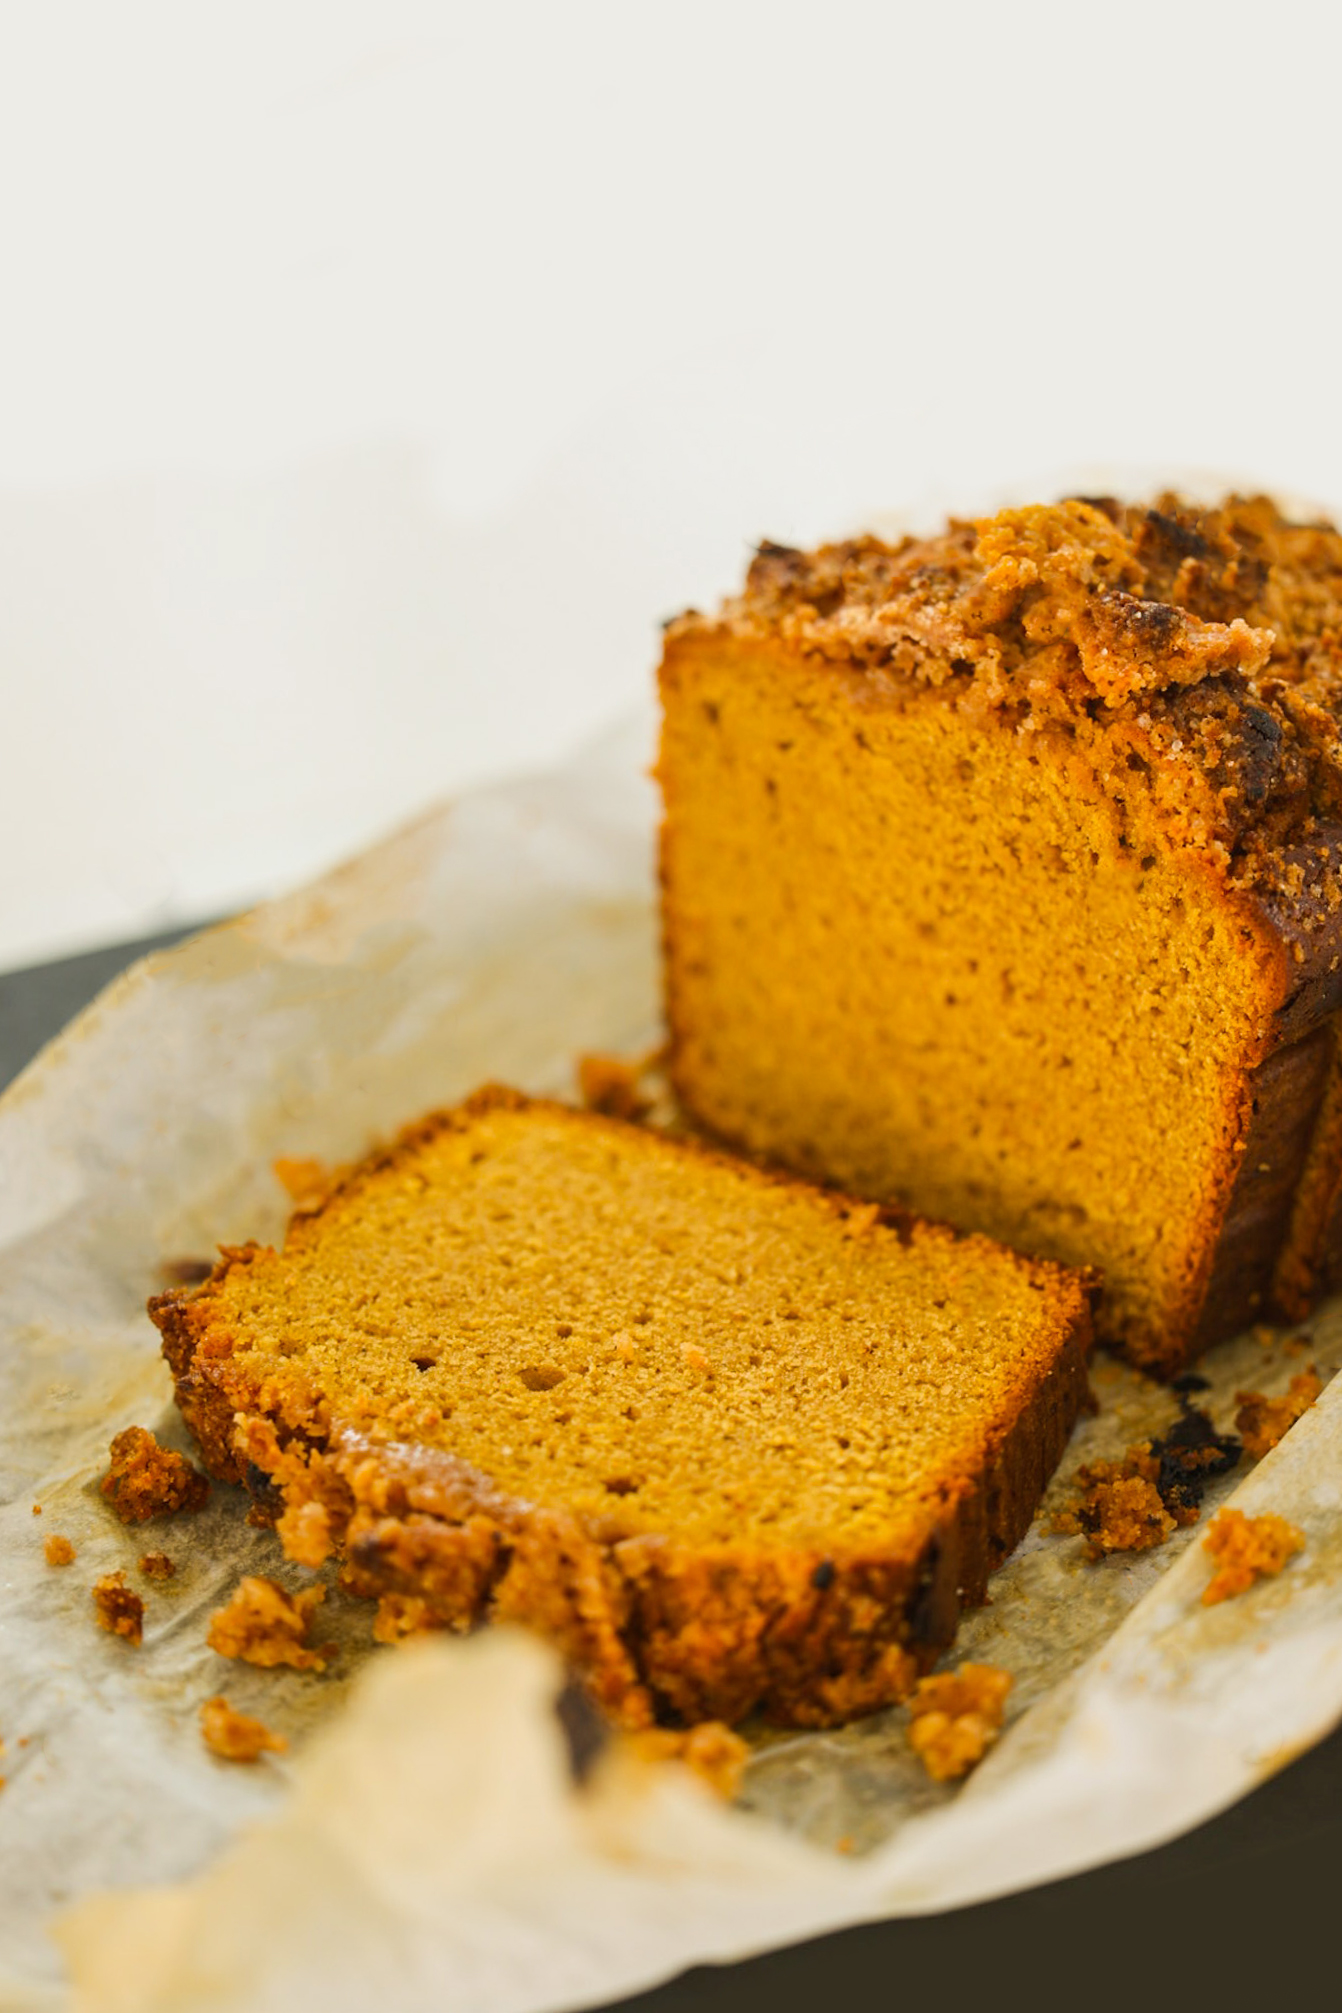
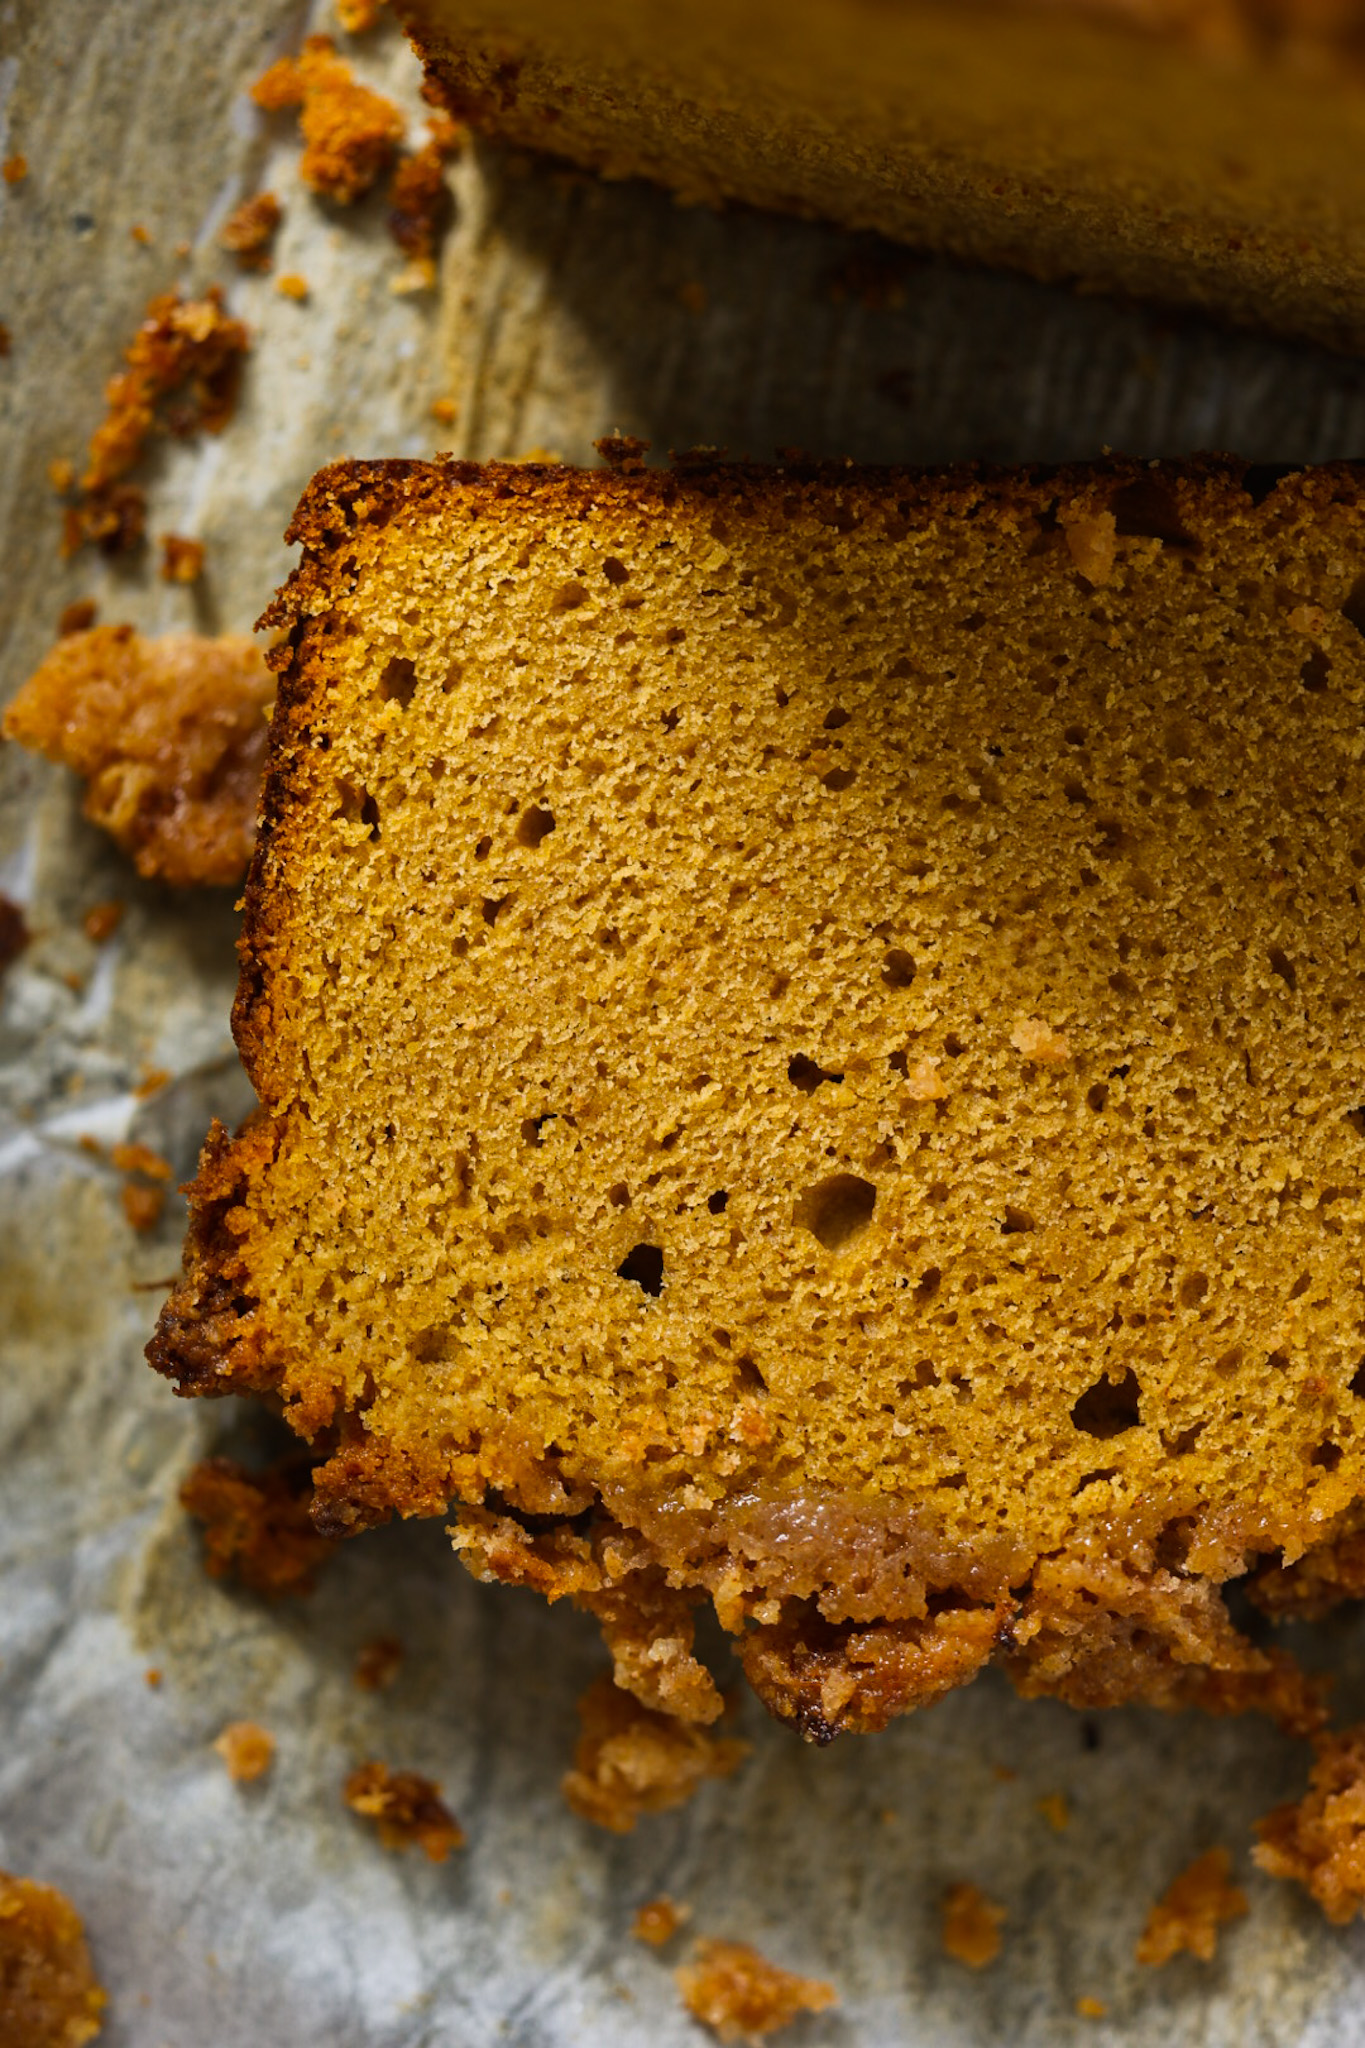
    slice of Vegan Pumpkin Bread

    This Vegan Pumpkin Bread with Streusel Topping, is the best thing I have baked this fall. I made two loaves back to back and I am certain I will be baking it a few more times as the weeks roll by. We are snacking on it with morning lattes, after dinner, in the car on the way to activities and I’ve grabbed a few chunks as a midnight snack too. So good! The warm pumpkin spice is accented with sugar and melty butter flavor.

    Oil Free, Using Nut/Seed Butter

    It just happens to be oil-free, even though I have nothing against oil and would have usually used sunflower oil in this variety of loaf. But I was out. So, in swoop my swapping skills / curiosity. I used an oil substitute that worked out so well. You still get all those rich healthy fats and some bonus fiber too. I am so excited about this recipe and hope you can bake it soon!…

    Approved for School Lunches

    This Vegan Pumpkin Bread with Streusel Topping is nut-free, so for my purposes, that made it school lunch approved. It is also a new fave of my toddler. She has been gobbling this bread down. And I love that it is one yummy way for her to get some healthy, vitamin A-rich pumpkin in her diet!

    gold pumpkin
    Vegan Pumpkin Bread with Streusel Topping

    Make-Ahead Tip:

    When I bake a large loaf of this Vegan Pumpkin Bread with Streusel Topping (or any snack bread), I like to slice it, then freeze individual slices. Then I can simply place a frozen slice in her lunch and by lunchtime it is thawed and fluffy. I tried that trick today and indeed the bread thawed beautifully in about an hour.

    Vegan Pumpkin Bread with Streusel Topping

    Other Vegan Snack Breads to Try:

    I love this type of loaf. Fluffy and moist, sliced thick and spongy. Perfect with coffee or tea. Snackable any time of day.

    I have quite a few recipes here on the blog. Give a few of these a try. The chocolate loaf is a must-try!

    • Double Chocolate Loaf (so good!)
    • Peanut Butter & Jelly Bread
    • Chocolate Chip Banana Bread
    • Blueberry Lemon Loaf
    • Pumpkin Loaf with Walnuts
    • Banana Bread with hidden chickpeas
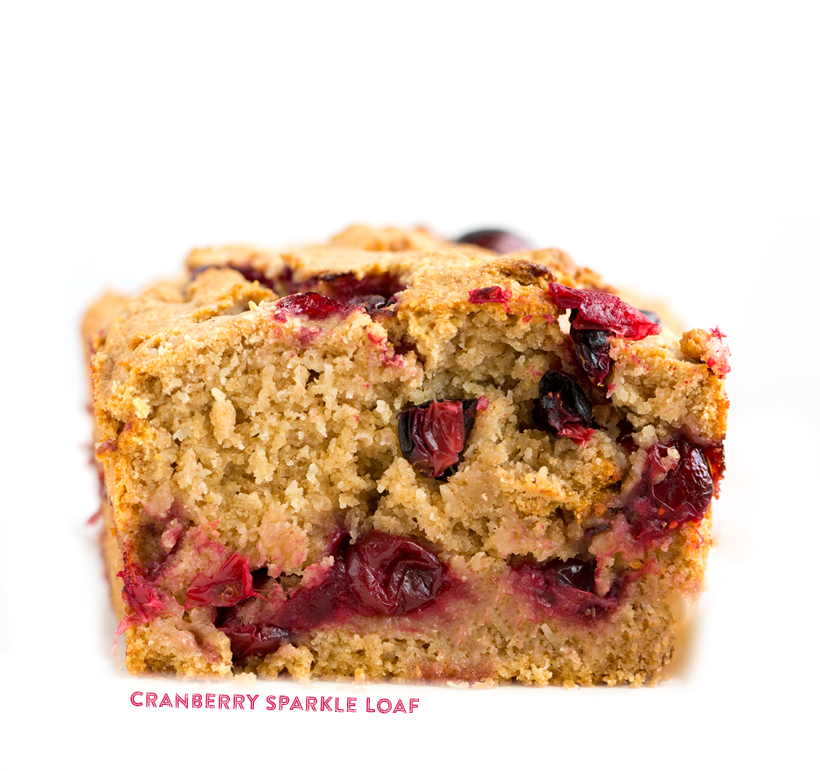
    • Cranberry Sparkle Loaf
    • Chocolate Chip Pumpkin Loaf
    • Cornbread

    And even though I have a few other pumpkin breads on the list above, this Vegan Pumpkin Bread with Streusel Topping is probably my fave so far. As usually happens with me. I love constantly updating and improving on previous recipes. Giving them a new spin and amplifying the flavors even more.

    [feast_advanced_jump_to]

    Ingredients

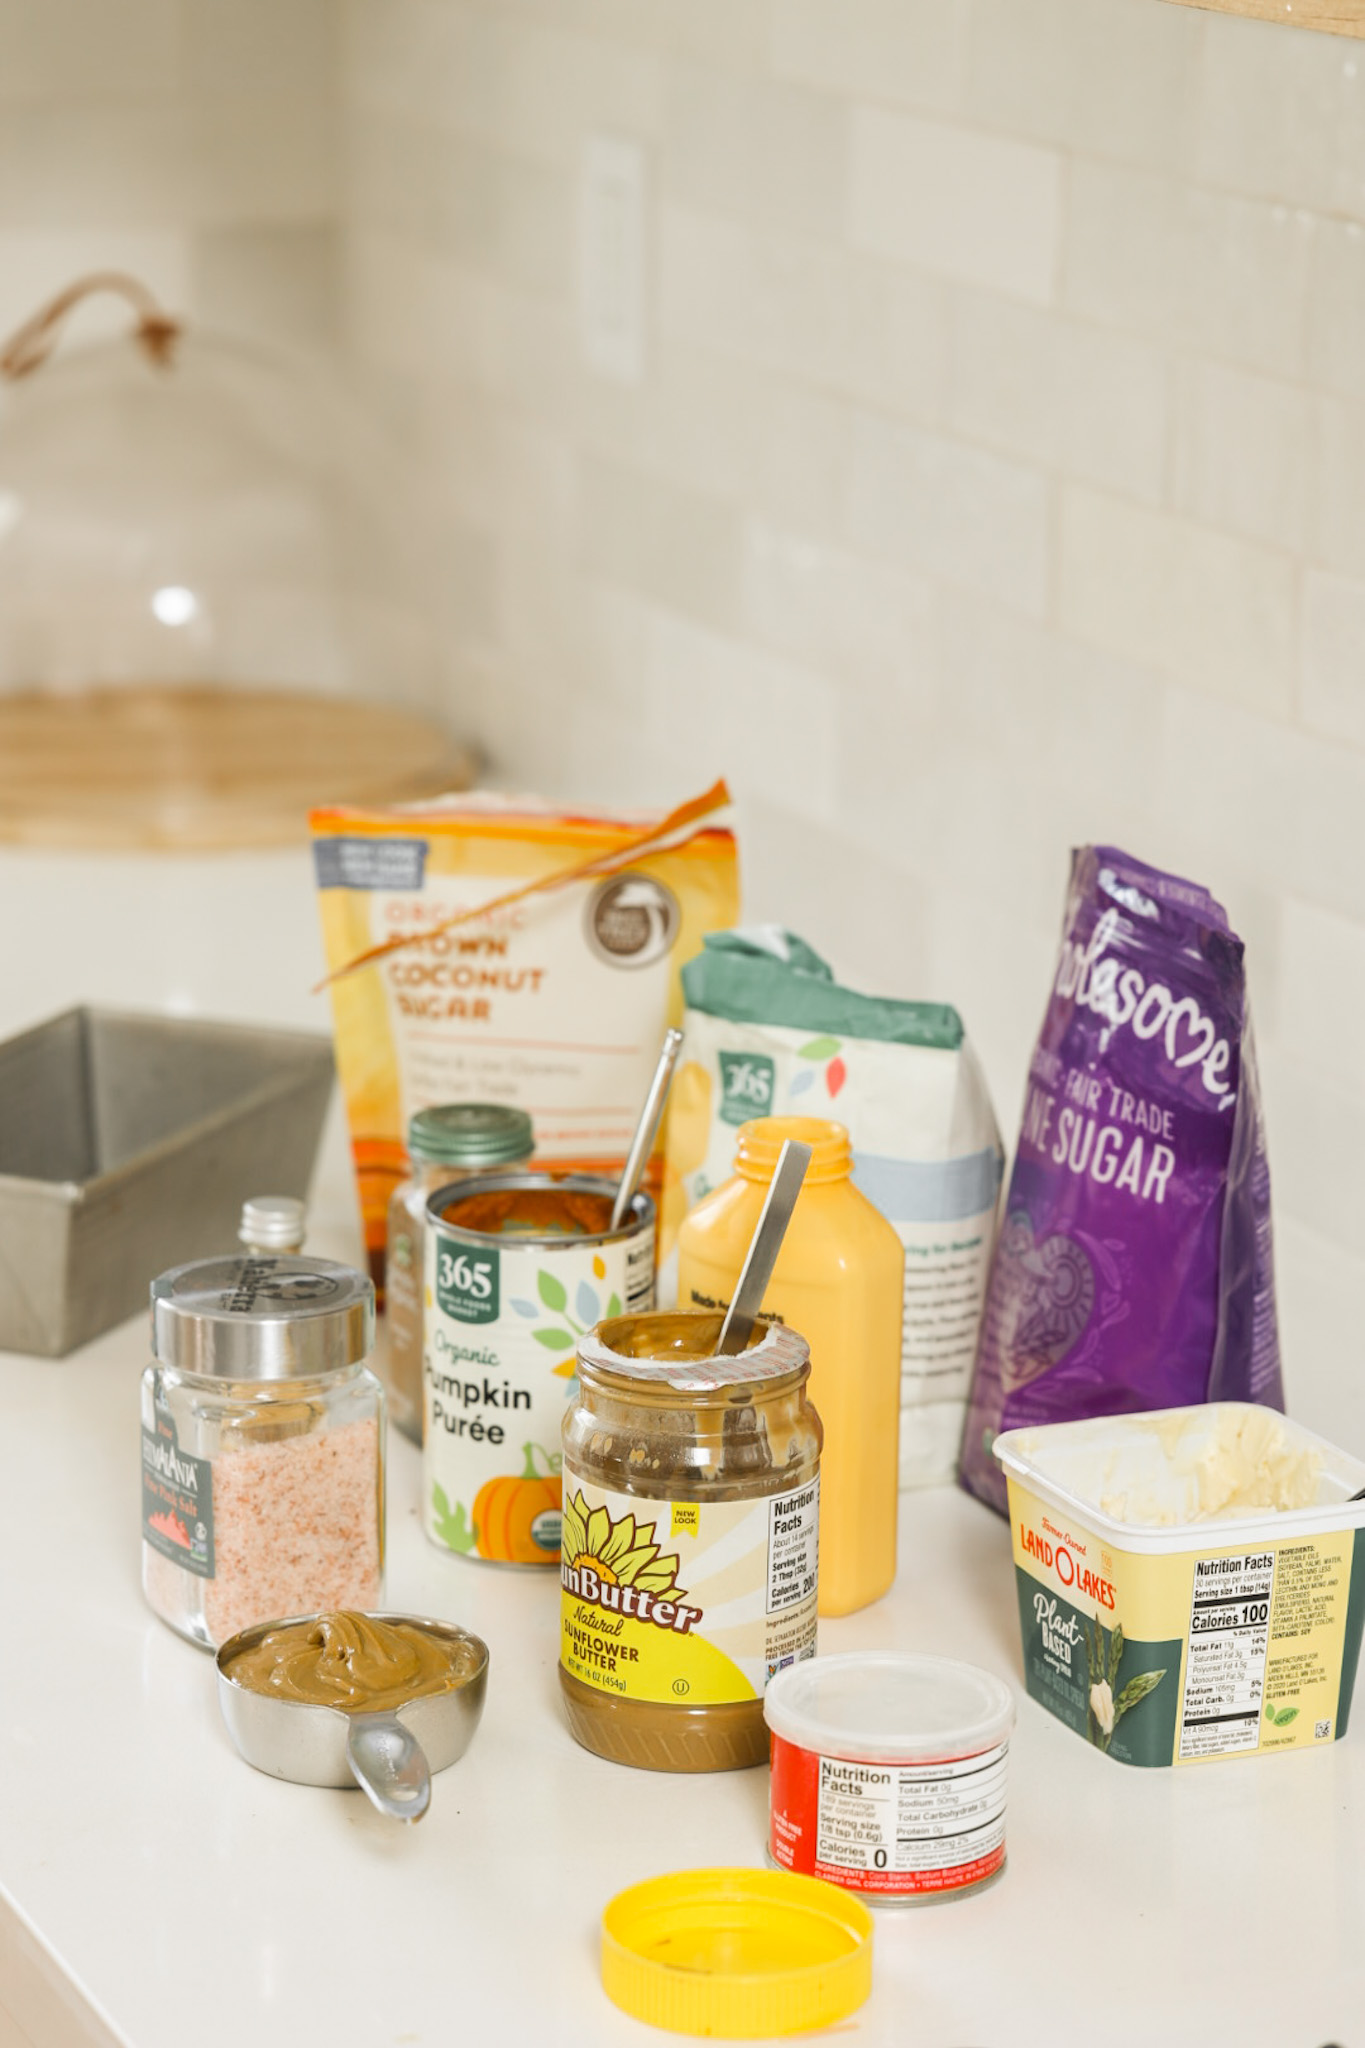
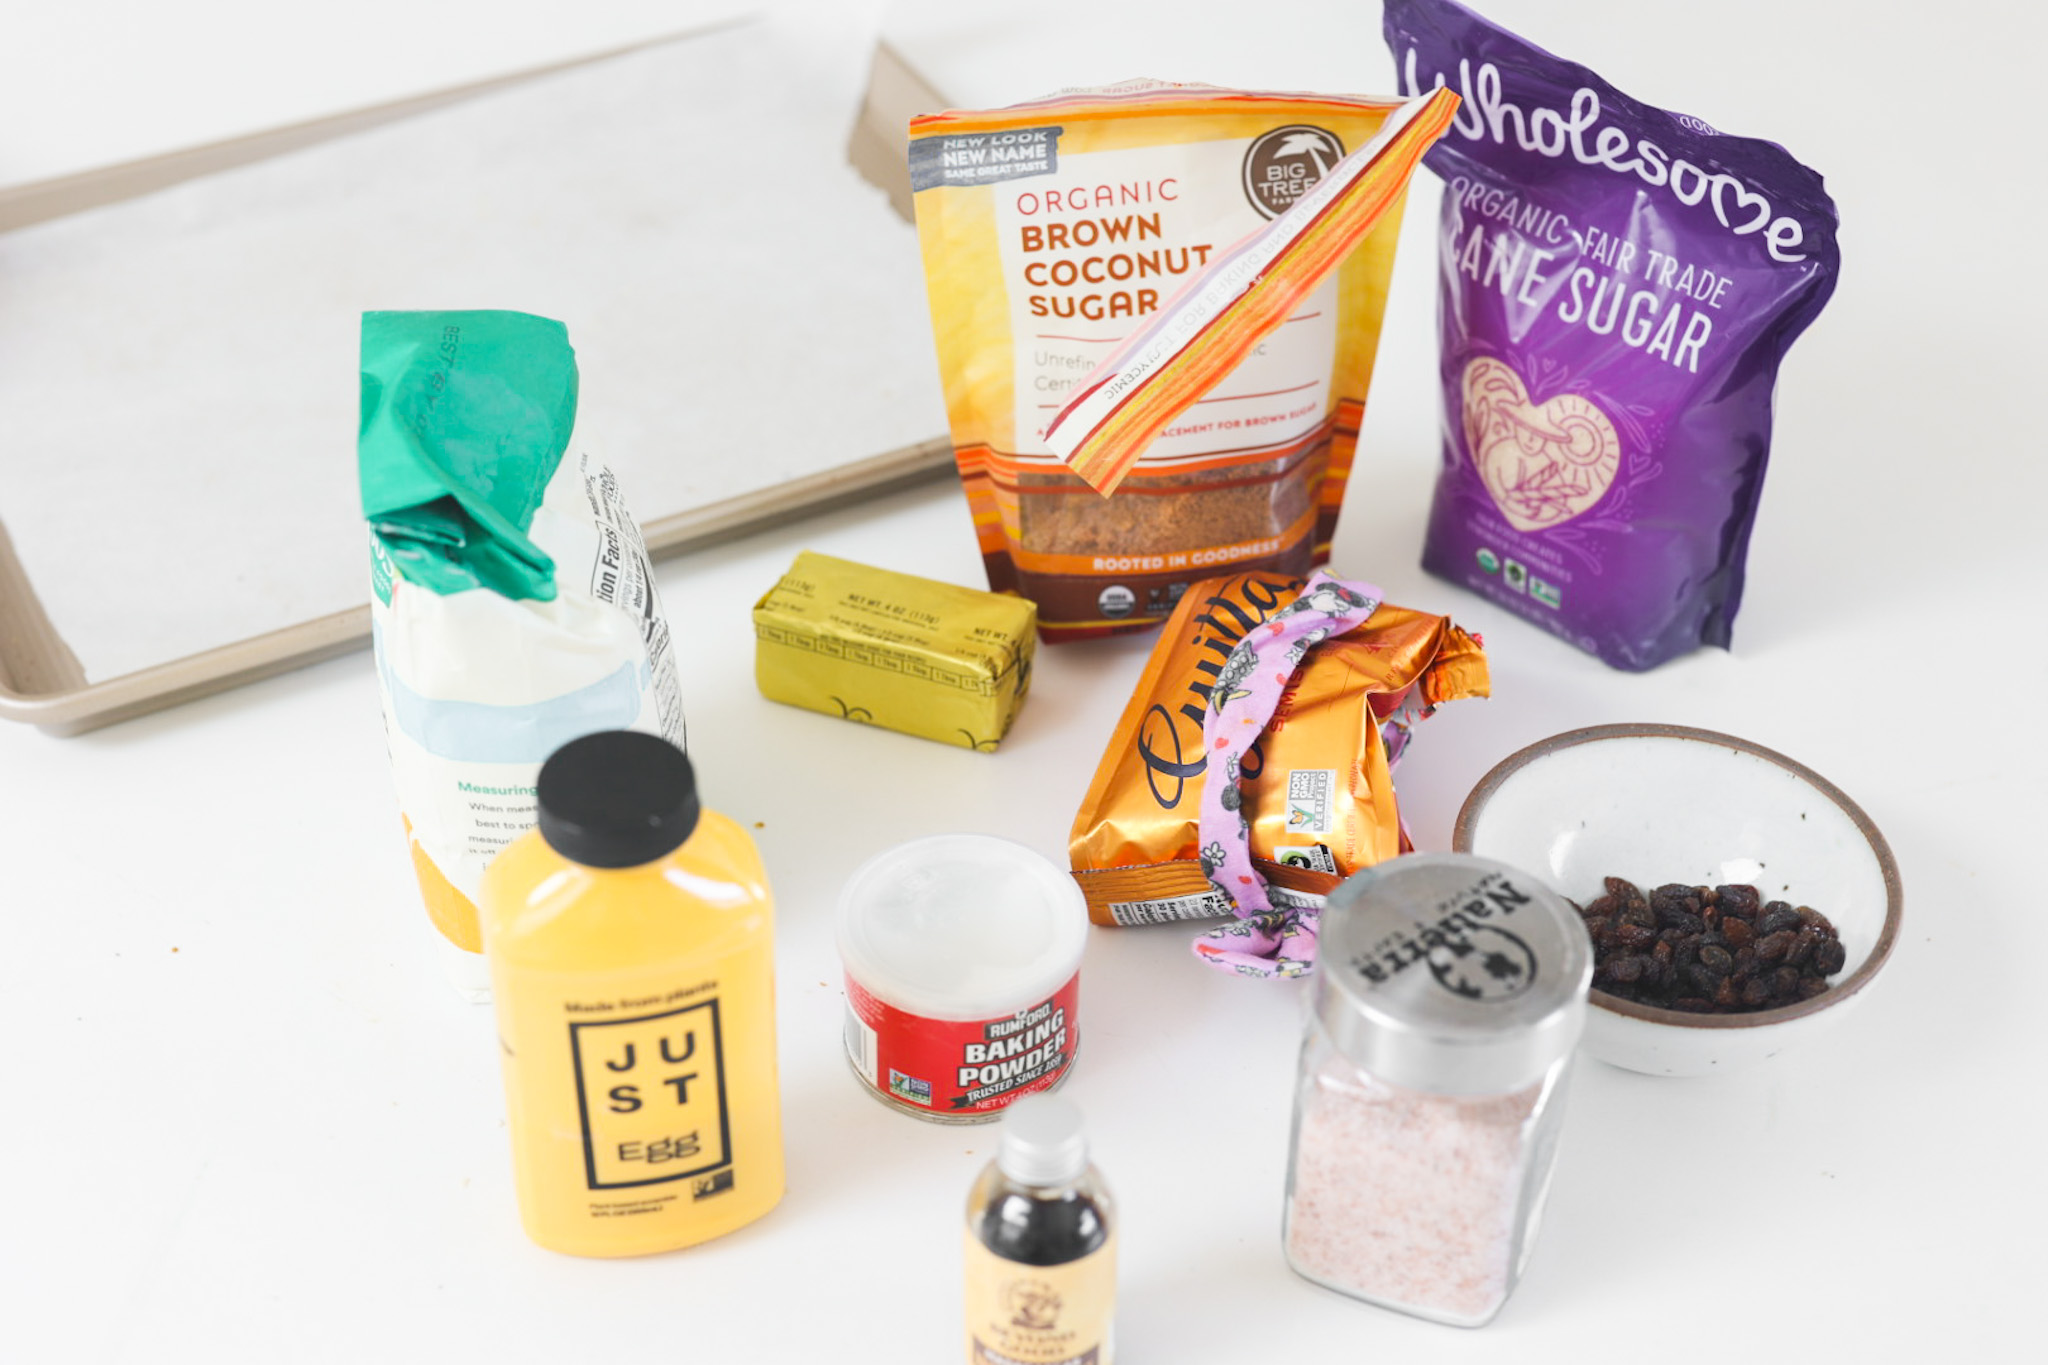
    Here are the main ingredients for this Vegan Pumpkin Bread with Streusel Topping recipe…

    • flour
    • pumpkin puree
    • vegan Egg
    • pumpkin spice
    • sugar
    • brown or coconut sugar
    • baking powder
    • vanilla extract
    • salt
    • sunflower seed butter

    See the recipe card below for quantities.

    ingredients pumpkin bread

    Instructions

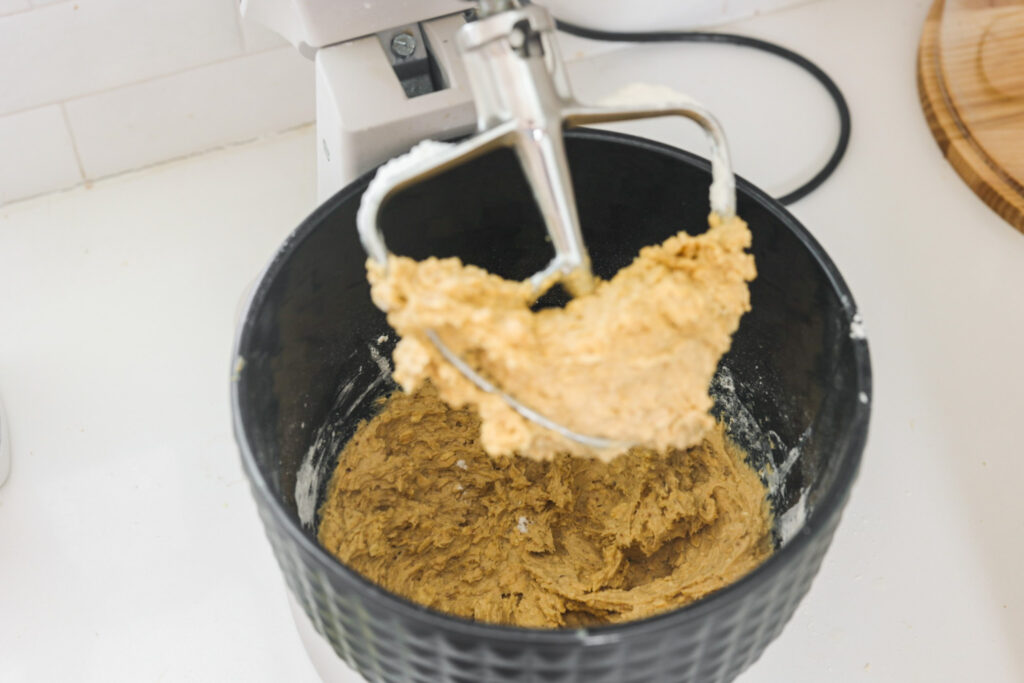
    Making these Vegan Pumpkin Bread with Streusel Topping is actually a very speedy process. The longest portion of the recipe process is the hour-long bake.

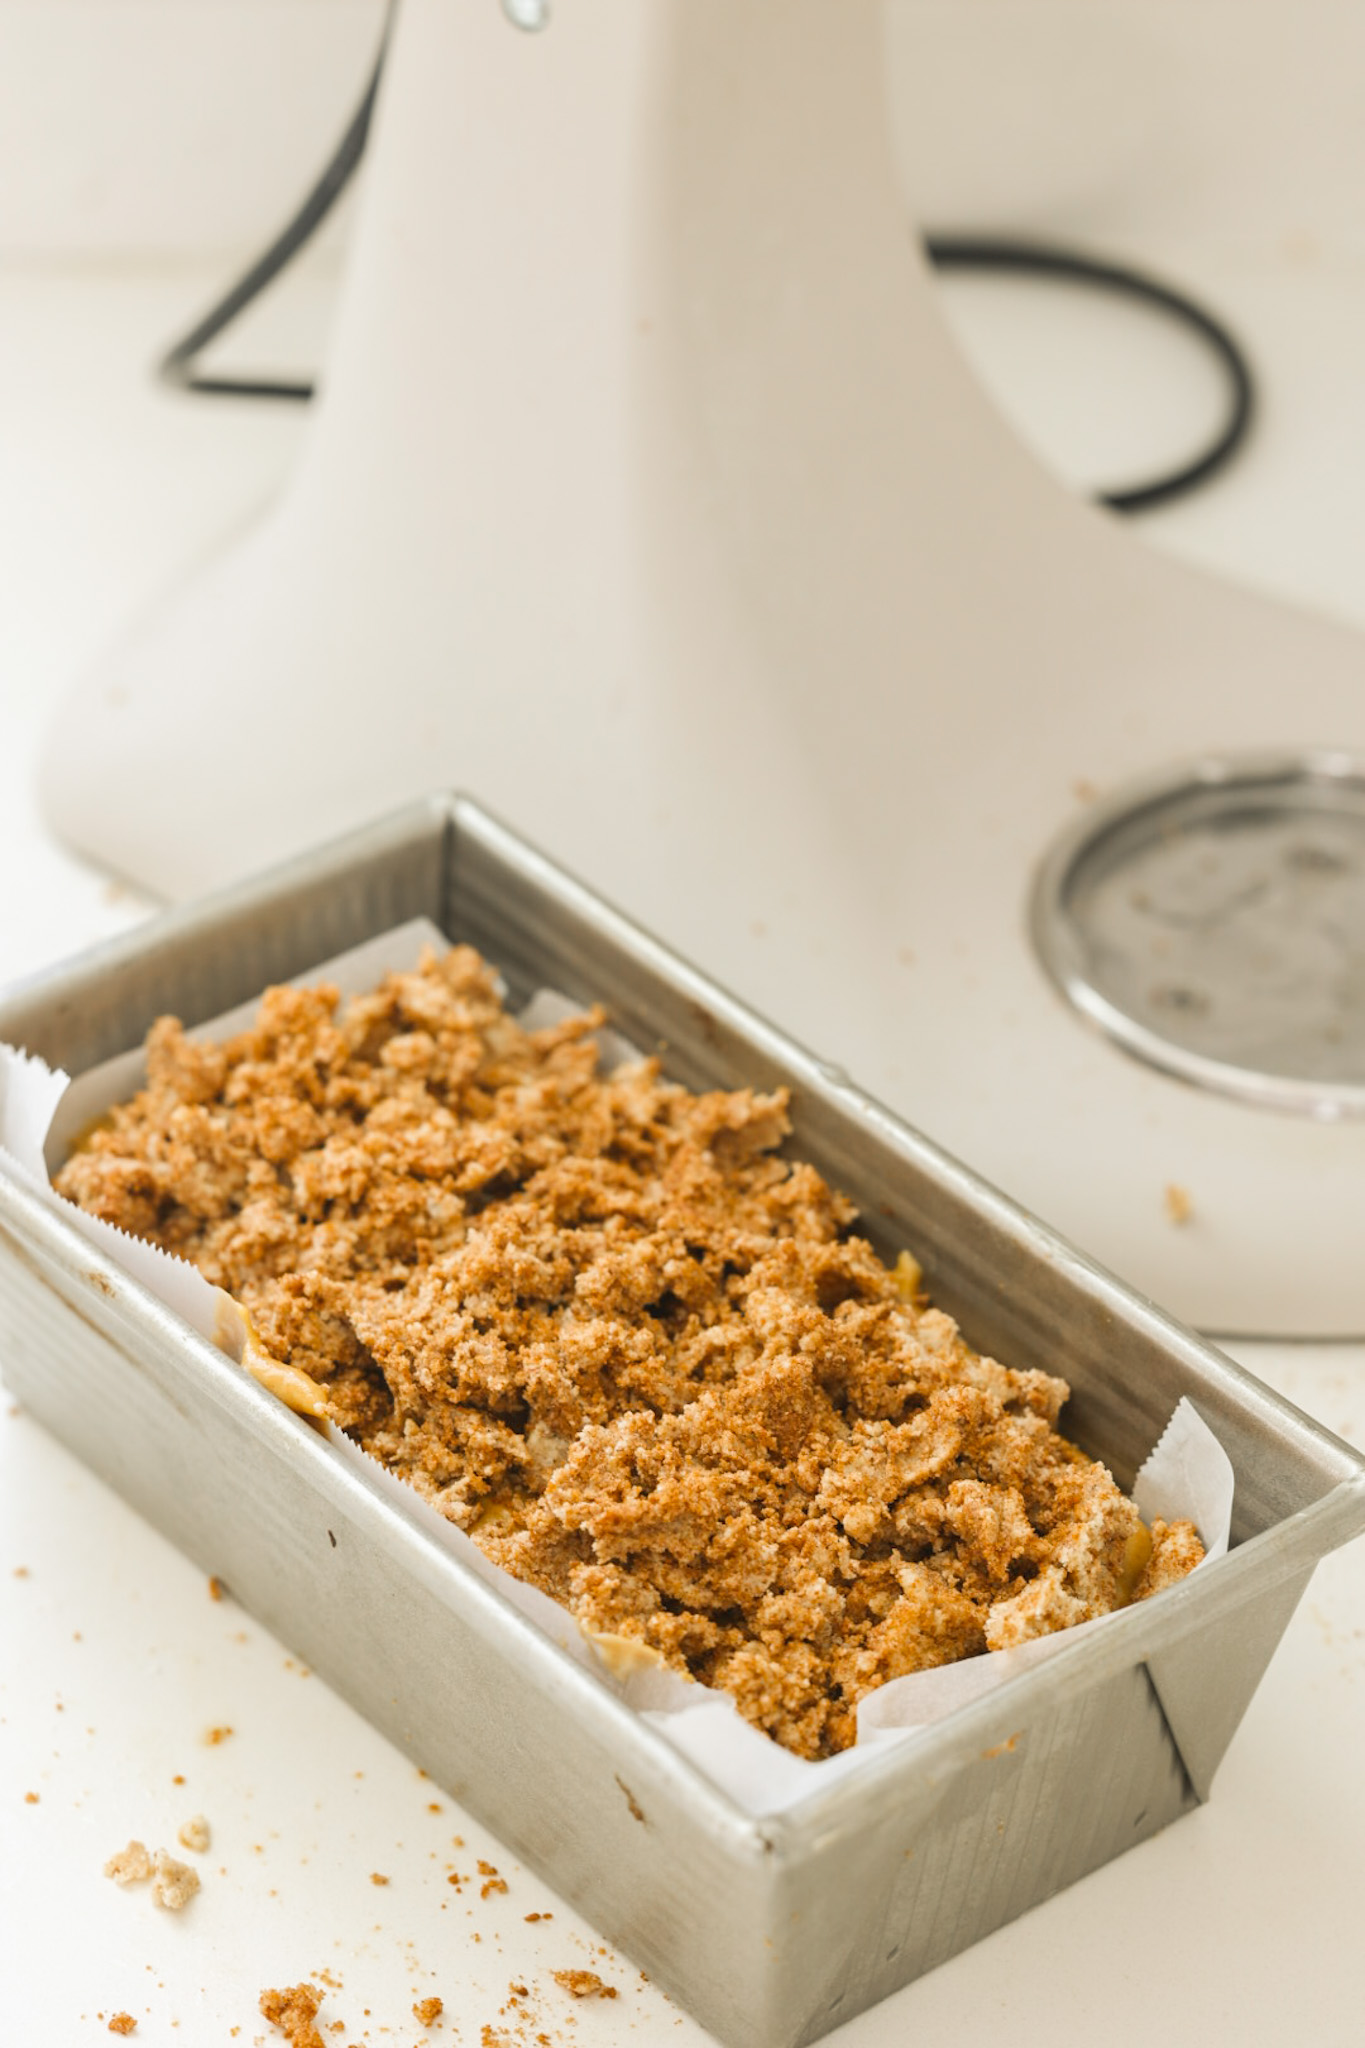
    But as for prep, you just mix the wet ingredients together, add in the dry and pour the batter into a parchment paper-lined baking pan. Add the streusel topping over top and bake.

    batter and streusel topping  before baking

    Substitutions

    Vegan Pumpkin Bread with Streusel Topping

    Here are a few substitution notes for you.

    Vegan Pumpkin Bread with Streusel Topping subs:

    • Gluten Free – You can absolutely substitute the AP flour with your favorite gluten-free flour or flour blend. Bob’s makes a great 1:1 ratio GF flour.
    • Egg – I use JUST egg, but a flax egg or silken tofu (puree) would also work. But since the JUST Egg has an excellent binding quality, I would actually reduce the “egg” by half if you are using a sub.
    • Sugars – You could swap out the cane sugar for coconut sugar. But the cane sugar, I think, adds a really light lovely flavor and texture to this loaf. Sometimes coconut sugar, with it’s caramel-y flavor can feel a bit heavy and overpowering – especially to something like pumpkin, which has a subtle flavor.
    • Sunflower Butter – You could switch out the sun butter for nut butter, but just make sure that the nut butter is soft and oily, very stirred or from the top of a new jar. You could also experiment with subbing actual sunflower oil for the sun butter — though I have not tested this version yet.

    Tip: Luckily, sun butter usually stays quite “wet” and silky in the fridge, but if yours has become hard for any reason, warm it up a bit to soften — or even a drizzle of vegetable oil to get it stirred up.

    Recipes – Blogger Friends:

    I always encourage you to look at a few different recipes when settling on one to follow! This helps to educate you on the various ways to make something and what those slight variations may produce. Browsing food blogs is such a great educational activity for any budding baker or cook.

    My blogger buddies shared these awesome pumpkin loaf recipes. Check them out!

    • Jasmine at Sweet Simple Vegan made this beautiful loaf with frosting on top.
    • Jessica in the Kitchen made this pumpkin bread with chocolate chips.
    • Love and Lemons made this super thick-cut yummy pumpkin loaf.
    • Gena at The Full Helping made this moist pumpkin bread.
    • And my friend Vegan Richa made this wonderful 1-bowl pumpkin loaf.

    Pumpkin Bread with Streusel Topping – Variations

    Change it up!

    • Chocolate Chips – You could absolutely add some chocolate chips to this bread for a sweet spin.
    • Omit the Streusel – The topping is one of my fave parts of this recipe, but you could totally omit it if desired. I would reduce the bake time by 5 minutes if you do.
    • Add nuts and fruit – To give this loaf a bit more texture you could add in chopped nuts, dried or even fresh fruit or even some whole grains from rolled oats. Fold ½ – ¾ cup of goodies into the finished batter.
    • More Streusel! – Um, if you are like me, you are obsessed with the topping. Well don’t be shy. If you see a few empty spots on top, mix up and load on even more streusel topping.

    Or you can try my vegan pumpkin pie with streusel topping.

    kathy eating pumpkin loaf

    Equipment

    • bread loaf pan
    • KitchenAid stand mixer
    • Parchment paper

    Storage

    I store this bread on the counter the first day, then place it in the fridge if I will eat it in the next day or two. But any longer, and I go for freezer storage.

    For the freezer, I slice up the bread into ¾″ thick slices, then individually wrap them for the freezer. They are super easy to that in a few seconds in the microwave or in an hour at room temp.

    Top tip

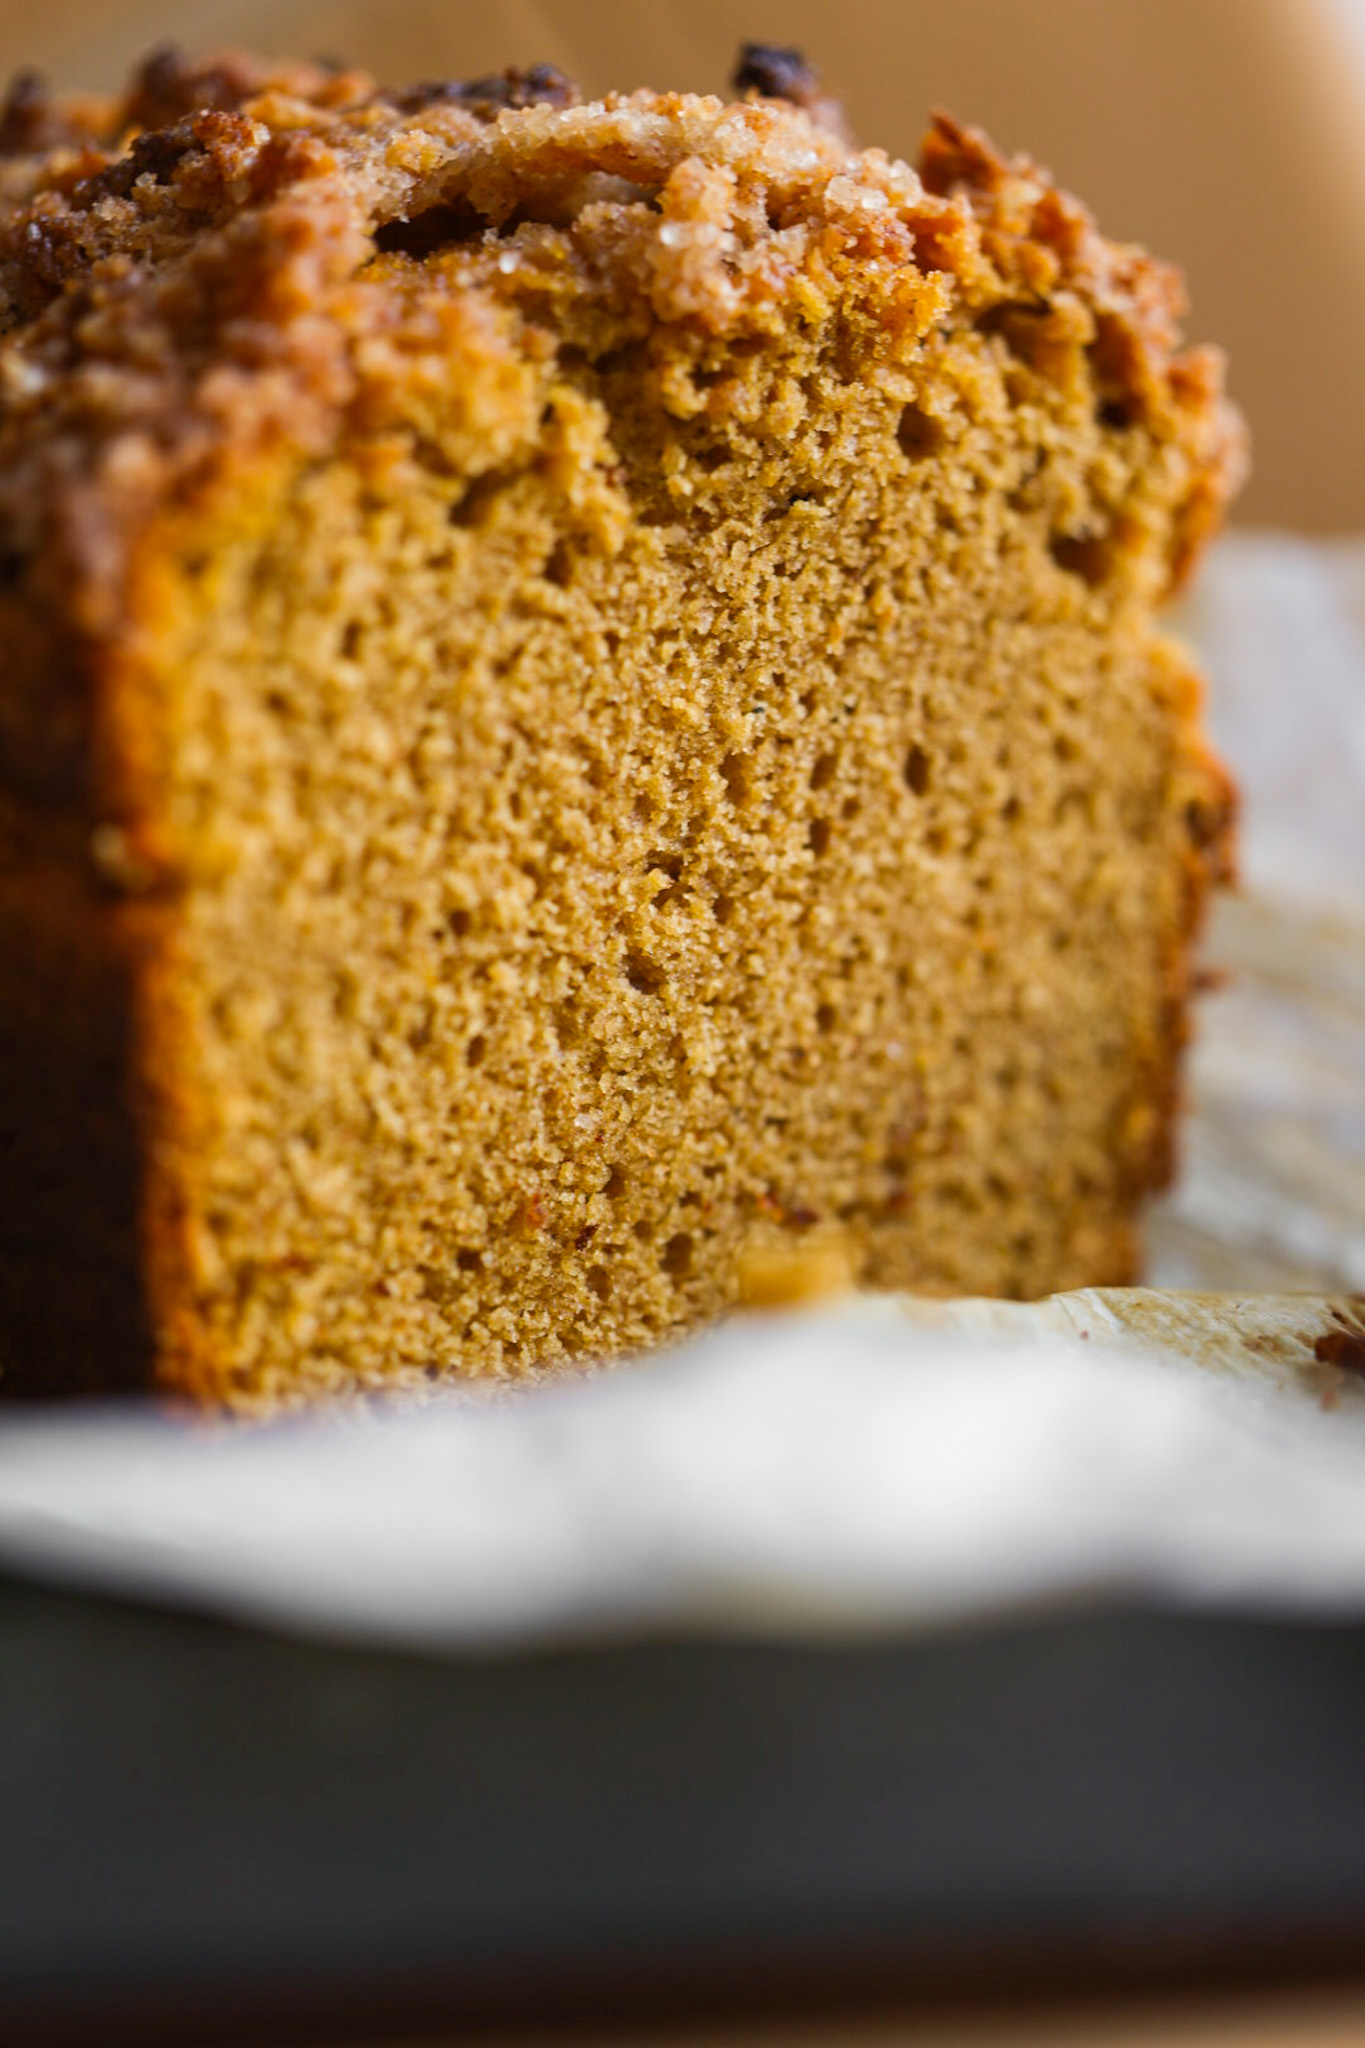
    Love your pumpkin puree! Not all pumpkin purees are created equal. And you don’t always have a say over what your puree looks and tastes like. But find a brand and container you love and stick to it. Some of the “boxed” versions can be a bit heavy and mushy. What you want is light, fluffy and golden orange in color.

    If you have time and energy, you can even DIY your own pumpkin puree like the Pioneer Woman does here.

    Happy pumpkin season everyone!!

    pumpkin loaf slice close
    Print Recipe
    5 from 4 votes

    Vegan Pumpkin Bread with Streusel Topping

    Fluffy and moist vegan pumpkin bread with a buttery sweet, crumbly cinnamon streusel topping.
    Prep Time5 mins
    Cook Time55 mins
    Total Time1 hr
    Course: baking, Breakfast, Snack
    Cuisine: American
    Keyword: baking, pumpkin, pumpkin bread
    Servings: 10 slices
    Calories: 324kcal
    Author: Kathy Patalsky

    Equipment

    • 1 mixer
    • 1 loaf pan
    • parchment paper

    Ingredients

    Wet Ingredients:

    • 1 cup pumpkin puree
    • ½ cup sun butter
    • ¾ cup JUST Egg
    • 1 cup cane sugar
    • ¼ cup coconut sugar
    • ¼ teaspoon vanilla extract

    Dry Ingredients:

    • 1 teaspoon salt
    • 2 cups bread flour
    • 1 ½ teaspoon baking powder
    • 2 teaspoon pumpkin pie spice

    Streusel Topping

    • 3 tablespoon vegan butter
    • 3 tablespoon flour
    • 2 tablespoon sugar any variety
    • ½ teaspoon pumpkin pie spice

    Instructions

    • Preheat oven to 450 degrees. Line a loaf pan with parchment paper.
    • Add all the wet ingredients to a mixing bowl. Mix until smooth.
    • Add the dry ingredients in, mix until silky smooth – but do not over mix.
    • Pour the batter into the loaf pan.
    • Prepare the streusel topping in the used mixing bowl for ease. Add the ingredients and using your hands, blend the ingredients together, forming small clumps of sugar, butter and flour with spice. Crumble the streusel over top the batter in the loaf pan.
    • Bake for 20 minutes at 450 degrees. Then reduce heat to 350 and bake for another 20-40 minutes. See notes.

    Notes

    Baking time: You can use a toothpick test if you are unfamiliar with how long your oven needs to bake a loaf this size.
    I generally like to bake at 450 for 20 minutes, then 350 for 30 minutes, then I turn off my oven and let the loaf sit in the warm oven for about ten minutes before pulling it out to fully cool on the counter.

    Nutrition

    Calories: 324kcal | Carbohydrates: 52g | Protein: 8g | Fat: 10g | Saturated Fat: 2g | Polyunsaturated Fat: 1g | Monounsaturated Fat: 1g | Trans Fat: 0.02g | Sodium: 271mg | Potassium: 153mg | Fiber: 2g | Sugar: 26g | Vitamin A: 3982IU | Vitamin C: 1mg | Calcium: 79mg | Iron: 2mg

    FAQ

    How exact is the baking time?

    Not exact.

    I hate to say this all the time, but all ovens are different. My oven runs cold, so I often have to turn the heat up a bit more than usual. I keep an oven thermometer hanging from my oven rack so I can monitor in real-time.
    For this loaf, I like to start off in a very hot oven. 450 is my preference, though I have done 415 or so in the past. I keep the oven that hot for about twenty minutes, just to fluff up the batter and firm up the tops and sides. Then I reduce the heat to around 350 for the rest of the baking. That is usually 30-40 minutes for a loaf like this.

    But you will know your oven best. Tweak time and temp slightly, as needed.

    Can I tweak the spice? Or I don’t have pumpkin pie spice..

    Yes, if you do not have pumpkin pie spice, you could use a blend of cinnamon, nutmeg and even some ginger or allspice.

    But at the very least, use some cinnamon. If you sub cinnamon for pp spice, reduce a pinch, since cinnamon on it’s own can be quite strong.

    My Bread Didn’t Fluff Up, Help!


    Are you using the JUST Egg? If so and your bread is still “soggy” I want you to add in ¼ cup more flour next time. I really cannot tell you exactly why your bread isn’t working, but in my experience, adding in a bit more flour OR turning the heat up a bit can help.

    If you think your bread just didn’t cook all the way through, well then your oven may run cold and it actually needed an additional 15-20 minutes in the oven.

    Food safety

    Some reminders:

    • Cook to a minimum temperature of 165 °F (74 °C)
    • Never leave cooking food unattended
    • Always have good ventilation when using a gas stove
    • Heat: When cooking with your kids be sure to keep them out of reach of hot surfaces at all times. Also, keep them out of reach of appliances like mixers.

    Vegan Oatmeal Cookies, Lunchbox-Ready

    September 16, 2022

    Back to School Oatmeal Cookies

    These lunchbox-ready, vegan Oatmeal Cookies are the perfect healthy treat nibble for back to school. Pack them in lunchboxes or serve with some cold plant milk for an after-school treat. These cookies are plant-based, rich in whole grain oats and are studded with small bits of sweet raisin and dark chocolate. These cookies are a wholesome, homemade, feel-good dessert to bake with your little one(s).

    vegan oatmeal cookies on a baking sheet

    Best for School Lunches

    The usual homemade cookie option? Everyone’s go-to homemade cookie is chocolate chip, yes? Or even the chewy, yummy peanut butter cookie. Well, sometimes chocolate chip cookies can have a bit too much chocolate in them – lending to a too sweet flavor. And many schools these days do not want peanut butter snacks sent in, so peanut butter is to be avoided.

    But these vegan oatmeal cookies, with a hint of sweetness and tons of personality, are a cozy way to treat your kiddos with something homemade at school or after school.

    This is a fun cookie to bake together as well! So grab those aprons and warm up the mixer. This recipe is going to make you feel cozy and warm…

    bite of oatmeal cookie with chocolate

    Back to School Snacks.

    If you are a parent, you are probably craving more school snack ideas. And while we all end up buying snacks, it is always nice to have some homemade options. These cookies fill that lunchbox space. And it doesn’t get any cozier than oatmeal.

    I have definitely posted an oatmeal cookie recipe here before…

    oatmeal cookies with raisins

    But today’s vegan oatmeal cookie recipe uses a few different ingredients, like the egg replacer. And sugar sources. And also has those micro-chopped bits of raisin and chocolate.

    [feast_advanced_jump_to]

    Ingredients

    Here are the main ingredients for this vegan oatmeal cookie recipe…

    • rolled oats
    • vegan butter
    • cane sugar and brown sugar – or alternatives listed
    • vegan egg replacer – I used JUST Egg
    • spices
    • vanilla exrtract
    • baking powder
    • flour
    • salt
    Oatmeal Cookies ingredients

    See the recipe card for quantities.

    Instructions

    Making these vegan oatmeal cookies is pretty easy. Simply mix, scoop dough, bake and cool. You can absolutely chill the dough or make the dough a day ahead of time, but that isn’t necessary.

    Wet ingredients ready to beat.

    Dough ready for baking.

    Dough ready for add-ins.

    Substitutions

    Here are a few substitution notes for you.

    • Gluten Free – You can absolutely substitute the AP flour with your favorite gluten-free flour or flour blend. Bob’s makes a great 1:1 ratio GF flour.
    • Egg – I use JUST egg, but another egg replacer would work. Try a flax egg or silken tofu, or even some old-school simple applesauce. Pumpkin puree, mashed banana or even a properly prepared powdered egg replacer would work as well. And if you are not vegan, you can always use regular eggs. This recipe would call for 1-2. though has not been tested.
    • Sugars – If you want to experiment with using all refined-free sugars like date sugar, you absolutely can. You could even swap out the cane sugar with all coconut sugar. Coconut sugar is one of my favorite sugars to use because of its rich and caramel-y aroma. This article on Healthline talks about how coconut sugar actually does retain quite a bit of nutrients after processing.

    Tip: Warm your vegan butter up to room temperature before mixing for an easier mixing process. Otherwise, be sure to at least chop it up into smaller pieces before turning on your mixer. Vegan butter can get quite hard when it is chilled.

    Oatmeal Cookies

    Recipes – Blogger Friends:

    A few of my blogger buddies sharing some awesome oatmeal cookie recipes.

    • Chewy Oatmeal Raisin Cookie Recipe by beaming baker
    • Three-ingredient oatmeal cookie recipe from Arman at The Big Man’s World
    • Oatmeal Chocolate Chip by Eating by Elaine
    • The Vegan 8 adds some nut butter and starch to her oatmeal cookies

    Vegan Oatmeal Cookie Variations

    Change it up! My base of an oatmeal cookie can absolutely be changed up a bit to make it new and interesting every time you bake.

    • Raisin Free – So my husband hates raisins. I love them. So if I make these for him, I will omit the raisins and just add a bit more chocolate. Some swaps for raisins could be dried cranberries or chopped dates, if you can get away with those!
    • Pumpkin Spice – Turn up the fall flavor by adding in pumpkin spice and even some pumpkin puree. I would reduce the vegan egg to ¼ cup and then add in ¼ cup of pumpkin.
    • Unicorn Cookies – My kid loves anything rainbow sprinkled and called “unicorn” so for this variation, I would omit the raisins and maybe even the chocolate chips and add in vegan sprinkles and some vegan white chocolate chips too. I think this will be my next batch of these cookies.
    • Ice Cream it – If you have some leftovers, whip up my vanilla bean ice cream base and crumble in oatmeal cookies for an oatmeal version of cookies and cream. Just swap out the strawberries for oatmeal cookies in this ice cream recipe.

    See this fun pink dessert recipe: pink cheesecake bars, for another “unicorn” approved treat/snack.

    oatmeal cookie

    Equipment

    A sturdy cookie baking sheet and some parchment paper. I love my KitchenAid stand mixer for cookies. And a nice cookie scoop. If making mini cookies you won’t need a scoop. You could use a melon baller to scoop tiny circles though.

    Storage

    I store these vegan oatmeal cookies on the counter for a day, then move them to the fridge for consumption within a week. If longer, move them to the freezer and you can store them for up to a few months. To warm, place at room temp, or warm for a few seconds in the microwave.

    Top tip

    For the best results with these vegan oatmeal cookies, please make sure your raisins are fresh! Hard or crunchy, dried out raisins are sure to be unappealing in a big cookie bite. Fresh raisins have some moisture and melt into cookies in the same way that a chocolate chip will. If your raisins are a bit older and dried out, try this trick: Add ¼ cup to a small bowl and add 1-2 tablespoon water. Warm them in the microwave for 10 seconds. Drain any excess liquid. Boom. Moist raisins.

    Print Recipe
    5 from 2 votes

    Vegan Lunchbox Oatmeal Cookies

    These fluffy yet chewy oatmeal cookies are studded with tiny bits of juicy raisins and melty chocolate chips. Perfect for little hands when you scoop them into mini sizes!
    Prep Time10 mins
    Cook Time10 mins
    Course: Dessert
    Cuisine: American
    Keyword: baking, cookies, dessert, kids, vegan dessert
    Servings: 24 cookies
    Calories: 120kcal
    Author: Kathy Patalsky

    Equipment

    • 1 baking sheet
    • 1 mixing bowl
    • 1 spatula
    • 1 stand mixer / beater
    • 1 sheet parchment paper

    Ingredients

    Wet ingredients

    • ½ cup vegan butter
    • ½ cup coconut sugar
    • ⅓ cup cane sugar
    • 1 teaspoon vanilla extract
    • ⅓ cup JUST vegan egg
    • 1 tablespoon lemon juice optional

    Dry ingredients

    • 1 ½ cups all purpose flour see notes
    • ½ teaspoon salt
    • ½ teaspoon baking powder

    Mix-ins

    • 1 cup oats rolled or quick – see notes
    • ⅓ cup chocolate chips
    • ⅓ cup raisins
    • warm water

    Instructions

    • Preheat oven to 350 degrees. Line a baking sheet with parchment paper.
    • Gather your ingredients.
    • Tip: Warm your butter a bit so it isn't rock hard, or chop into small pieces. Slightly softened is best for mixing. Add all of your wet ingredients to your mixing bowl. Beat until creamed together.
    • Add in the dry ingredients and continue beating until smooth.
    • Add in the oats and mix on low for another minute.
    • Soak your raisins in the warm water for a few seconds. Drain and then finely chop. Optionally chop your chocolate as well. Add both the chocolate and raisins to the douh. Fold in.
    • Scoop dough onto baking sheet.
    • Bake at 350 for 10 minutes for mini cookies or 14 minutes for regular sized cookies.
    • Transfer to cooling rack. Serve warm.

    Notes

    • Flour: You can use all-purpose, bread or gluten-free flour.
    • Egg Replacer: Other options can be used such as a flax egg, silken tofu or even applesauce. JUST egg is my preferred ingredient for this recipe.
    • Oats: I like to use a mix of whole rolled outs and quick oats. About a 50/50 ratio. Though you can use either one or both.

    Nutrition

    Calories: 120kcal | Carbohydrates: 14g | Protein: 3g | Fat: 6g | Saturated Fat: 2g | Polyunsaturated Fat: 1g | Monounsaturated Fat: 2g | Trans Fat: 0.02g | Cholesterol: 5mg | Sodium: 122mg | Potassium: 38mg | Fiber: 0.4g | Sugar: 6g | Vitamin A: 278IU | Vitamin C: 0.4mg | Calcium: 23mg | Iron: 1mg
    Oatmeal Cookies

    FAQ

    How will baking times vary based on cookie size?

    For medium-average sized cookies, I do 14 minutes at 350 degrees. For mini cookies, I reduce to about 10-12 minutes, depending on size and density of the scoop. Of course a longer bake will lend to a crispier, browned edge, while less baking makes a more cake-like soft cookie.

    What kind of oats do I use?

    You can use whole rolled oats or even quick oats. The whole rolled oats will make a more hearty texture, while the quick oats, which are finer in texture, will make a more refined cookie. It really just depends on what texture you prefer. Just do not use pre-sweetened oatmeal oats or anything along those lines. You also do not want to use steel-cut oats, which would be way too crunchy and firm for cookies.

    Do I have to add raisins?

    Nope! See the variations for a few ideas. But you can absolutely just make plain oatmeal cookies with no add-ins at all, or just add in chocolate. Or even omit the chocolate chips for a more classic cookie.

    Food safety

    Some reminders:

    • Cook to a minimum temperature of 165 °F (74 °C)
    • Never leave cooking food unattended
    • Always have good ventilation when using a gas stove
    • Heat: When cooking with your kids be sure to keep them out of reach of hot surfaces at all times. Also, keep them out of reach of appliances like mixers.
    • Serving size: When serving cookies to kids or toddlers always use your best judgment as a parent on how small you may need to cut up the item – to prevent a choking hazard. Some kids can also be sensitive to cookies containing chunky items like raisins, so be cautious. even the thick-cut oat texture can leave some kids sensitive. So never serve unattended, keep some milk or water on hand with cookies, and teach your kid how to spit out food that isn’t working for their mouth.

    Super Fudgy Peanut Butter Brownies

    May 15, 2022

    peanut butter swirl brownies

    These vegan Super Fudgy Peanut Butter Brownies are easy to whip up and make for the perfect chocolate-craving treat! Plant-based and made using simple ingredients. The peanut butter swirl on top is totally optional, but highly advised. Enjoy these decadent brownies served chilled or warm from the oven.

    …

    Read More

    10 Tips for Flying with a Toddler

    March 29, 2022

    flying with a toddler stickers

    Flying with a toddler. Crazy?? Maybe. Exhausting? OH YES. But exhausting in the best way possible. Exhausting in that “I did it! OMG I’m so tired. But I did it!” sort of way.

    And the cool part is this: you get to have a true adventure with your tiny human. And the adventure starts even before you arrive at your destination. Airports are exciting places! Giant planes, shuttles, conveyor belts, beeping machines at security, SO MANY PEOPLE, luggage to roll, snacks to eat, bathrooms to explore, escalators to use. I mean, airports just might be toddler paradise.

    Ok, ok, maybe that’s a bit optimistic. This flying with toddlers thing is HARD. But we like a good challenge, yes?

    This past week we embarked on our first post-COVID flight, which also happened to be the very first airplane flight for our 19-month-old daughter. So today I’m sharing, Toddler’s First Flight: 10 Survival Tips!..

    …

    Read More

    Spicy Stovetop Beans

    February 26, 2022

    spicy beans in bowl

    These Spicy Stovetop Beans are an absolute favorite of mine. Beans for lunch has been somewhat of a healthy addiction for me lately. The past few years, really.

    I kid you not when I say I have had beans for lunch pretty much every day for the past year. It started as a habit to add more iron to my diet when I was pregnant, and now I just can’t stop. I crave my bean bowl lunch, and hope that this recipe helps you to crave them too!

    …

    Read More

    JUST Egg Omelet

    February 10, 2022

    JUST Egg Omelet breakfast

    This JUST Egg Omelet has been a huge hit in our household. It is plant-based, cheesy, fluffy and filled with veggies. You can switch up the type of veggies, based on whatever you have on hand. Today I used crisp green bell pepper and mushrooms.

    Kid Approved

    This vegan omelet is so delicious and filling that even my toddler gobbles it up. So it seems to be kid-approved. Huge win for moms since this “egg” is loaded with plant-based protein from beans. Learn how to make this cheesy, amazing, vegan classic…

    …

    Read More

    • Go to page 1
    • Go to page 2
    • Go to page 3
    • Interim pages omitted …
    • Go to page 258
    • Go to Next Page »

    Primary Sidebar

    • Bloglovin
    • Facebook
    • Instagram
    • Pinterest
    • RSS
    • Twitter
    • YouTube

    newsletter:

    Trending

    my cookbooks

    my cookbooks

    Disqus Latest Comments

    1. s

      s: Absolutely one of the best things I've ever baked. Used dairy butter…

      Commented on: Cinnamon Toast Morning Muffins, gluten-free and vegan

    2. JanetS

      JanetS: Neither of those non-grain flours will substitute for oats or wheat. As…

      Commented on: Cinnamon Toast Morning Muffins, gluten-free and vegan

    3. disqus_LfP7ofaP87

      disqus_LfP7ofaP87: Earth Balance brand HAS PALM OIL, as do most of the vegan…

      Commented on: Sticky Banana Bread Quinoa Breakfast Bowl

    about kathy

    kathy patalsky

    featured: peach coconut water smoothie

    browse recipes

    Breakfast  |  Entrees  |  Desserts  |  Smoothies  |  Sandwiches  |  Salads  |  Beverages  |  Soups |  Appetizers |  Snacks  |  Sauces  |  Sides   /  Cooking Videos  |  Round-Ups  |  Fan Favorites  |  Holiday  /  All the Recipes

    browse:

    • reviews
    • travel
    • vegan topics
    • people
    • videos
    • beauty
    • wellness
    • Mom Life

    my ttc + baby journey

    Footer

    BROWSE BY:

    Category:

    DATE:

    looking for something?

    contact   |   about   |   kathy’s cookbooks  |  press  |  findingvegan  |  meal plans  |  shop  |  vegan recipe index  |  privacy policy  | start a blog

    • Bloglovin
    • Facebook
    • Instagram
    • Pinterest
    • RSS
    • Twitter
    • YouTube

    Footer

    ↑ back to top

    About

    • Privacy Policy | Terms & Conditions

    Newsletter

    • Sign Up! for emails and updates

    Contact

    • Services | Work with me