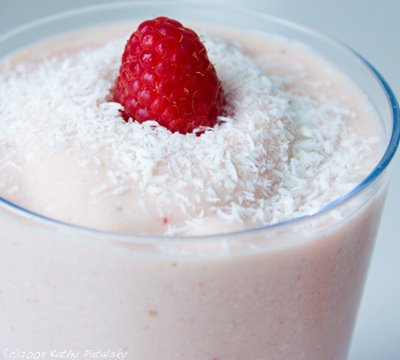
 I'm continually discovering new uses for ONE's Cashew Juice beverage. It has an uniquely refreshing sweet-tart apple-mandarin-peach flavor, a dry nectar-like texture and has a nice list of health benefits, described in my previous product review post. So when I came up with this ONE Cashew Juice Slushee Sipper recipe (it can even pass as Cashew sorbet), I wanted to share it. It's really simple and incredibly sippable...

Super Easy Slushee. So if you have a a fancy ice cream machine, then I suppose you can use the Cashew Juice base to make a pretty tasty sorbet. But for me, I went the easy and the results were pretty satisfying.
Healthy Makeover. I don't have to even tell you why this beverage/slushee is way healthier than and fake food coloring, corn-syruped kiddie beverage slushees. So I'll just tell you why it's a healthy beverage overall. It's 100% fruit juice. No sugars added. The sweetness comes from the sweet-tart cashew juice flavor. And cashew juice is high in vitamin C and also has been shown to sooth a sore throat and upset tummy. So needless to say, this sipper or sorbet has a lot of natural healthy appeal that those sugar-laden sorbet's and slushees don't have. Plus, you made it yourself and it's super duper easy. Here's my previous post blurb on Cashew Juice's health benefits: "Cashew Juice: It's health benefits include being high in Vitamins B1 B2 B3 and C and calcium. It is said to calm a upset stomach, sore throat, fortify the immune system and even protect the skin from acne and eczema. 140 calories per 11 ounces."
There are two versions: A Slushee Sipper and a classic sorbet.
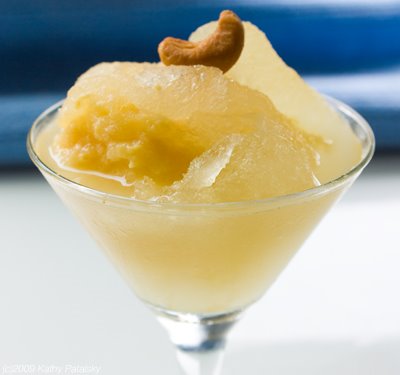
Recipe 1: ONE Cashew Juice Slushee Sipper
serves two
1 tetra pak of ONE Cashew Juice
2 teaspoon lemon juice
2 tablespoon ONE Coconut Water
dash salt
dash of cinnamon
garnish: fresh mint and/or raw whole cashews
Pour the ONE Cashew Juice out into a freezer-friendly container.
Stir in the salt and cinnamon.
Stir well-Cashew Juice can be a bit grainy-that's the yummy fruit pulp.
Place in freezer and allow to harden.
Remove from freezer, set on counter for 15 minutes to soften.
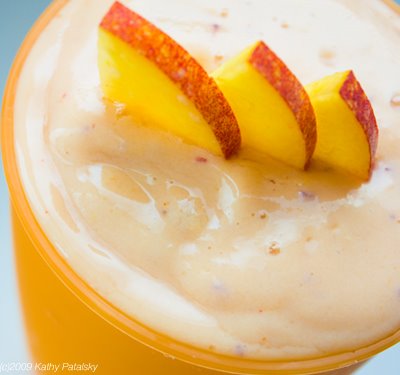
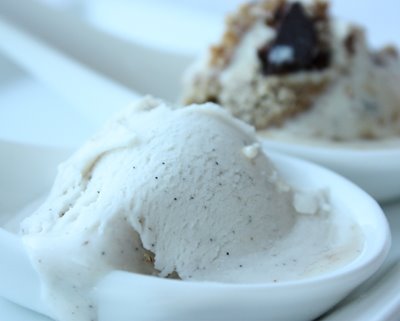
Once the mixture has started to soften, it will melt into a soft creamy slushee. I don't know why is melts so softly instead of hard and icy, but it does.
Scoop the mixture into two small glasses.
Pour 1 tablespoon of coconut water and 1 teaspoon of lemon juice over top of each slushee.
Serve as is, or mush around with a spoon until the desired consistency is reached.
Serve with raw whole cashews as garnish.
Recipe 2: Cashew Juice Sorbet
vegan, serves 2
1 tetra pak of ONE Cashew Juice
Yes this is as easy as the ingredients list.
Simply freeze the juice and scoop it out after it is frozen and thawed a bit.
It won't scoop perfectly, but tastes like sorbet and has a thick almost creamy texture like sorbet.
Garnish with cinnamon, mint, cashews and/or agave or maple syrup.

Here are more photos.
Note: that the clump of thick stuff is pulp. To prevent pulp clumping, you can stir the mixture well and use a shallow dish to freeze it in. either way, it makes an interesting and tart taste. Try it and let me know what you think!